使用子片段(Subclip)Working with the Subclips
7 steps
简介Overview
在继续往时间线上添加更多 soundbite 之前,先回顾一下第一个片段实际用了多少。查看 source viewer 中片段上的 In / Out 点,会发现你只用了原始素材的一小段——大概只有 6、7 秒,而原片约 1 分钟长。Before you start adding additional soundbites to this timeline, it’s worth considering just how much of that first clip you used. If you look at where you added the In and Out points on the clip in the source viewer, you’ll see that it’s only a small portion of a much larger clip—only about 6 or 7 seconds of a clip that is about a minute long!
实拍素材量与成片使用量之间的巨大差距很常见,这就是所谓的 shooting ratio(拍摄比)。不同类型节目差异极大:典型新闻片大约 3:1(拍 3 分钟用 1 分钟),而部分真人秀可达 600:1 甚至更高。This disparity between the amount of footage shot and the amount used in the edit is not unusual and is often referred to as the shooting ratio. Depending on what’s being edited, shooting ratios can vary wildly; a typical news piece might have a shooting ratio of 3:1 (for every 3 minutes shot, 1 minute was used), whereas some reality shows might have a shooting ratio of around 600:1 or more!
面对如此海量的素材,像 Chris 采访这样又长又杂的原始片段里,只关注其中相关的小段会高效很多,这正是 subclips(子片段)的价值所在。With so much footage being captured and needing to be edited, it can sometimes be helpful to just focus on a much smaller, relevant portion of much longer clips like Chris’s interview. This is where subclips come in.
Subclips 是从长片中分离出的独立片段,但它们仍然引用原始媒体文件,不会额外占用存储空间。如何自己创建和管理 subclips 将在第 7 课讲解。本课中,剪辑助理已经为采访素材预先创建好了一系列 subclips。Subclips are discrete clips that have been isolated from a much longer clip but, because they are still referencing the original media file, are not taking up additional storage space on your system. You will learn how to create and manage your own subclips in Lesson 7. For this lesson, though, your edit assistant has already created a series of subclips for you from the much longer interview clips.
在 source timeline 中打开片段——除了 subclips,DaVinci Resolve 20 还有另一种方式帮你浏览像 Chris 采访这样的长片段。Opening Clips in the Source Timeline While subclips are one way of dealing with lengthy clips, DaVinci Resolve 20 has another trick up its sleeve to help you navigate through long clips like Chris’s interview.
点击 source viewer 顶部的 Timeline按钮,当前片段会以独立时间线形式显示。Clicking the Timeline button at the top of the source viewer will show the current clip in its own timeline.
这样便于快速定位片段内容:和普通时间线一样,可以缩放、移动浏览素材(详见本课后文 “Controlling Timeline Zoom”)。This can be useful for easily finding parts of a clip since you can zoom in, zoom out, and move around the footage just like in a regular timeline (see “Controlling Timeline Zoom” later in this lesson).
从 source viewer 打开的时间线为只读状态——source viewer 顶部片段名变为蓝色,时间线 playhead 也为蓝色。只读时间线不可编辑,但仍可添加 In / Out 点和其他 marker,以提高剪辑效率。Opening a timeline from the source viewer makes it read-only, which is represented by a blue clip name at the top of the source viewer and a blue timeline playhead. Read-only timelines cannot be edited. However, you can add In and Out points and other markers to help you edit footage more efficiently.
要从 source timeline 切换回主剪辑时间线,点击对应的 viewer,或按 Q 键。To switch from the source timeline to your main editing timeline, simply click the relevant viewer or press Q.
要回到普通片段视图,点击 viewer 顶部的 Source Clip按钮。To return to the regular clip view, click the Source Clip button at the top of the viewer.
TIP · 提示提示:source viewer 左上角的 duration 时码可以显示片段总长或 In / Out 点之间的时间长度…
提示:source viewer 左上角的 duration 时码可以显示片段总长或 In / Out 点之间的时间长度。You can tell how long a clip is, or the duration between the In and Out points you’ve added, using the duration timecode value in the top left of the source viewer.
NOTE · 注意提示:如何自行创建 subclips 将在第 7 课介绍…
提示:如何自行创建 subclips 将在第 7 课介绍。You will learn how to create your own subclips in Lesson 7.
- 在 bin 列表中,选中 SUBCLIPS bin 来查看子剪辑。In the bin list, select the SUBCLIPS bin to view the subclips.
每个子剪辑都有唯一的 clip name,方便识别。Each subclip has a unique clip name assigned to it, making it easy to recognize.
TIP · 提示提示:如果想显示素材的文件名(而不是项目里用的 clip name),可以选择 View > Show File Nam…
提示:如果想显示素材的文件名(而不是项目里用的 clip name),可以选择 View > Show File Names。再次选择 View > Show File Names即可恢复显示 clip name。To show the file names of the clips rather than the clip names used in the project, you can choose View > Show File Names. Choose View > Show File Names again to return to seeing the clip names.
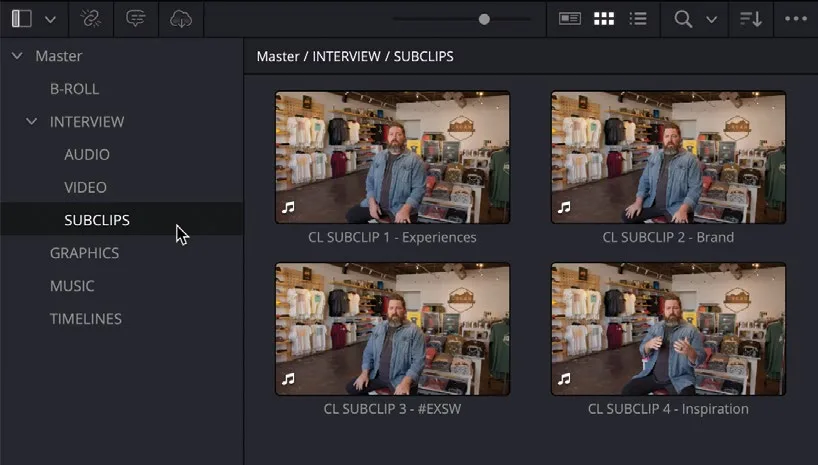
- 双击 CL SUBCLIP 1 - Experiences 这条剪辑,在 source viewer 中打开它,然后从头到尾播放一遍。Double-click the clip CL SUBCLIP 1 - Experiences to open it in the source viewer, and then play this clip through from the start.
虽然这只是很长一段采访素材中大约 27 秒的内容,但你仍然只需要使用其中一部分。不过子剪辑时长更短,waveform 在整个子剪辑时长上更容易看清。Even though this is only about 27 seconds of a much longer interview clip, you still only need to use a portion of it. However, because the subclip is a much more manageable duration, it’s easier to see the waveform represented over the duration of the subclip.
- 点击 source viewer 中的 Options (…) 菜单,取消勾选 Show Audio Waveforms Zoomed In。Click the Options (…) menu in the source viewer and deselect the Show Audio Waveforms Zoomed In option.
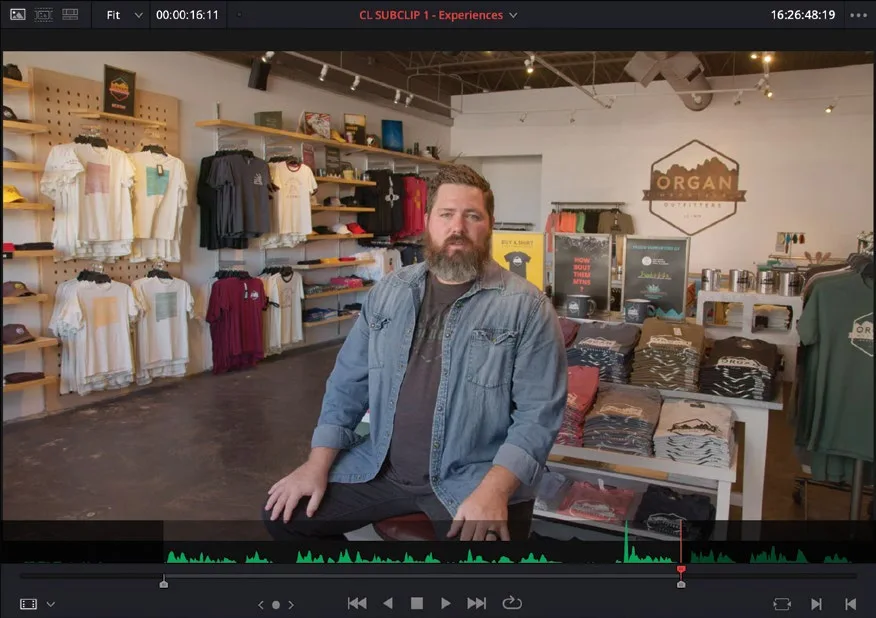
- 以 waveform 为参考,把 playhead 移到 Chris 即将开口说话之前,按 I 设置入点。Using the waveform as a guide, move the playhead to just before Chris Starts speaking and press I to add an In point.
- 播放剪辑,在 Chris 说完 "…it's changed my life" 之后、眨眼之前停下,按 O 设置出点。Play through the clip and then stop after Chris says, “…it’s changed my life” but before he blinks, and press O to add an Out point.
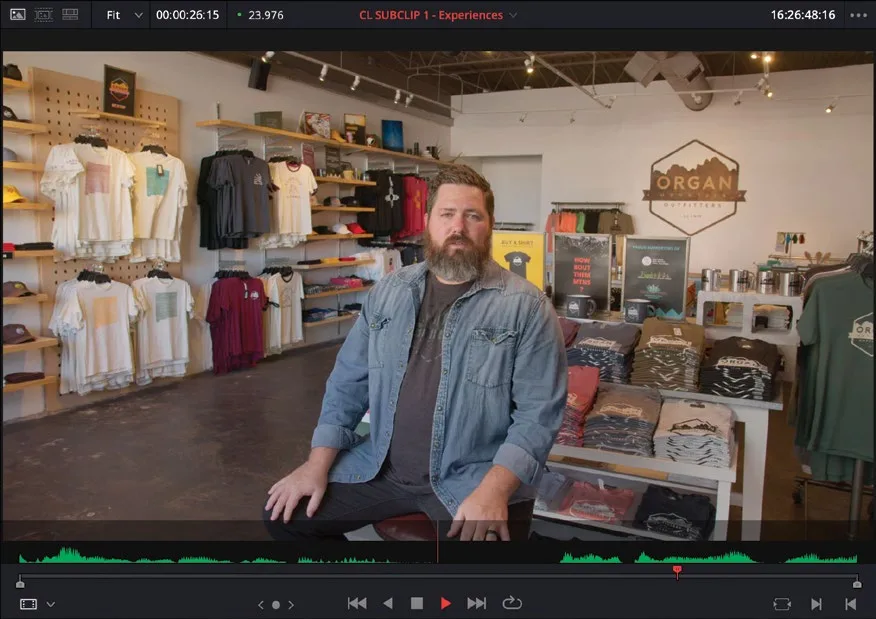
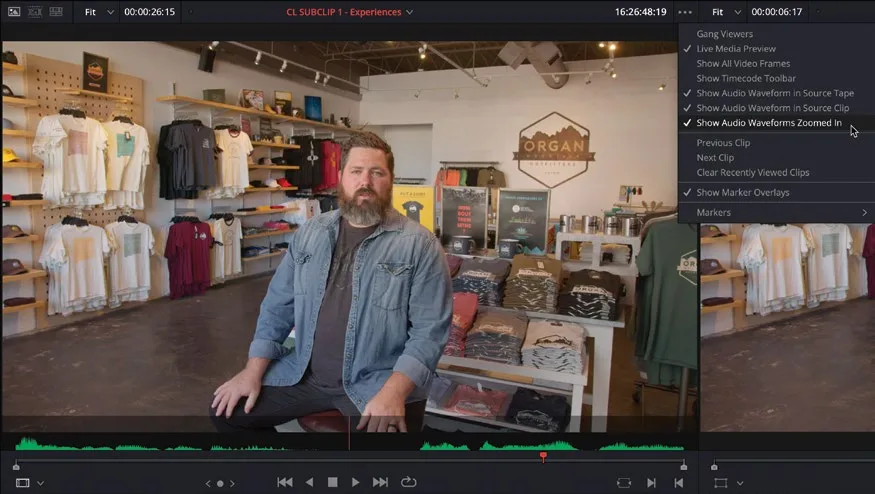
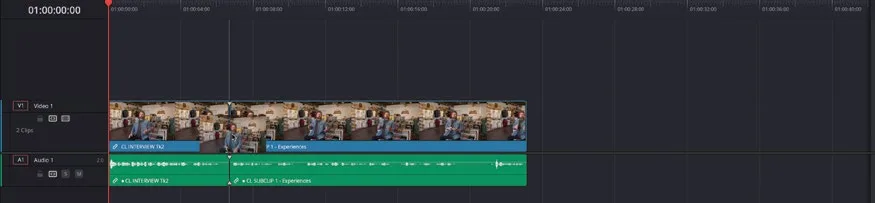
设置好入点和出点后,就可以把这条剪辑添加到时间线上了。With the In and Out points set, you can add this clip to the timeline.
- 在 source viewer 中点击空白处,再次把标记好的剪辑拖入时间线,使其吸附到上一条剪辑的末尾。Click in the middle of the source viewer and, again, drag the marked clip into the timeline so that it snaps to the end of the previous clip.
- 在 timeline viewer 中点击
Play按钮,或按 Spacebar 播放时间线上的这两条剪辑。In the timeline viewer, click thePlaybutton or press the Spacebar to play the two clips in the timeline.
很好。两条 soundbite 放在一起听起来很通顺,虽然它们来自采访的两个不同位置。确实,第二段采访开始时有一个明显的 jump cut,但稍后你会用一些 B-roll 镜头作为 cutaway 来修复这个问题。Excellent. The soundbites seem to make sense next to each other, even though they were taken from two different parts of the interview. Yes, there is a nasty visual jump cut as the second interview starts, but you will fix that using some of the B-roll clips as cutaways in a short while.
控制时间线缩放 Edit页面有三种主要的缩放方式,用来控制时间线里片段的显示大小:Full Extent Zoom、Detail Zoom 和 Custom Zoom。熟练使用它们是搭建剪辑的基础。Controlling Timeline Zoom The edit page has three main options for controlling the zoom level of clips in the timeline, which you will need to be able to use effectively as you build up your edit: Full Extent Zoom, Detail Zoom, and Custom Zoom.
Full Extent Zoom 会把整条时间线的全部时长都显示在时间线窗口内,自动调整缩放比例来保持全局可见。这对鸟瞰整个剪辑最有用,并可以让你像 cut 页面的上方时间线一样,在时间线中任意位置跳转。Full Extent Zoom will always display the whole duration of your timeline in the timeline window, automatically adjusting the zoom to keep everything in sight. This is most useful for seeing a bird’s-eye view of your edit and allows you to navigate anywhere within the timeline, like the upper timeline in the cut page.
Detail Zoom 以播放头为中心,把时间线放大到更近的视图。当需要深入时间线来选中某个片段或剪辑点做精细调整时,这个选项最实用,效果类似 cut 页面下方的细览时间线。Detail Zoom scales the timeline to a closer, zoomed view, centered on the playhead. This option is most useful when you want to step into the timeline to select a clip or edit point to make fine adjustments, like the lower timeline in the cut page.
Custom Zoom 最灵活,允许你自定义时间线的缩放比例。可以用滑块围绕播放头位置缩放,也可以按住 Option(macOS)或 Alt(Windows)配合鼠标(或触控板)滚轮,以播放头为中心动态调整时间线缩放。Custom Zoom provides the most flexibility, since it allows you to set your own zoom scale in the timeline. You can use the slider to zoom in and out of the playhead location or hold Option (macOS) or Alt (Windows) and use the scroll function on your mouse (or trackpad) to adjust the zoom of the timeline dynamically, centered on the playhead.
时间线的轨道高度可以通过 Timeline View Options 菜单来调整,也可以在时间线的音频或视频区域按住 Shift 并滚动鼠标滚轮来调整。Timeline track heights can be adjusted using the Timeline View Options menu or by holding Shift and using the mouse scroll wheel in either the audio or video areas of the timeline.
时间线缩放常用的快捷键:Useful keyboard shortcuts for zooming the timeline include:
— macOS 按 Command-=(等号),Windows 按 Ctrl-=(等号),向内放大至播放头位置 — macOS 按 Command--(减号),Windows 按 Ctrl--(减号),向外缩小至播放头位置 — Shift-Z 在“适合时间线窗口”与“回到上一次的缩放级别”之间切换— Command-= (equals) in macOS or Ctrl-= (equals) in Windows to zoom in to the timeline playhead — Command--(minus) in macOS or Ctrl--(minus) in Windows to zoom out of the timeline playhead — Shift-Z toggles between fitting the timeline to the timeline window and returning to the previous zoom level
本卡术语Terms in this card
B-roll 素材B-roll 媒体夹Bin 切出镜头Cutaway 入点和出点In & Out Points 拍摄比Shooting Ratio 声音片段Soundbite 源检视器Source Viewer 子片段Subclips 时间线Timeline 编辑页Edit page 标记Marker 播放头Playhead 窗口Power Window 静帧Still 键盘快捷键Keyboard Shortcuts 时间码Timecode