添加其他 SoundbiteAdding the Other Soundbites
17 steps
简介Overview
前面步骤用拖拽方式把片段加入时间线是构建剪辑的简单方法,但这种基础编辑方式选项有限。接下来你将用更精确、更灵活的不同编辑方法继续添加 soundbite。The “drag and drop” approach to editing clips into the timeline you used in the previous steps is one simple way of building up an edit. However, this is a very basic way of editing that offers limited options. In the next steps, you will continue adding soundbites using different editing methods that provide more accuracy and flexibility.
- 点击时间线工具栏中的
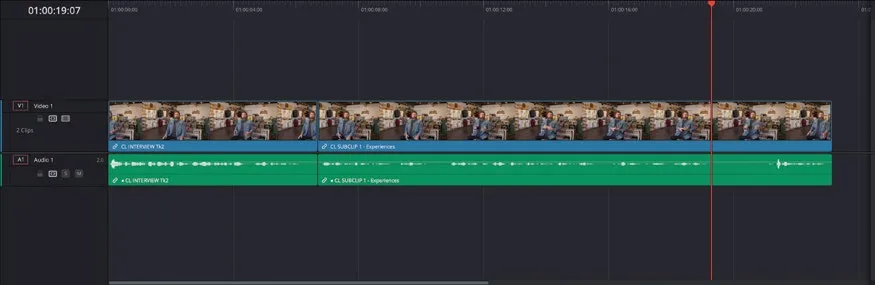
Full Extent Zoom按钮。Click the Full Extent Zoom button in the timeline toolbar. - 在时间线中移动播放头,使其吸附到第二个片段的开头,然后按 Spacebar 播放该片段。In the timeline, move the playhead so it snaps to the beginning of the second clip and press the Spacebar to play the clip.
仔细听下来,Chris 说的最后那句 "I can honestly say it's changed my life" 放在这里其实不太合适。On reflection, the last part of the clip where Chris says, “I can honestly say it’s changed my life” doesn’t really work.
- 在时间线中,把播放头放在 Chris 说完 "…the landscapes" 之后、他视线离开采访者之前的位置。In the timeline, place the playhead after Chris says “…the landscapes” but before he looks away from the interviewer.
这里就是你将把下一个片段插入时间线的位置。This is where you will edit the next clip into the timeline.
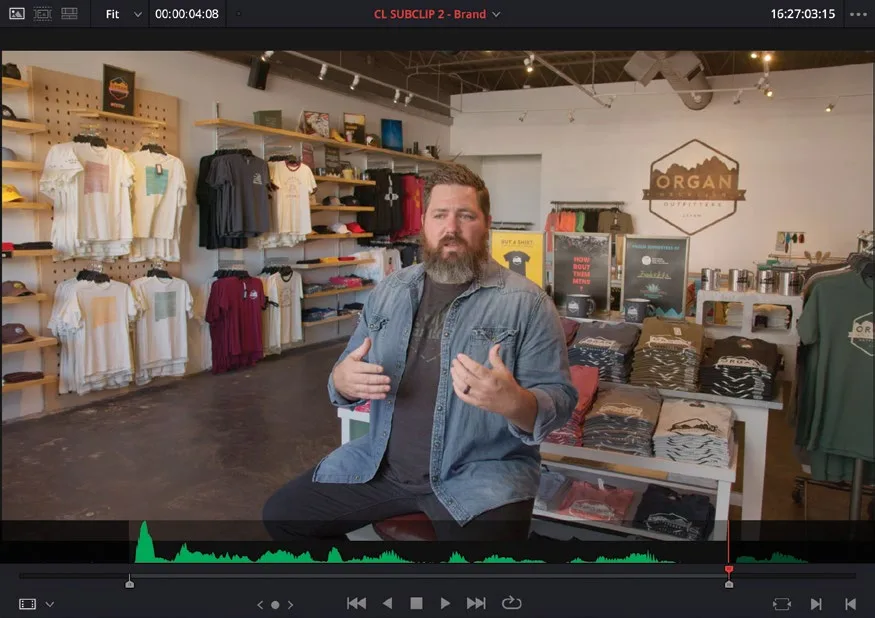
- 在 SUBCLIPS bin 中双击片段 CL SUBCLIP 2 - Brand,必要时把播放头回到片段起始处。From the SUBCLIPS bin, double-click the clip CL SUBCLIP 2 - Brand and, if necessary, return the playhead to the start of the clip.
- 在 source viewer 中播放片段,聆听采访内容,并在 Chris 说的 "Our brand is really a reflection of our community and who we are." 这段 soundbite 前后添加 In 点和 Out 点。Play the clip in the source viewer, listening to the interview, and add In and Out points around the soundbite where Chris says, “Our brand is really a reflection of our community and who we are.”
这次不用直接把片段拖到时间线,而是换一种略有不同的编辑方法。This time, instead of simply dragging the clip to the timeline, you’ll use a slightly different method of editing.
- 把片段从 source viewer 拖到 timeline viewer,但不要立刻松开鼠标。Drag the clip from the source viewer to the timeline viewer, but don’t immediately release the mouse.
这次会弹出一系列编辑 overlay,显示 DaVinci Resolve 中可选的不同编辑类型。如果你用过其他非线性编辑(NLE)软件,可能会认出其中一些功能。默认是 Overwrite。This time, a series of editing overlays appears showing the different types of edits available to you in DaVinci Resolve. If you have used other nonlinear editing (NLE) software before, you may recognize some of these functions. The default is Overwrite.
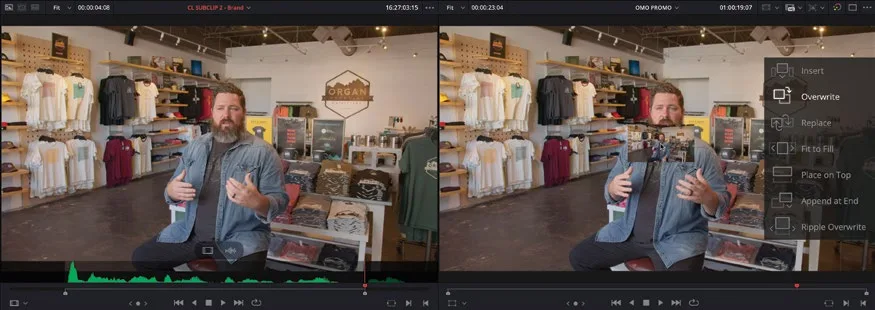
- 在 Overwrite edit overlay 保持高亮时松开鼠标按钮。With the Overwrite edit overlay highlighted, release the mouse button.
这段素材从 playhead 位置开始插入 timeline,会覆盖当前位置原本那段素材的尾部。The clip is edited into the timeline, starting at the playhead position and overwriting the end of the clip that was in its way.
别担心,达芬奇的剪辑完全是非破坏性的,被覆盖的素材随时可以 trim 回来。Don’t worry, though, all this editing is completely non-destructive, and you can always trim the clip back out later, recovering the footage that you’ve just overwritten, if necessary.
- 确认 timeline playhead 停在前一步刚编辑进来的第三段素材末尾(如果没动过 playhead,它应该自动在这个位置)。Ensure that the timeline playhead is at the end of the third clip you just edited into the timeline (it should be automatically unless you have moved it since the previous step).
- 在 SUBCLIPS bin 中双击 CL SUBCLIP 3 - #EXSW,把它载入 source viewer。In the SUBCLIPS bin, double-click the CL SUBCLIP 3 - #EXSW clip to open it in the source viewer.
- 在 "And that's why we say, 'experience the Southwest.'" 这段 soundbite 前后分别打上 In 点和 Out 点。Add In and Out points around the soundbite “And that’s why we say, ‘experience the Southwest.’”
- 在 timeline 工具栏里点
Overwrite Clip按钮,或者按 F10,把素材覆盖进 timeline。In the timeline toolbar, click theOverwrite Clipbutton or press F10 to overwrite the clip into the timeline.
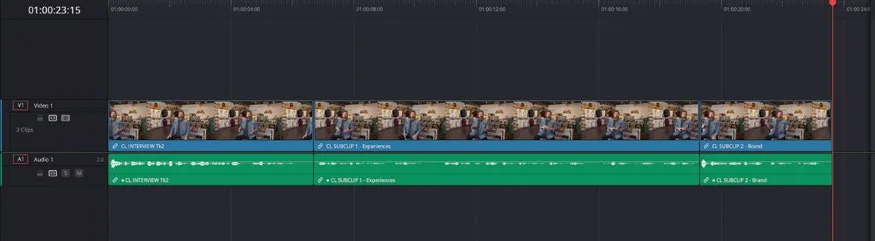
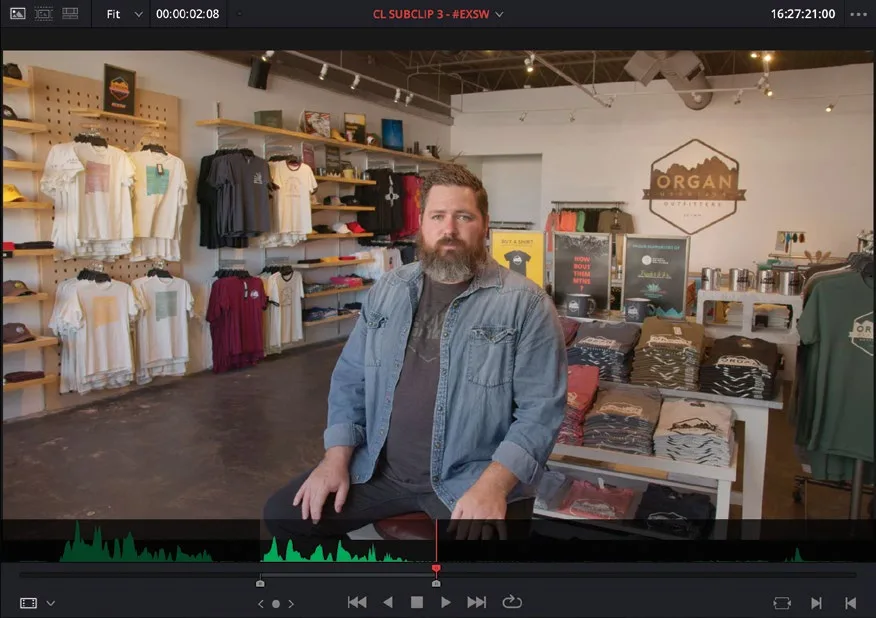
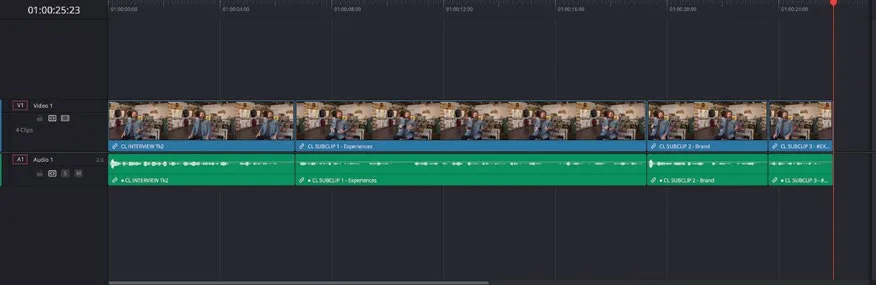
新素材会从 timeline playhead 当前位置开始插入。The new clip is added to the timeline, starting at the timeline playhead position.
NOTE · 注意如果你用的是 macOS 版的达芬奇,可能需要先把功能键调成标准的 F 键快捷键。点击 Apple 菜单,选择 Syst…
如果你用的是 macOS 版的达芬奇,可能需要先把功能键调成标准的 F 键快捷键。点击 Apple 菜单,选择 System Settings,在侧边栏里选 Keyboard;进入 Keyboard 设置后点 Keyboard Shortcuts按钮,选 Function Keys,勾上 "Use F1, F2, etc. as standard function keys";然后选 Mission Control,把 F11 对应的 Show Desktop 取消勾选,最后点 Done。也可以按住 fn 键再加 F 键来临时绕过 macOS 的快捷键。If you’re using DaVinci Resolve on macOS, you may need to configure your keyboard settings to use the default editing shortcuts. Select the Apple menu, choose System Settings, and select Keyboard in the sidebar. In the Keyboard settings, click the Keyboard Shortcuts button and select Function Keys. Enable the option “Use F1, F2, etc. as standard function keys.” Then select the Mission Control option and uncheck the Show Desktop option for F11, and click Done. Alternatively, you can use the fn key with any F-key to override the macOS shortcuts.
- 如果上一步之后你移动过 timeline playhead,先把它重新放到 timeline 中第四段素材的末尾。If you have moved the timeline playhead since the previous step, ensure it is at the end of the fourth clip in the timeline.
- 双击 CL SUBCLIP 4 - Inspiration 载入 source viewer,把 playhead 移到第二组波形位置。Double-click CL SUBCLIP 4 - Inspiration to open it in the source viewer and move the playhead to the second group of waveforms.
这里就是最后一段 soundbite 的起始位置。Chris 会有一次轻微的卡壳,把 "that" 说了两遍,In 点选起来有点紧;不过借助放大后的音频波形,可以又快又准地找到两个 "that" 之间的短暂停顿,让 soundbite 干净地起头。This is the start of the final soundbite you will add to the timeline, but it’s a bit of a tight edit to find the In point for when Chris stumbles slightly and says “that” twice. However, using the zoomed audio waveform display will make it so much easier to locate the short pause between the two “thats” quickly and accurately for a clean start to the soundbite.
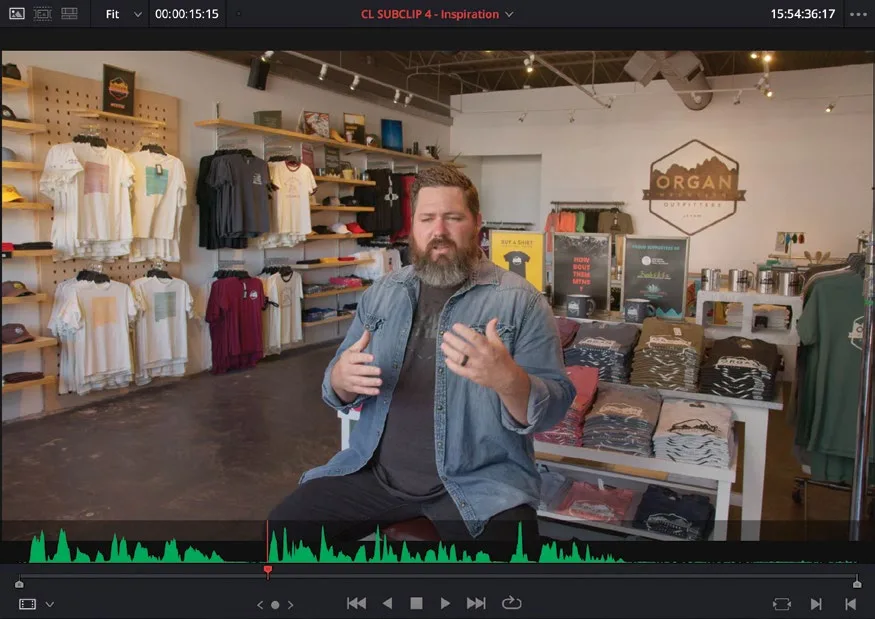
- 在 source viewer 的 Options 菜单里选 Show Audio Waveforms Zoomed In,再用 jog 把 playhead 慢慢推进两个波形之间的空隙。From the source viewer’s Options menu, choose Show Audio Waveforms Zoomed In and jog the playhead into the gap between the waveforms.
- 将播放头对齐到第一个 "that" 之后、第二个 "that" 之前的位置,按 I 键添加入点。When the playhead is aligned after the first “that” but before the second “that,” press I to add an In point.
- 点击 Options 菜单(…),取消勾选 Show Audio Waveforms Zoomed In 以关闭放大波形显示。继续在 source viewer 中播放片段,在 Chris 说完 "… that's really where the design process starts." 之后添加出点。Turn off the zoomed waveforms by clicking the Options menu (…) and deselecting Show Audio Waveforms Zoomed In, continue playing the clip in the source viewer, and add an Out point after Chris says, “… that’s really where the design process starts.”
- 按 F10 或点击
Overwrite Clip按钮,将片段以覆盖方式插入到时间线上播放头所在位置。Press F10 or click theOverwrite Clipbutton to overwrite the clip into the timeline at the playhead position.
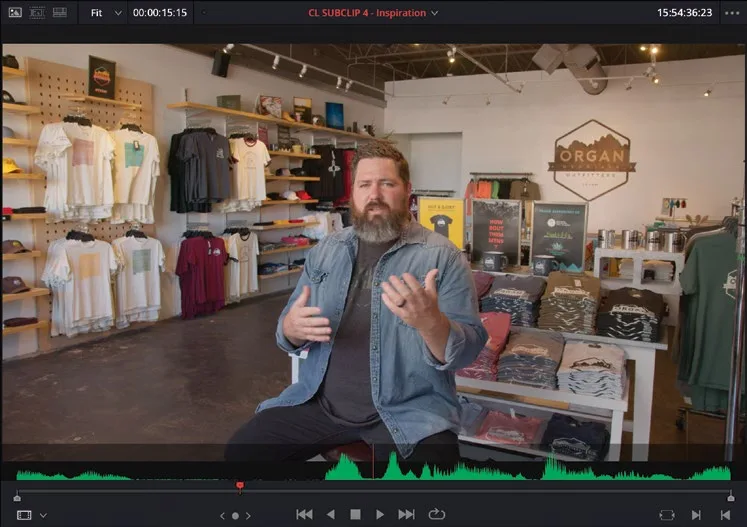
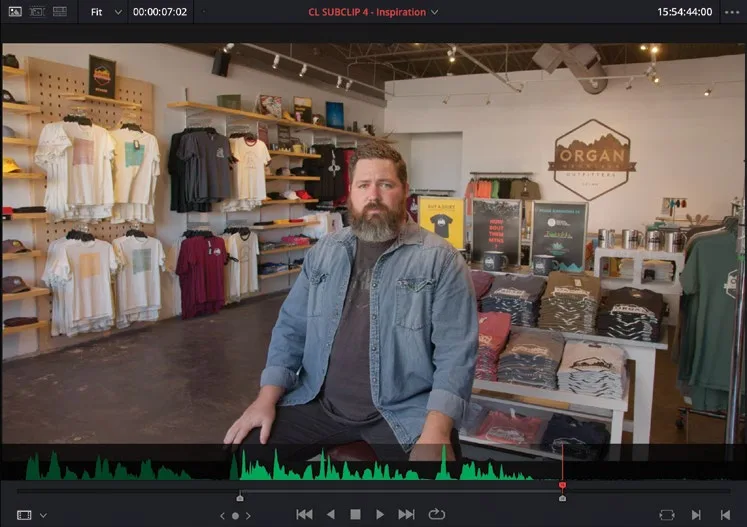
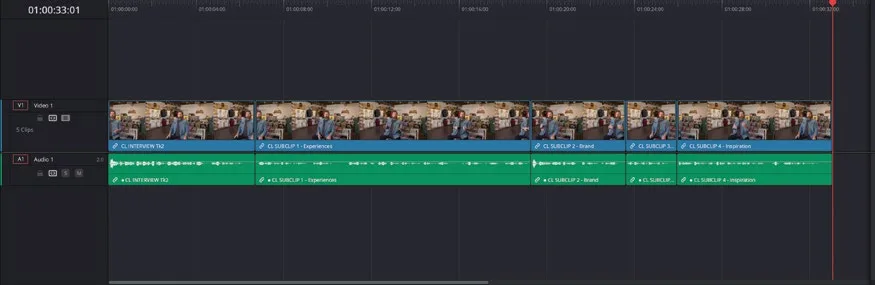
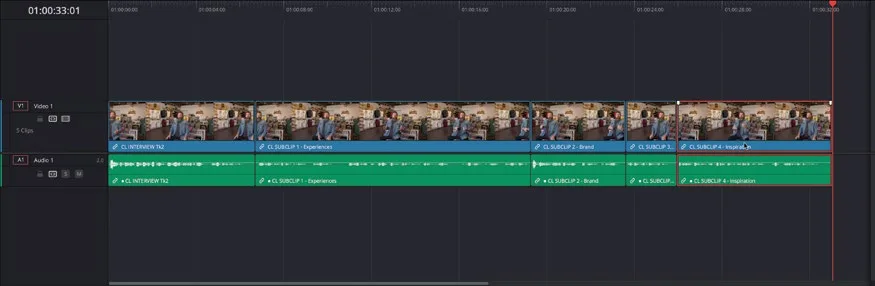
这是你需要添加到这条时间线上的最后一个 soundbite。此时可以自由地把播放头移回时间线起始位置,播放当前时间线来回顾所有 soundbite。This is the final soundbite you need to add to this timeline. At this point, feel free to move the playhead back to the start of the timeline and play back the current timeline to review the soundbites.
本卡术语Terms in this card
媒体夹Bin 覆盖编辑Overwrite Edit 声音片段Soundbite 源检视器Source Viewer 子片段Subclips 时间线Timeline 覆盖Overwrite 播放头Playhead 修剪Trim 键盘快捷键Keyboard Shortcuts