准备时间线Preparing the Timeline
14 steps
简介Overview
这条时间线是本书前三个课时里 OMO Promo 的一个调整版本,主要差别是在 Audio 2 轨道上增加了一些音频片段,它们为不同的 B-roll 画面提供环境声,后续步骤会基于这些素材来完善这条片子的声音设计。可以看到,这些片段还做了音量调整、部分关键帧调整、交叉溶解(cross-dissolve)转场以及音频淡入淡出。As you can see (and hear), this timeline is a version of the OMO Promo you worked on in the first three lessons of this book, with a few adjustments for this lesson. The main difference is that there are additional audio clips on the Audio 2 track. These clips provide ambience for the different B-roll clips. You will build on these in later steps to flesh out the sound design of the promo. You will also notice that there are several level adjustments to these clips, a couple of keyframed adjustments, some cross-dissolve transitions, and audio fades.
为了让混音流程更顺畅,可以给各轨道命名并配上不同颜色,方便辨识。To streamline the audio mixing process, you can name and color-code the tracks for easy reference.
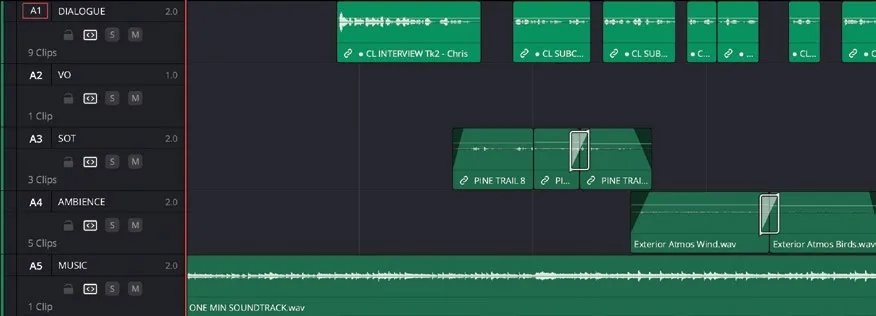
- 点击 Audio 1 轨道名称,将其重命名为 DIALOGUE。Click the Audio 1 track name and rename it DIALOGUE.
- 依次将 Audio 2 重命名为 VO、Audio 3 重命名为 SOT、Audio 4 重命名为 AMBIENCE、Audio 5 重命名为 MUSIC。Rename Audio 2 VO, Audio 3 SOT, Audio 4 AMBIENCE, and Audio 5 MUSIC.
也可以给轨道更换颜色,让它们在视觉上更易于区分。You can also change the color of the tracks so they are easy to identify visually.
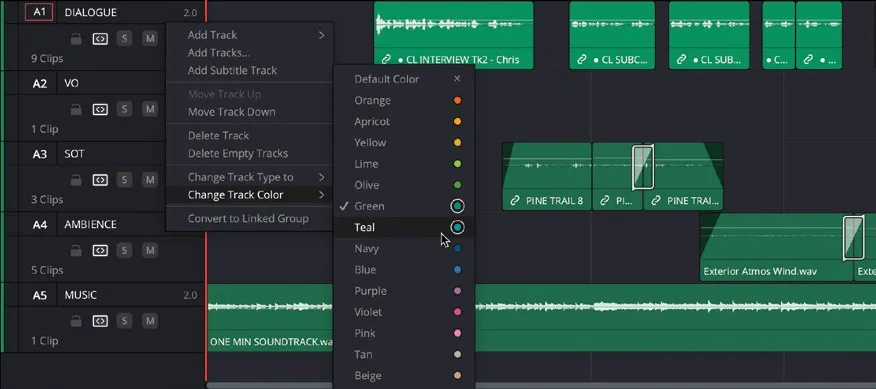
- 右键单击 DIALOGUE 轨道的轨道控件,选择
Change Track Color > Teal。Right-click the track controls for the DIALOGUE track and choose Change Track Color > Teal.
该轨道上的所有片段都会随之变色,让对白片段在众多音频片段中更醒目。All the clips in this track change color, making the dialogue clips easier to recognize among the other audio clips.
NOTE · 注意如果轨道内的某个片段已经单独应用了颜色标签,片段自身的颜色会覆盖轨道颜色…
如果轨道内的某个片段已经单独应用了颜色标签,片段自身的颜色会覆盖轨道颜色。If any clips in this track have their own color tag applied, this will supplant the color assigned to the track.
- 右键单击 VO 轨道,选择
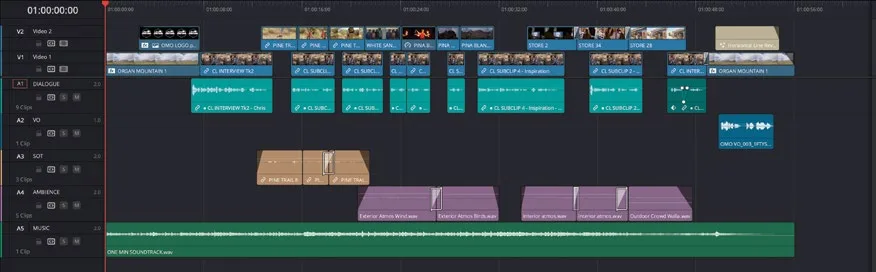
Change Track Color > Navy。Right-click the VO track and choose Change Track Color > Navy. - 将 SOT 轨道颜色改为 Beige。Change the color of the SOT track to Beige.
- 将 AMBIENCE 轨道颜色改为 Purple。Change the color of the AMBIENCE track to Purple.
- MUSIC 轨道保持音频轨道的默认绿色不变。Leave the MUSIC track the default Green for audio tracks.
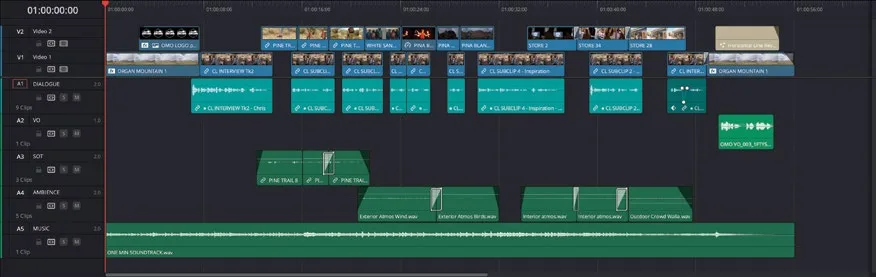
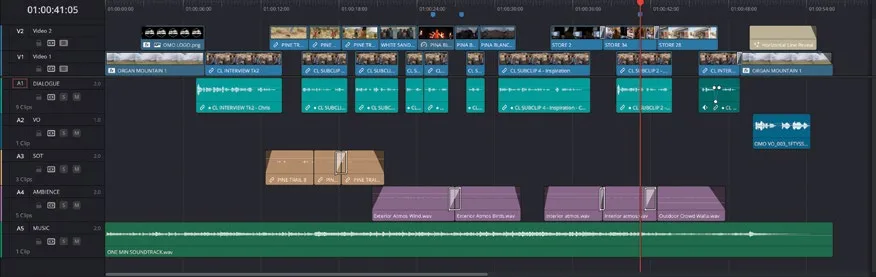
新版的彩色时间线能让你快速识别混音中不同的音频元素。The new colorful timeline makes it easy to quickly identify the different audio elements of your mix.
接下来,你将在时间线上添加一系列标记,快速定位需要用声音设计元素来增强音轨的位置。Next, you will also add a series of markers to the timeline to quickly identify parts where you want to enhance the soundtrack with elements of sound design.
- 在时间线中确保没有选中任何片段。可按 Shift-Command-A(macOS)或 Shift-Ctrl-A(Windows)确认。In the timeline, ensure that you have no clips selected. You can press Shift-Command-A (macOS) or Shift-Ctrl-A (Windows) to be sure.
- 将播放头移到 PINA BLANCA 70 片段上任意位置,点击时间线工具栏中的
Markers按钮。Move the playhead anywhere over the clip PINA BLANCA 70 and click theMarkersbutton in the timeline toolbar.
一个蓝色标记会出现在播放头下方、紧贴时间线顶部的位置。A blue marker appears underneath the playhead along the top of the timeline.
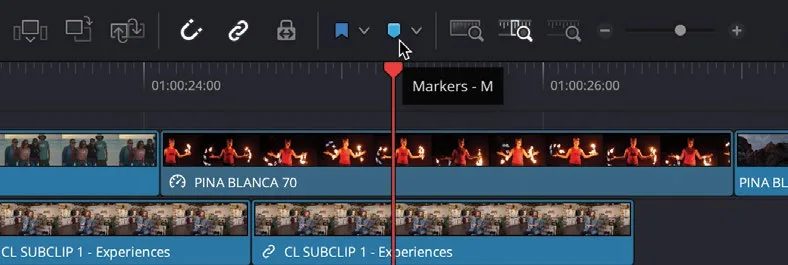
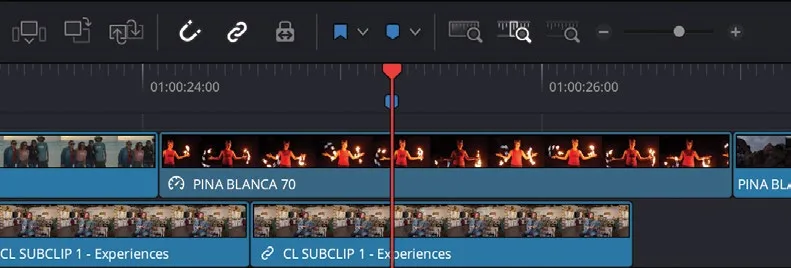
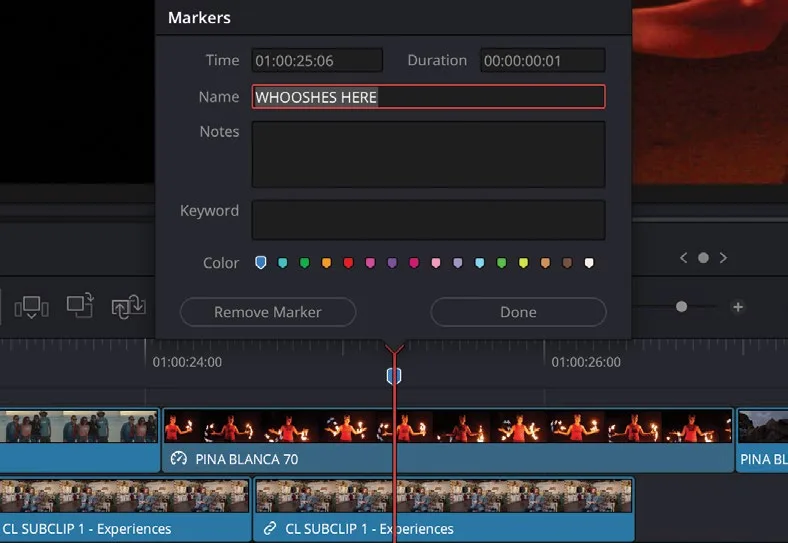
- 双击该标记,重命名为 WHOOSHES HERE,然后点击 Done。Double-click the marker and rename the marker WHOOSHES HERE, and click Done.
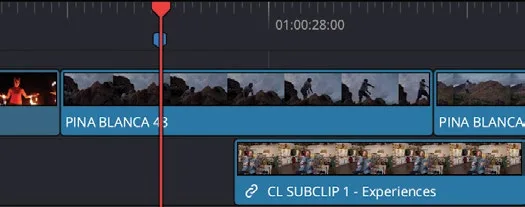
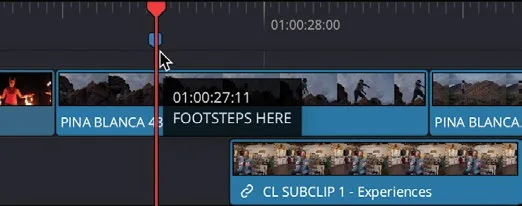
- 将播放头移到下一个片段 PINA BLANCA 48 上,按 M 在该片段上方添加另一个标记。Move the playhead over the next clip, PINA BLANCA 48, and press M to add another marker above this clip.
- 保持播放头在该新标记上,再按 M 打开
Marker窗口,将标记重命名为 FOOTSTEPS HERE,然后点击 Done。With the playhead still over the new marker, press M again to open the Marker window and rename this marker FOOTSTEPS HERE and click Done.
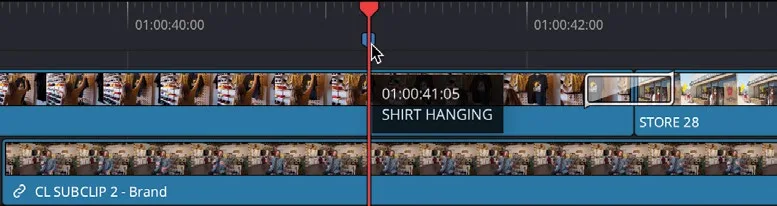
- 将播放头移到 STORE 34 片段上,连续按两次 M 来添加标记并立即打开
Marker窗口。将该标记重命名为 SHIRT HANGING,然后点击 Done。Move the playhead over the clip STORE 34 and press M twice to add a marker and open theMarkerwindow in quick succession. Rename this marker SHIRT HANGING and click Done.
TIP · 提示提示:你可以在 Index 的 Markers 标签页中查看当前打开时间线的标记列表…
提示:你可以在 Index 的 Markers 标签页中查看当前打开时间线的标记列表。You will find a list of the markers in the open timeline in the Markers tab in the Index.
- 点击时间线工具栏中的
Full Extent Zoom按钮,查看添加了新标记的时间线全貌。Click the Full Extent Zoom button in the timeline toolbar to look at the timeline with the new markers added.
现在你已准备好将时间线带入 Fairlight——DaVinci Resolve 的音频编辑与混音环境。You are now ready to take your timeline into Fairlight, DaVinci Resolve’s audio editing and mixing environment.
点击 DaVinci Resolve 界面底部的 Fairlight按钮,或按 Shift-7 快捷键,即可切换到 Fairlight页面。At the bottom of the Davinci Resolve interface, click the Fairlight button or press Shift-7 to switch to the Fairlight page.
在 DaVinci Resolve 中,从剪辑阶段进入音频后期制作,只需这一个步骤。This is the one and only workflow step required to move from editing to audio post- production in DaVinci Resolve!
本卡术语Terms in this card
B-roll 素材B-roll 时间线Timeline 交叉溶解Cross Dissolve 关键帧Keyframe 标记Marker 覆盖Overwrite 播放头Playhead 转场Transition 淡入淡出Fade 窗口Power Window 静帧Still 声音设计Sound Design Fairlight 音频Fairlight