认识 Fairlight页面界面Exploring the Fairlight Interface
9 steps
简介Overview
第 3 课里你已经完成了 OMO Promo 全部音频的混音。不过 Fairlight页面专为音频工作设计,在多通道音频的录制、剪辑、混音和润色方面都有更强的控制力,默认布局也以时间线中的音频为核心。In Lesson 3, you completed steps that resulted in an acceptable mix of all the audio for the OMO Promo. However, the Fairlight page offers a greater level of control over your soundtrack since it is designed around working with audio specifically and is optimized for multichannel audio recording, editing, mixing, and sweetening. As you can see, the default layout is streamlined to focus on the audio in the timeline.
- 按 Shift+Z,让时间线窗口中的所有片段在水平方向上铺满视图。Press Shift-Z to fit all the timeline clips horizontally in the timeline window.
- 如有必要,使用 Shift+鼠标滚轮调整轨道高度,以便看清时间线里的所有片段。If necessary, Shift-mouse scroll to adjust the height of the tracks so you can see all the clips in the timeline.
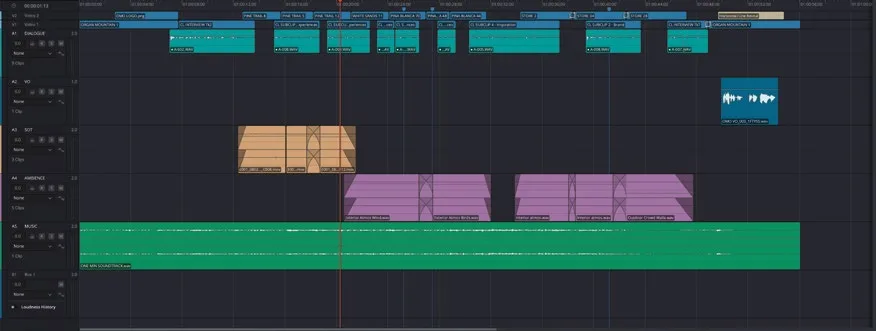
可以看到,时间线里之前在 Edit page 中添加的音频淡入淡出、转场、关键帧、轨道名称、颜色以及标记都完整保留并可见。这是因为 Fairlight 与 Edit page 共用同一条时间线——在 Edit page 中做的任何音频调整都会立即反映在 Fairlight 中,反之亦然。先前在 Edit page 完成的操作,用同样的方法在 Fairlight 中也能直接实现。Looking at the timeline, you’ll notice that all the audio fades, transitions, and keyframes are still applied and viewable in the Fairlight page, along with the track names, colors, and markers you added in the edit page. This is because this is exactly the same timeline as you were viewing in the edit page, so any audio adjustments you made in the edit page are immediately viewable in the Fairlight page, and vice versa. In fact, the changes you made previously in the edit page could just as easily have been made here in the Fairlight page using the same techniques.
Fairlight 在操作和体验上与 Edit page 十分相似,但仍有一些差异。在动手调整之前,先花点时间熟悉一下 Fairlight 界面的主要组成部分。In many ways, the Fairlight page operates and feels like the edit page, but there are some differences. Before you dive in and start adjusting things, take a moment to become more familiar with the main parts of the Fairlight interface.
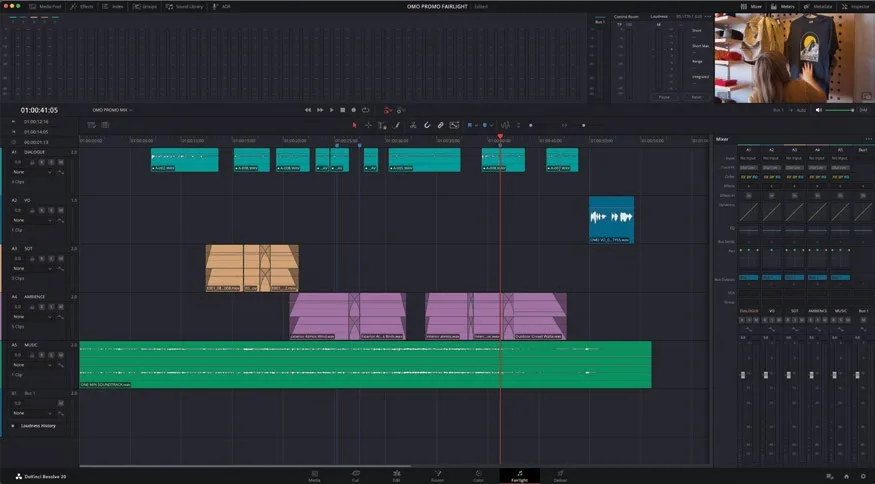
除了片段调整外,你在调音台(mixer)中所做的修改同样会在 Fairlight 中看到。区别在于,Fairlight 提供完整的调音台访问权限,而 Edit page 只能使用其中部分控制。In addition to clip adjustments being viewable in the Fairlight page, so too are any adjustments you’ve made to the mixer. The only difference is that in the Fairlight page, you have access to the full mixer, whereas in the edit page, you only have access to certain controls in the mixer.
时间线底部会多出一条在 Edit page 中看不到的轨道:Bus 1,代表时间线的立体声输出。通过 Fairlight > Bus Format可以修改 Bus 1 的 Format,从而改变时间线的通道数。更多总线相关的内容,请参考 The Fairlight Audio Guide to DaVinci Resolve 20。At the bottom of the timeline, you will also see an extra “track” that you do not see in the edit page: Bus 1. This represents the stereo output of your timeline. You can change the number of channels for your timeline by choosing Fairlight > Bus Format and changing the Format for Bus 1. For more information on this and other bussing options, see The Fairlight Audio Guide to DaVinci Resolve 20.
NOTE · 注意NOTE:Fairlight 页面没有 Edit page 那种专门的 extent 和 detail zoom 按钮…
NOTE:Fairlight页面没有 Edit page 那种专门的 extent 和 detail zoom 按钮,但仍然沿用了相同的缩放方式:Option+鼠标滚轮(macOS)或 Alt+鼠标滚轮(Windows)缩放时间线,Shift+鼠标滚轮(macOS 和 Windows)调整轨道高度。若想以某条轨道为中心缩放高度,先点选该轨道的 header,再使用 Shift+鼠标滚轮,同时会自动选中该轨道上播放头所在位置的片段。The Fairlight page doesn’t have the equivalent of the edit page’s full extent and detail zoom buttons, but you can still use the same options for controlling timeline zoom and track height as in the edit page: Option-mouse scroll (macOS) or Alt-mouse scroll (Windows) to zoom the timeline and Shift- mouse scroll (macOS and Windows) to zoom track height. To zoom the track height centered on a specific track, click the track’s header to highlight the track and use Shift-mouse scroll. This will also automatically select the clip on that track under the playhead.
- 将播放头移动到时间线起点,播放以回看剪辑。Move the playhead to the start of the timeline and play back to review the edit.
你可能会立刻注意到几件事。首先,各轨道的电平表在多处同时显示:轨道 header、界面上方的 meters 面板,以及界面右侧的调音台里。You’ll probably notice several things immediately. First, the meters for each track that show the level of the clip currently playing can be seen in several locations: in the track headers, along the top of the interface in the meters panel, and in the mixer on the
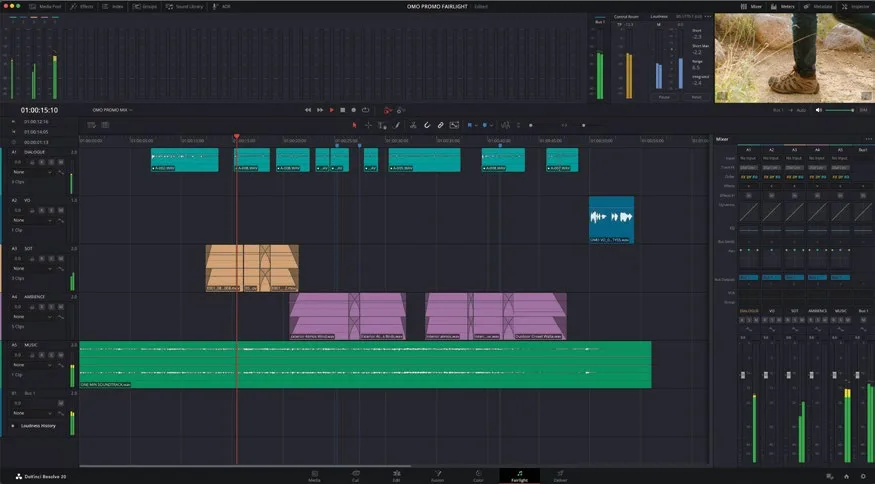
不过不用担心,它们显示的是相同的信息——目前你暂时用不到调音台。right of the interface. Don’t worry, though, since they are showing the same thing, for the moment at least, you don’t need the mixer.
- 点击 viewer 上方的
Mixer按钮,隐藏调音台。Click the Mixer button above the viewer to hide the mixer. - 按 Shift+Z,让时间线铺满整个界面宽度。Press Shift-Z to display the timeline across the full width of the interface.
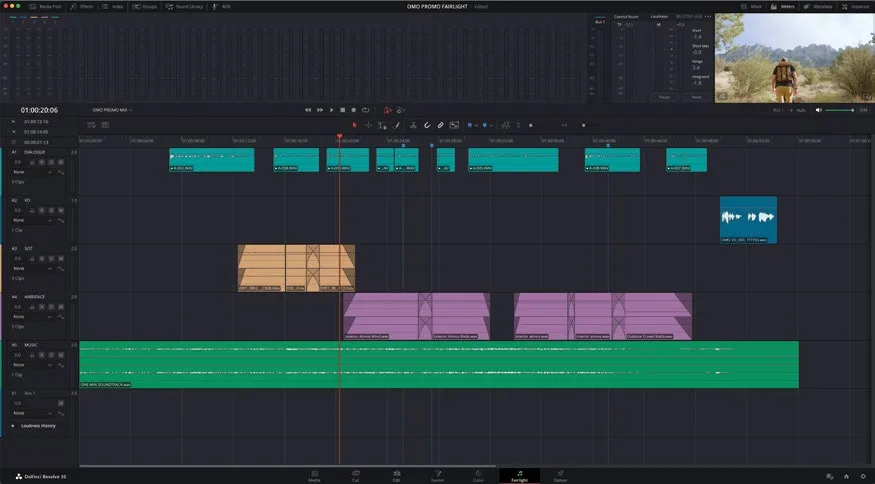
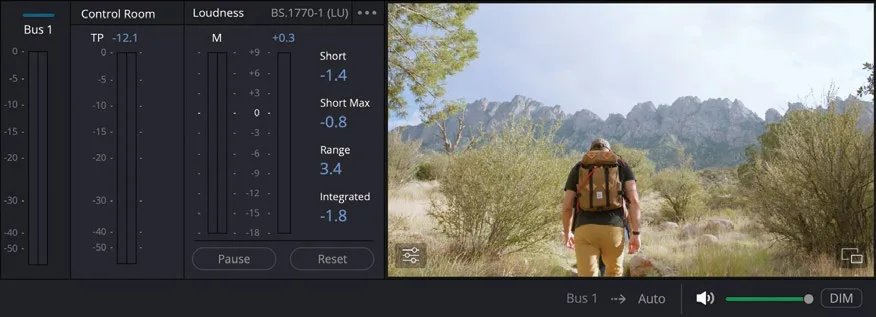
你会发现 meters 面板右侧可以直接看到 Edit page 的视频画面,包括 effects、titles 和 transitions。The other thing you will have noticed is that you can see the video from the edit page, including effects, titles, and transitions, on the right of the meters panel.
这个视频预览始终跟随时间线上 playhead 所在位置显示当前帧,可以作为参考,确保音画同步、声音与画面时间对齐。This video preview always shows the current video frame wherever the playhead is in the timeline. It can be used as a reference to ensure everything stays in sync and the sound is timed correctly.
NOTE · 注意如果使用 Blackmagic Design 的输出设备(如 Ultrastudio 或 Decklink 卡),预览画…
如果使用 Blackmagic Design 的输出设备(如 Ultrastudio 或 Decklink 卡),预览画面也会同时输出到外接监视器。If you use a Blackmagic Design output device such as an Ultrastudio or Decklink card, you will also see the preview on your external monitor.
除了使用 Viewer,在查看时间线上的 edit point 或 titles 等元素时,调出对应的视频轨也很方便。In addition to using the viewer, it can be useful to see the video edits that were made when referencing edit points or other elements in the timeline, such as titles.
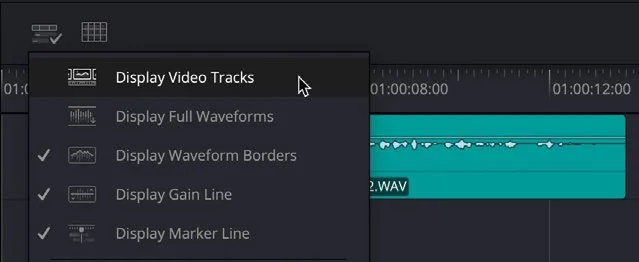
- 点击 Timeline View Options 菜单。Click the Timeline View Options menu.
- 在 Track Display Options 区域,点击第一项,把 video track 显示到时间线顶部。Click the first option in the Track Display Options section to display the video tracks at the top of the timeline.
NOTE · 注意为防止在视频轨上误改 clip,可以在 Edit page 把这些 track 锁定…
为防止在视频轨上误改 clip,可以在 Edit page 把这些 track 锁定。To prevent inadvertently adjusting the clips in the video tracks, you can choose to lock the tracks on the edit page.
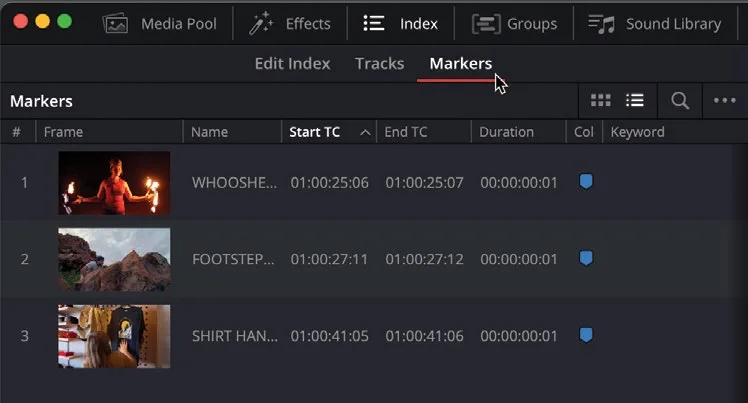
- 在时间线上按 Shift+Up Arrow 或 Shift+Down Arrow,在各个 marker 之间跳转。In the timeline, press Shift-Up Arrow or Shift-Down Arrow to jump between the different markers.
- 点击
Index按钮,在 Edit Index 中选择 Markers 标签,即可列出时间线上所有的 marker。Click the Index button and, in the Edit Index, select the Markers tab to view a list of all the markers in the timeline.
由于暂时还用不到 marker,可以把 Index 关闭,腾出更多屏幕空间。Since you won’t be using the markers just yet, you can easily close the Index so it’s not taking up valuable screen real estate.
点击 Index按钮隐藏 Edit Index面板,然后按 Shift+Z 让时间线缩放至窗口大小。Click the Index button to hide the Edit Index panel and press Shift-Z to zoom the timeline to fit the window.
简单了解 Fairlight页面(page)的主要元素之后,我们来看看如何用 Fairlight 提升你的 soundtrack 音质。After that brief tour of the main elements of the Fairlight page, it’s time to see how you can start to use Fairlight to enhance your soundtracks.
本卡术语Terms in this card
时间线Timeline 编辑页Edit page 关键帧Keyframe 标记Marker 播放头Playhead 转场Transition 淡入淡出Fade 调音台Mixer 窗口Power Window 静帧Still Fairlight 音频Fairlight