使用 DaVinci Resolve 色彩管理Using DaVinci Resolve Color Management
13 steps
简介Overview
到目前为止,我们的调色过程还算轻松,只用几个控件就让素材看起来更好了。如果你的项目只用同一种摄影机文件,大体上可以继续沿用本节课的方法。So far, we’ve had it fairly easy in our color-grading process. We worked with a few controls and made the camera files look better. In your projects, if all you do is work with the same camera files, then you can essentially continue with the process we started in this lesson.
但影视制作在技术层面相当复杂,最能说明这一点的是摄影机及其各种文件格式。每个厂商都会通过自定义色域(gamut)和色调范围(gamma)来呈现最佳画质,这种素材通常被称为 log 素材,因为它们采用对数式对比曲线。log 素材在监视器上看起来并不漂亮。当一个项目里混用不同摄影机的 log 素材时,就需要更高效地管理各种 gamut 和 gamma,以保证最终输出一致。Resolve Color Management(RCM)就是为解决这个问题而设计的。However, filmmaking is technical and at times complicated. Few aspects of the process illustrate this as well as cameras and their various file formats. Each camera manufacturer tries to give you the best-looking image possible by customizing the color palette (gamut) and tonal range (gamma). You’ll often hear these types of clips referred to as log clips due to their logarithmic contrast profiles. The result of recording log clips is that they don’t look great on your monitor. When using different log clips from different cameras in a single project, you need to manage various gamuts and gamma ranges more efficiently to achieve consistency in your final output. That’s where Resolve color management (RCM) helps.
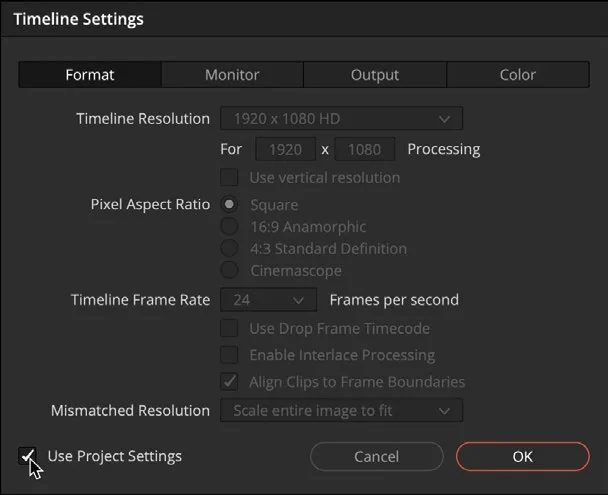
- 在监视器上方,点击时间线名称旁的下拉箭头,显示该项目的所有时间线。Above the viewer, click the dropdown arrow next to the timeline name to reveal all the project’s timelines.
- 选择 Conservation Filming 时间线。Choose the Conservation Filming timeline.
这条时间线包含来自多种摄影机的素材,大部分是 Blackmagic Design 的 Pocket 4K 和 6K,此外还有副机 Sony、无人机 DJI 以及 GoPro 的镜头。它们的 gamut 和 gamma 各不相同。This timeline contains shots from several different cameras. The majority of the material comes from Blackmagic Design’s Pocket 4K and 6K cameras. However, we also have a shot from our secondary camera, which is a Sony, a drone, which is a DJI, and also a GoPro. All these clips have their own gamut and gamma profiles.
- 在时间线上点击第四个缩略图。In the timeline, click the fourth thumbnail.
和许多数字电影摄影机的素材一样,这些 log 风景素材在电视或电脑显示器上看起来并不理想——虽然拥有宽色调范围和宽色域,画面却显得平淡且欠饱和。监视器只能识别它认识的 profile,因此不知道如何正确还原这些数字电影摄影机的素材。Resolve Color Management(RCM)是把来自不同摄影机的素材统一成目标输出的最简单、最准确的方法。Like many clips from digital cinema cameras, these scenic log clips are not intended to look perfect on a TV or computer display for example. Although they have a wide tonal range and a wide color gamut, they look flat and undersaturated. Your monitor is expecting a profile that it understands, so it has no idea how these digital cinema camera clips should look. Resolve color management (RCM) is the easiest and most accurate way to unify different clips from different cameras so they all match your desired output.
NOTE · 注意DaVinci Resolve 色彩管理是一种非破坏性流程。虽然素材会被显示为适合在电视上观看的 profile,但摄影…
DaVinci Resolve 色彩管理是一种非破坏性流程。虽然素材会被显示为适合在电视上观看的 profile,但摄影机原始 profile(包含更多信息)依然完整保留——RCM 只是把这个 profile 映射到输出上。DaVinci Resolve color management is a non-destructive process. Even though you will see the clips in a profile that is suitable for viewing on a TV, the original profile of the camera that contains a lot more information is still there—it is just mapping this profile to the output.
- 点击屏幕右下角的 Project Settings 图标。Click the Project Settings icon in the bottom right corner of the screen.
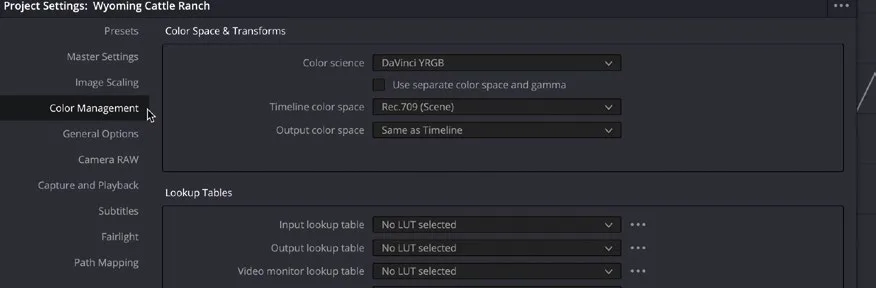
- 在弹出的窗口中选择 Color Management 类别。Select the Color Management category from the window that pops up.
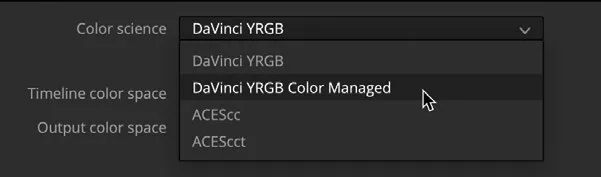
- 在 Color Science 下拉菜单中选择 DaVinci YRGB Color Managed。In the Color Science dropdown menu, choose DaVinci YRGB Color Managed.
开启色彩管理后,Color Science 菜单下方会出现新的下拉菜单,默认开启 Automatic color management。该预设菜单包含 SDR 和 HDR 两项,可通过 Color processing mode 菜单选择。SDR 用于标准动态范围的源素材和输出;本时间线中既有 log HDR(高动态范围)源素材,也有 SDR 素材。Enabling color management presents a new dropdown menu below the Color Science menu. By default, Automatic color management is turned on. This preset menu contains two settings, either SDR or HDR, which can be chosen from the Color processing mode menu. SDR is the choice for standard dynamic range source media, and output. The media in our timeline is a mix of log HDR (high dynamic range) source media and SDR media.
TIP · 提示NOTE:Automatic 色彩管理只显示少量的处理和输出选项。如果找不到所需设置,取消勾选 Automatic co…
NOTE:Automatic 色彩管理只显示少量的处理和输出选项。如果找不到所需设置,取消勾选 Automatic color management,即可看到完整的处理模式和色彩输出选项。The Automatic color management shows only a few options for processing and output. If you cannot find the setting you require, uncheck the Automatic color management option to see the full range of processing modes and color outputs.
- 在 Resolve Color Management Preset 下拉菜单中选择 HDR。In the Resolve
Color Management Presetdropdown menu, choose HDR.
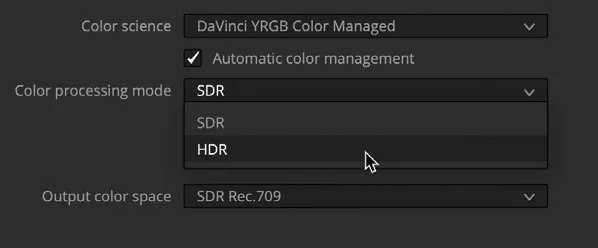
该预设虽然仍以 SDR 为输出目标,但当素材中混合了 HDR log 和 SDR 素材时,它是最佳选择,因为它能保留 HDR 源素材中的超高光部分。Although this preset is still targeting an SDR output, it is the best choice when using a mix of HDR log and SDR clips because it preserves the super-bright highlights contained in HDR source media.
Output Color Space 应根据最终输出交付来设置。由于本项目输出为 SDR,因此保持 SDR Rec709 不变。这是许多显示设备(包括标准电视)的通用设置。The output color space should be set for your final output delivery. Because our project will be output to SDR, we’ll leave this menu set to SDR Rec709. This is the standard setting for many displays, including standard TVs.
- 点击 Save 关闭设置,同时留意 Viewer 的变化。Click Save to close the settings but keep an eye on the viewer.
TIP · 提示NOTE:在向不同显示设备交付时,可随时更改 Output Color Space,这正是色彩管理工作流的主要优势之一…
NOTE:在向不同显示设备交付时,可随时更改 Output Color Space,这正是色彩管理工作流的主要优势之一。You can change the output color space at any time when you are delivering to different display devices. This is one of the main benefits of using a color-managed workflow.
使用 DaVinci Resolve 色彩管理时,部分源素材格式(如 RAW 文件,以及部分 QuickTime 和 MXF 封装的文件)自带色彩 gamut 和 gamma 信息。如果文件中带有这些 metadata 标签,RCM 会自动读取并应用正确的源素材设置。当前素材均带有标签并已完成色彩管理,因此在 HD 监视器或电脑屏幕上看起来更亮、色彩更丰富。When using DaVinci Resolve color management, some source clip formats like RAW files, as well as some QuickTime and MXF wrapped files, include information about the color gamut and gamma. If these metadata tags are present in the files, RCM can automatically read them and apply the correct settings for the source clips. This is the case with the clips we have now. They are all tagged and color managed, so now they look brighter and more colorful on our HD monitor or computer screen.
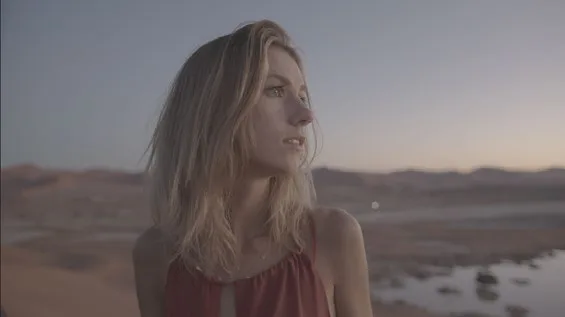

不过,实际素材中很可能有一些并不包含 metadata 标签,下面演示如何为未自动识别的源素材手动设置 Input Color Space。However, you will likely have some content that does not include metadata tags, so let’s walk through how you might manually set the Input Color Space for source clips that are not set automatically.
通常应将 Input Color Space 的值改为与拍摄素材所用设备相匹配。默认情况下,无 metadata 的素材会被应用 Rec709 Gamma 2.4,这通常适合 HD 拍摄的素材,但也会遇到其他格式。Typically, you want to change the Input Color Space value to match the device that recorded the imported clips. By default, a Rec709 Gamma 2.4 setting is applied to clips without metadata. This is probably suitable for your HD recorded clips, but you will come across other formats.
- 在时间线上选中第 17 个片段,该片段来自 GoPro 相机。Select clip 17 in the timeline. This clip is from a GoPro camera.
进入 Project Settings,关闭 Color Management。Go into the Project Settings and turn off the Color Management.
你会发现 GoPro 片段没有变化。由于它采用 Rec709 拍摄,与输出 profile 一致,因此即便此时没有 metadata,影响也不大。You will see the GoPro clip does not change. Since it was shot in a Rec709 profile, it simply matches the output profile, so while the clip might have no metadata at this stage, it doesn’t really matter.
- 进入 Project Settings,重新开启色彩管理。Go into the Project Settings and turn Color Management back on.
对于没有 metadata 标签的片段,可以在时间线上单独设置,也可以在 bin 中成组设置。When you have clips without metadata tags, you can manually set those clips individually from the timeline or in groups from a bin.
TIP · 提示把 Input Color Space 添加为 Media Pool 列表列后,每条片段当前使用的色彩 profile(…
把 Input Color Space 添加为 Media Pool 列表列后,每条片段当前使用的色彩 profile(无论是你手动指定还是由 metadata 自动分配)都会显示出来。Adding the Input Color Space as a media pool column will display the currently assigned color profile for each clip, whether it is assigned manually by you or automatically by metadata.
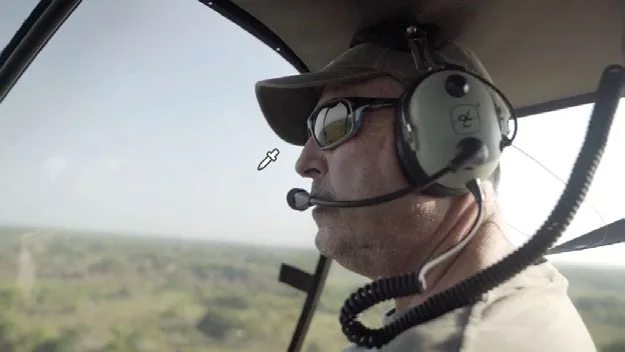
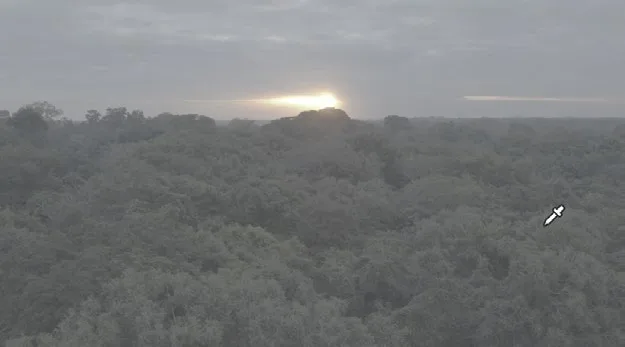
- 在时间线上选中 clip 18。这是一段 DJI 无人机拍的画面,看起来仍然很平。原因在于该片段没有 DaVinci Resolve 可读取的 metadata,因此无法识别其 profile。Click clip 18 in the timeline. This is a shot from a DJI drone, and it still looks very flat. This is because there’s no metadata in the clip that DaVinci Resolve can read, so it cannot understand the profile.
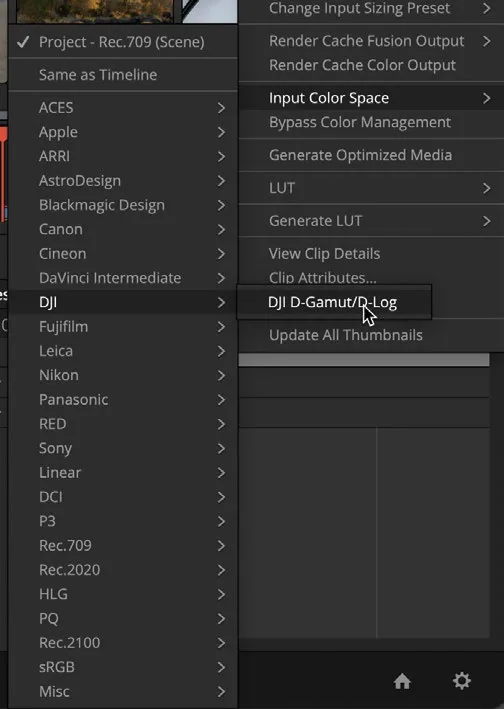
- 在时间线缩略图上右键,选择
Input Color Space > DJI > D-Gamut/D-Log。画面会立即调整,不再发灰。Right-click the thumbnail in the timeline and choose Input Color Space > DJI > D-Gamut/D-Log. The clip will adjust and will no longer look flat.
NOTE · 注意把片段从一种格式转码(transcode)为另一种格式时,文件中的 metadata 通常会被剥离。如果确实需要在不同…
把片段从一种格式转码(transcode)为另一种格式时,文件中的 metadata 通常会被剥离。如果确实需要在不同 codec 之间转换,务必记下拍摄所用的机型,长期来看能省下大量时间。Transcoding clips from one format to another tends to strip the metadata out of the file. If you do convert your clips from one video codec to another, make a note of the camera they were shot on; it will save you time in the long run.
注意,到这一步你并没有真正对片段做色彩校正(color correction),画面看起来变好只是 gamma 与 gamut 被统一到了适合 SDR 显示与输出设备的规范上。如果原片过曝,它仍然过曝;如果原片白平衡偏色,它仍然偏色。接下来,你可以用之前学过的技巧,在色彩管理的工作空间里继续调整对比度、白平衡等参数。Note that you have not color corrected these clips, although they may appear improved. If the clips were shot overexposed, they will appear overexposed. If they were shot with the incorrect white balance, they will display incorrect white balance. All you have done is correct the different gamma curves and color gamuts, so they are uniformly set to suit your SDR display device and file output. From here, you can use the techniques you learned earlier to correct contrast, white balance, etc., in the color-managed workspace.
调色过程中你可能需要反复播放片段来确认每一步效果,连续听同样的声音难免枯燥,所以现在把音频关掉。When grading this sequence, you may find yourself playing the clips repeatedly to check certain processes you are applying. Playing back the audio continuously may get a little repetitive, so at this stage we will turn it off.
- 切换到 Edit page,点击电平表旁的
Mute按钮;也可以留在 Color page,通过 Fairlight 菜单选择Monitoring > Mute来实现。Go to the edit page and click theMutebutton next to the audio level. Alternatively, you can stay in the color page and go to the Fairlight menu and choose Monitoring > Mute.
本卡术语Terms in this card
媒体夹Bin 媒体池Media Pool 时间线Timeline 编码器Codec 预设Preset 编辑页Edit page 色彩管理Color Management 调色页Color page 色彩空间Color Space 对比度Contrast 曲线Curves Gamma(中间调)Gamma 白平衡White Balance 窗口Power Window 调色Grade 静帧Still 元数据Metadata 项目设置Project Settings Fairlight 音频Fairlight