使用窗口调整光线Using Windows to Adjust Lighting
15 steps
简介Overview
除了可以隔离特定区域进行调色,你还可以用窗口(Windows)来改变画面中的光线,把观众的视线悄悄引导到你想让他们注意的地方。In addition to being able to isolate certain regions to grade, you can use windows to change the light in a shot, and without your audience noticing, pull their attention to something that you, as the colorist, want them to focus on.
- 在时间线上选中片段 03。Select clip 03 in the timeline.
我们在上一节课已经对这段素材做了白平衡,消除了画面中的黄色偏色,但片段本身显得非常平淡,几乎发灰。此外,猎豹身后有大量背景。We balanced this shot in the previous lesson, and while we neutralized the yellow cast on the shot, the clip itself looks very flat and almost gray. Also, there is a lot of background behind the cheetah.
接下来,你将在画面中塑造更具方向感的光线,让观众更聚焦于主体,也避免画面光线显得过于平淡。So at this stage, you will create more definitive lighting in the shot so the audience will focus more on the subject, and the shot’s lighting will not look so flat.
- 添加第二个节点:右键点击节点 01,选择 Add Serial,或者按 Option-S(macOS)/ Alt-S(Windows)。Add a second node by right-clicking node 01 and choosing Add Serial or by pressing Option-S (macOS) or Alt-S (Windows) on the keyboard.
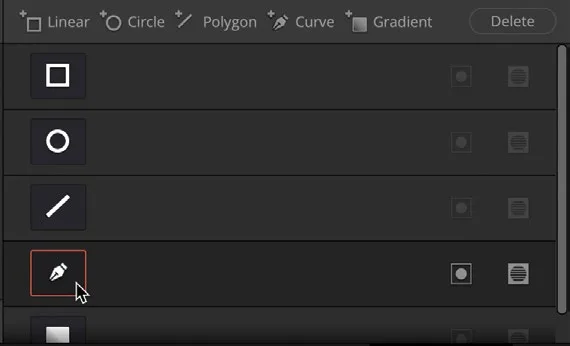
- 在工具栏中央的调色板中,点击 Windows 图标,从窗口选项中选择 Curve 工具。此时鼠标指针会变成画笔形状,你就可以用它来绘制想要的窗口形状。In the toolbar center palettes, click the Windows icon and select the Curve tool from the Window options. The mouse pointer will look like a pen, and the tool will allow you to draw the window shape you want.
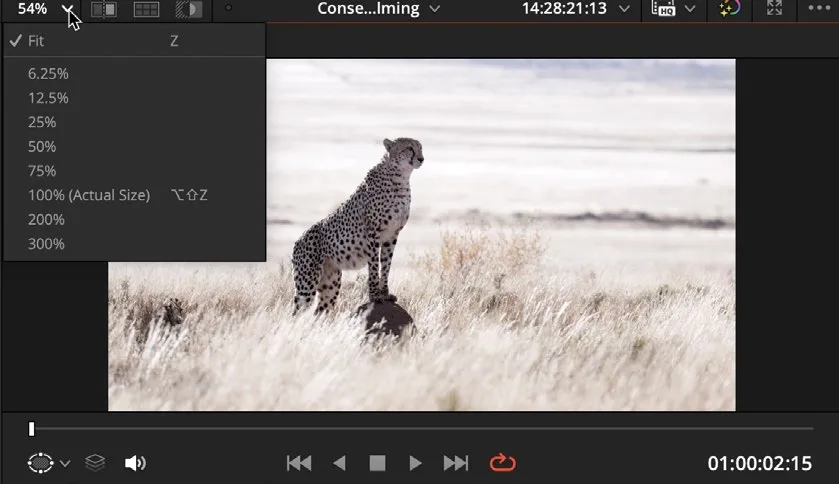
你需要把 Viewer 稍微缩小一些,确保窗口的上下边缘都位于画面之外。You will need to zoom out of the viewer slightly to make sure the top and bottom edges of the window are not in the shot.
- 把鼠标指针移到 Viewer 上方,使用鼠标滚轮向下滚动以缩小视图,显示出画面边缘;也可以点击右上角的百分比按钮,选择一个比当前更小的数值。Place the mouse pointer over the viewer window and, using the mouse scroll wheel, scroll out to reveal the edge of the image or click the percentage button in the top right corner and choose a value lower than the current one.
NOTE · 注意注意:图像适配 Viewer 后的百分比数值因系统而异,取决于你所使用屏幕的分辨率…
注意:图像适配 Viewer 后的百分比数值因系统而异,取决于你所使用屏幕的分辨率。The percentage value of an image fitted to the viewer will differ from system to system since it is dependent on the resolution of the screen you are using.
- 你也可以按 Command-减号(macOS)/ Ctrl-减号(Windows)来缩小图像。每按一次减号,图像就会缩小一档。You can also press Command-minus (macOS) or Ctrl-minus (Windows) to zoom out of the image. Each time you press the minus key, the image will zoom out further.
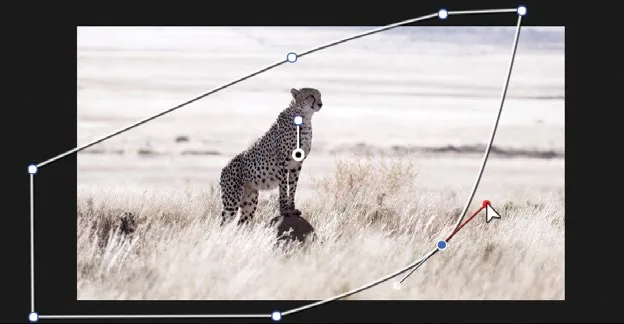
- 点击并添加第一个点,位置大约在画面右侧三分之一处,但要确保该点位于画面框线之外。Click and add the first point about a third of the way in from the right of the frame but make sure the point is outside the frame.
TIP · 提示提示:绘制窗口时不必过于纠结点的位置,它们的位置以后可以再调整,也可以在形状上添加或删除点…
提示:绘制窗口时不必过于纠结点的位置,它们的位置以后可以再调整,也可以在形状上添加或删除点。Don’t worry too much about the points when you are drawing a window; their positions can be changed later, and points can also be added and deleted from a shape.
- 在画面左侧大约中间位置再添加一个点,同样确保该点位于画面之外。Add a second point approximately halfway down the left side of the frame, again making sure that the point is outside the frame.
- 如下图所示,再添加三个点。Add another three points as shown in the image below.
- 添加完第五个点后,将鼠标指针移到最开始创建的第一个点上并点击,形状就会闭合。After adding the fifth point, position the mouse pointer over the first point you created and click the point. The shape will close.
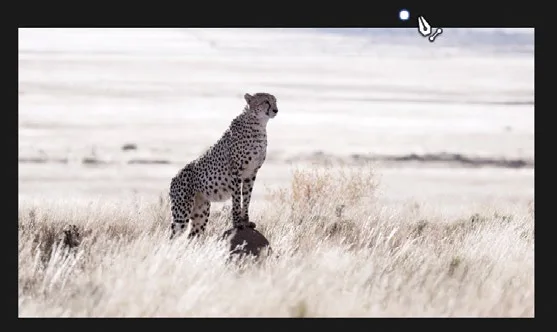
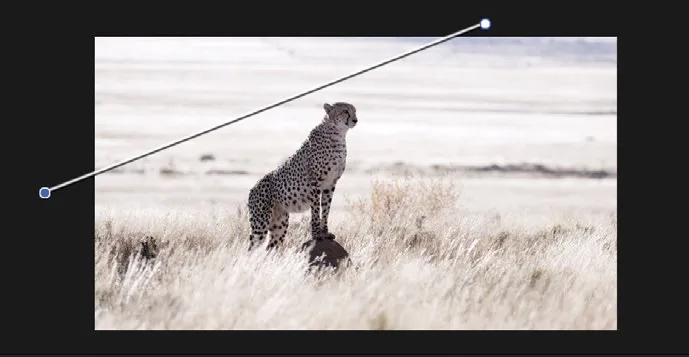
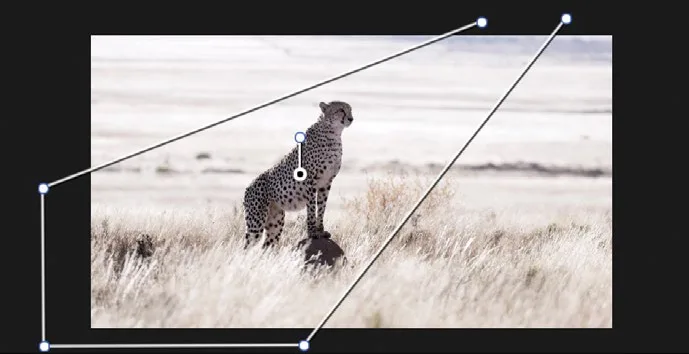
在此阶段,如果需要调整任何点,直接选中并拖动到新位置即可。鼠标中键点击某个点可以删除它;点击形状路径上的任意位置可以添加新点。At this stage, if you want to adjust any of the points, you can simply select and drag them to a new position as needed. Middle mouse clicking a point will delete it. You can click anywhere on the shape path to add a point.
实际光线从来不是那么规则的线性,所以需要为这个窗口添加一些点,让形状更贴合自然光的感觉。Since light is never that linear, you will add a few points to the window you created to give the shape a more customized look that appears more like natural light.
- 在 Curve(曲线)工具选中状态下,在猎豹头部正上方添加一个点。With the Curve tool selected, add a point just above the cheetah’s head.
- 将该点稍微向上拖动,然后拉长 Bézier(贝塞尔)手柄,形成一段平滑的曲线。Drag the point up slightly and then drag to lengthen the Bézier handles to create a smooth curve.
- 在形状另一侧竖边的中间位置再添加一个点,沿对角线向下拖动,直到与第一个点对齐。同样拉长 Bézier 手柄,让形状呈现漂亮的弧线。Add another point halfway down the other vertical side of the shape and drag it down diagonally until it lines up with the first point you added. Again, lengthen the Bézier handles so that the shape has a nice curve to it.
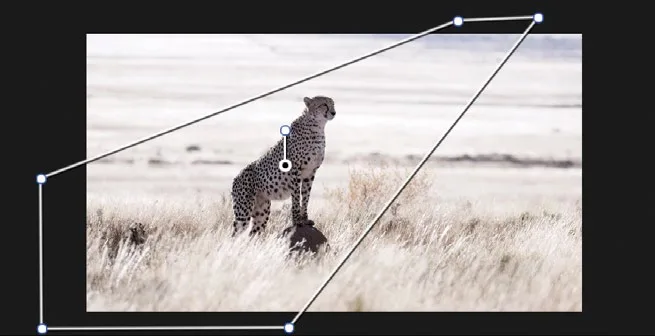
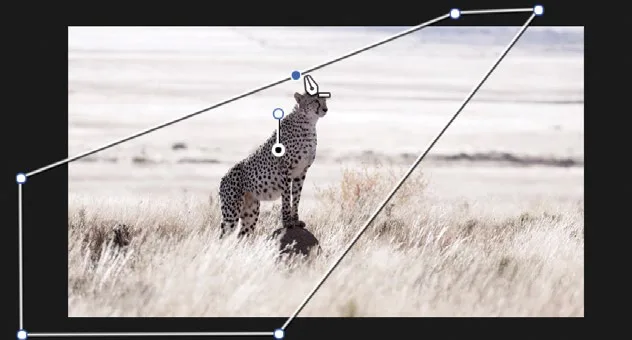
接下来需要调整窗口内部的颜色,营造傍晚时分的氛围。Now you’ll want to change the color inside the window to give it a late afternoon feel.
- 切换到上一课用过的 HDR 色轮。Go to the HDR wheels you used in the previous lesson.
- 在 Offset(偏移)控制中,将 temperature(色温)滑块向橙色方向拖到底。In the Offset control, drag the temperature slider up toward orange until it can go no further.
TIP · 提示用 HDR 色轮为画面添加颜色有一个好处:它不会把颜色施加到最亮的高光和最暗的阴影上,因为这些区域在自然光下本来就不带颜…
用 HDR 色轮为画面添加颜色有一个好处:它不会把颜色施加到最亮的高光和最暗的阴影上,因为这些区域在自然光下本来就不带颜色。Using the HDR wheels to add color to a shot can be beneficial since that will avoid adding color to the brightest highlights and darkest shadows, which should have no color in them naturally.
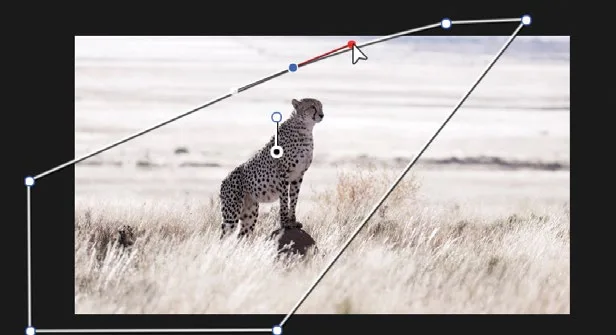
将 HDR 色轮中的 Contrast(对比度)向右拖动至约 1.050。Drag the Contrast control in the HDR wheels to the right until it hits approximately 1.050.
将 Pivot(轴心)一路拖到最右,数值应为 6.000。Drag the Pivot all the way to the right until it can go no further. The value should be 6.000.
现在窗口内部已经变暗,模拟出低角度阳光投下的较长阴影。We’ve now darkened inside our window to give the impression of longer shadows as if there is a low-lying sun.
在 Node Editor 中选中 02 节点,右键点击并选择 Add Node > Add Outside,或按 Option-O(macOS)/ Alt-O(Windows)。With node 02 selected in the Node Editor, right-click it and choose Add Node > Add Outside or press Option-O (macOS) or Alt-O (Windows).
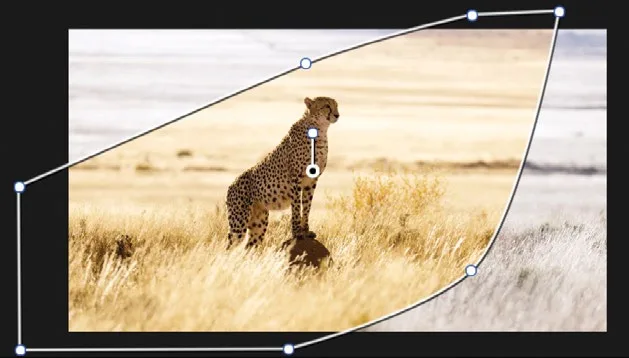
选中新建的 03 节点,将 Global 控制中的 Exposure 向左拖动至约 -4.20,使窗口外的区域看起来足够暗。With the new node 03 selected, drag the Exposure in the Global control to the left until it reads approximately -4.20 or the area outside our created window looks suitably dark.
外部区域现在更暗了,但可能偏冷,需要给阴影加一点暖意。The area now looks darker but perhaps a little too cold. We need to add a bit of warmth to the shadows.
轻微向上拖动 Global 中的 temperature 滑块,消除阴影中的蓝色调。Click and drag the Global temperature slider up slightly so the shadows lose the blue tint.
此时的整体光线已接近预期,但窗口边缘过于硬朗,看起来有点不自然。You now have the lighting for the look you want; however, it looks slightly ridiculous since the window itself is so defined.
重新选中 02 节点。Select node 02 again.
点击屏幕上的 Overlay按钮,关闭检视器中的窗口叠加。Click the onscreen Overlay button to turn off the window in the viewer.
在 Window面板右侧,向右拖动 Soft 1 数值,使窗口边缘柔化到自然为止。On the right side of the Window panel, click and drag the Soft 1 value right until the window softens enough to look natural.
如需对比 02 节点的效果,按 Command-D(macOS)/ Ctrl-D(Windows)禁用该节点的调整,再按一次快捷键重新启用。To compare the change you made on node 02, press Command-D (macOS) or Ctrl-D (Windows) to disable the node’s adjustments, and then press the keyboard shortcut again to enable it.
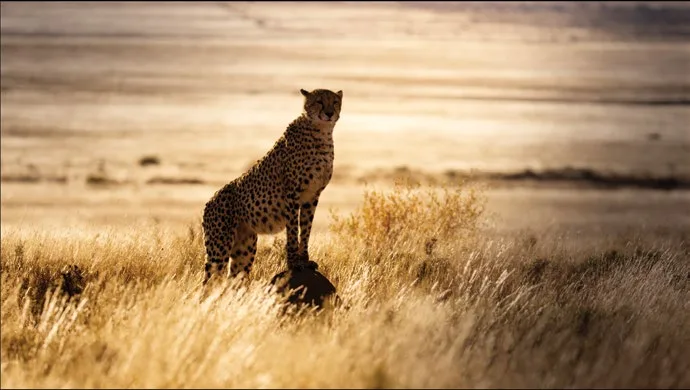
现在画面中观众的视线更集中在主体上,光线也更有层次感,更真实地还原了环境氛围。打开和关闭调色效果时你会发现,开启 Power Window 后视线明显被引向主体的面部。想看得更清楚,可以切换到全屏模式。You now have a shot for which the eyes are drawn more to the subject, and the lighting is much more interesting and reflective of the environment than in the original shot. If you toggle the grade on and off, you will notice your eyes are drawn more toward the subject’s face when the window is on. To see this more clearly, you might want to switch to full-screen mode.
- 按 Command-F(macOS)或 Ctrl-F(Windows)将 Viewer 扩展为全屏。然后按 Command-D(macOS)或 Ctrl-D(Windows)切换窗口节点的开关,对比前后变化。Press Command-F (macOS) or Ctrl-F (Windows) to expand the viewer to full screen. Then press Command-D (macOS) or Ctrl-D (Windows) to toggle the window node on and off to see the changes.
本卡术语Terms in this card
时间线Timeline 分辨率Resolution 对比度Contrast 曲线Curves HDR 色轮HDR Wheels 偏移Offset 白平衡White Balance 窗口Power Window 调色Grade 节点Node