使用 HSL 曲线进行二级调色Making Secondary Adjustments with HSL Curves
14 steps
简介Overview
Power Window 适合调整边界清晰的简单区域。但当区域不够明确、形状过于复杂,或需要针对某一特定颜色进行调整时,HSL(Hue/Saturation/Luminance,即色相/饱和度/亮度)曲线是更合适的工具。Windows come in handy when you have well-defined simple areas that you want to adjust. However, in cases where the area is less defined, the shape is too complicated, or you are trying to select a particular color, HSL (Hue, Saturation, Luminance) curves may be a more appropriate tool.
- 在
Color页面,选中片段 04。On the color page, select clip 04.
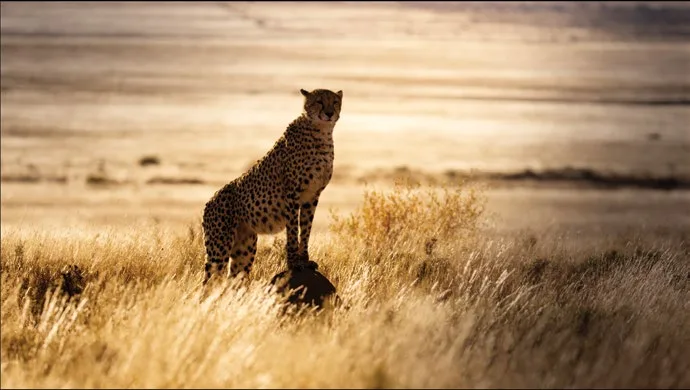
这段素材整体平衡不错,但蓝天显得发灰,沙漠的橙色也偏冷。把蓝色天空调得更鲜艳,再让画面中的橙色更暖一些,可以让镜头更有视觉冲击力。This clip already has a nice balance to it, but the blue sky seems washed out. Also, the orange of the desert could use a little more warmth. Making the blue sky more vivid and the orange in the image more vibrant will make this a more striking shot.
- 右键点击节点 01,将它重命名为 ORANGE SATURATION。Right-click over node 01 and label it ORANGE SATURATION.
进行简单的二级色彩调整时,最便捷的方法就是使用 HSL 曲线,它位于 Custom Curves 调色板中。The easiest technique to use when you have a simple secondary color adjustment is to use the HSL curves. HSL curves are located in the custom curves palette.
- 在工具栏中,点击 Curves 调色板。In the toolbar, click the curves palette.
- 在 Curves 调色板右上角,从左往右数点击第三个按钮,即 Hue vs Sat 曲线。In the upper right corner of the curves palette, click the third button from the left, which is the Hue vs Sat curve.
调色板右上角的这些按钮用来切换不同的曲线类型。每条曲线表示「选取某一属性」与「如何调整该属性」之间的关系。这里使用 Hue vs Sat,可以从画面中选取一种色相,并调整该色相的饱和度,让画面中出现更多所选颜色。The buttons in the top right corner of the window give you access to different curves. Each curve displays the property that will be selected versus how that property will be adjusted. In this case, you will use Hue vs Sat, which will select a hue from the image and adjust that hue’s saturation, pushing more of the selected color into the image.
本例中,沙漠的颜色本身没问题,只是希望让它更饱和。So, in this case, the color of the desert is correct; you just want more of it.
- 在 Viewer 中,点击画面左下角沙漠区域的某个位置。In the viewer, click a point in the desert in the bottom left of the image.
点击 Viewer 后,图中的直线上会新增三个点。中间的点对应你在画面中选取的精确色相,外侧两个点则用来限定参与调整的色相范围。Clicking in the viewer adds three points to the line in the graph. The middle point is the precise hue shade you selected in the viewer. The outer two points limit the range of green hue that will be adjusted.
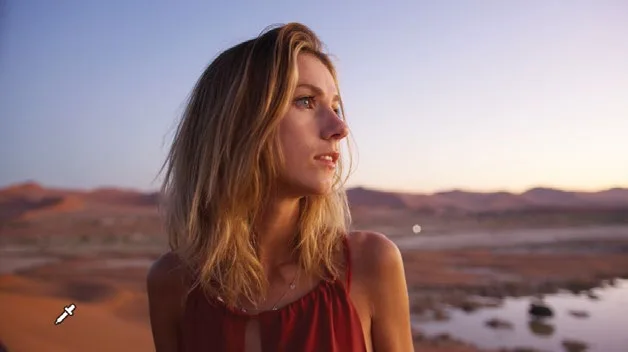
- 拖动曲线上的中间点向上移动,开始让沙漠变成更鲜艳的橙色。Drag the middle point in the graph up to start making the desert a more vivid orange.
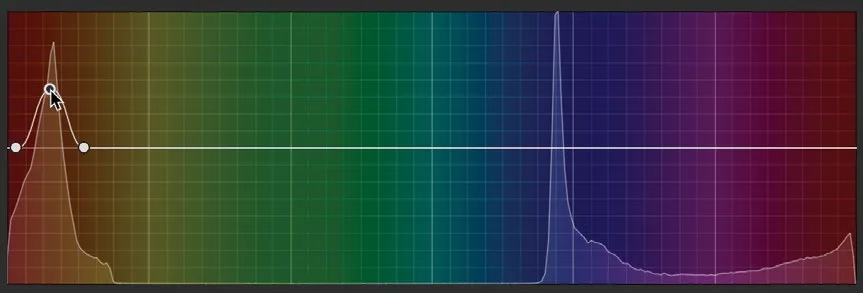
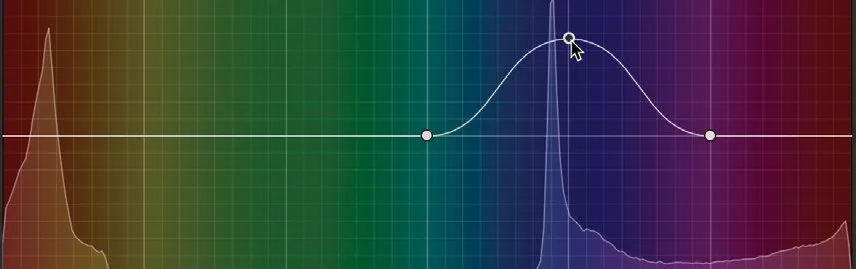
画面里有一片橙色区域,包括人物主体。把橙色色相往暖调偏移后,人物在画面中显得自然而温暖。接下来调天空:蓝色色相需要调整,但你可以在曲线窗口里直接看到直方图上蓝色对应的尖峰位置。There is a range of orange in the image, including on our subject; however, as we are warming the orange hue, it gives the subject a natural warm look in keeping with the image. Now you need to adjust the sky. We know the blue hue must be adjusted, so we could select it; however, you can see in the curves window that there is a natural spike on the histogram showing where the blue sits.
既然能看到蓝色的位置,就直接在蓝色曲线上手动加一个点即可。Since we can see where the blue sits, we can just manually add a point to the blue section of the curve.
- 在 Node Editor 中选中 01 号节点,右键选择
Add Node > Add Outside,或按 Option-O(macOS)/ Alt-O(Windows)。With node 01 selected in the Node Editor, right-click it and choose Add Node > Add Outside or press Option-O (macOS) or Alt-O (Windows). - 在 02 号节点上右键,将其命名为 SKY SATURATION。Right-click over node 02 and label it SKY SATURATION.
- 在同一条 Hue vs Sat 曲线里,从曲线窗口左下角的颜色菜单中选择蓝色通道,曲线上会自动出现三个点。In the same Hue vs Sat curve, select the blue channel from the color menu in the bottom left corner of the curves window. Three points will automatically appear on the curve.
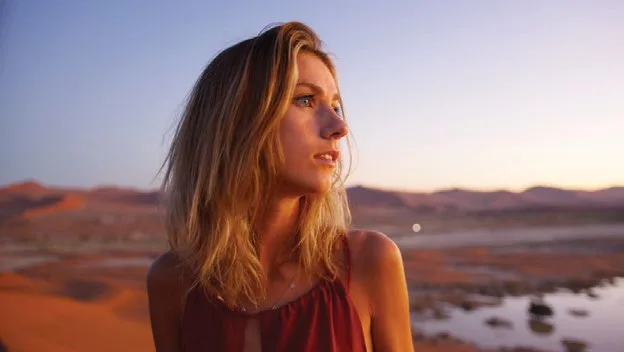
把蓝色那个点直接往上拖,直到天空看起来更蓝。Drag the blue point directly upward until the sky looks bluer.
TIP · 提示NOTE:如果要在曲线上只上下移动某个点、不让它左右偏移,可以按住 Saturation 参数进行点击拖动,这样该点只会…
NOTE:如果要在曲线上只上下移动某个点、不让它左右偏移,可以按住 Saturation 参数进行点击拖动,这样该点只会沿垂直方向移动。If you want to move a point up and down in the curves and make sure its position doesn’t move left or right, you can click and drag on the Saturation parameter, which will only move the point vertically.
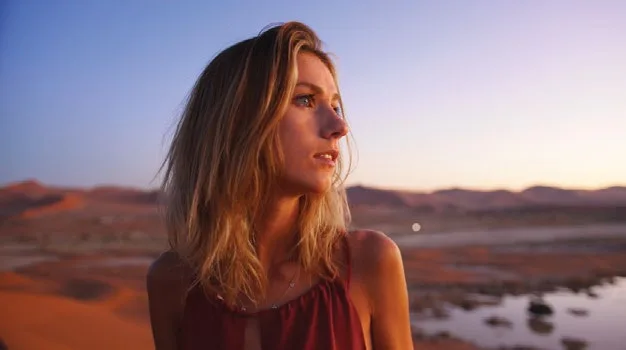
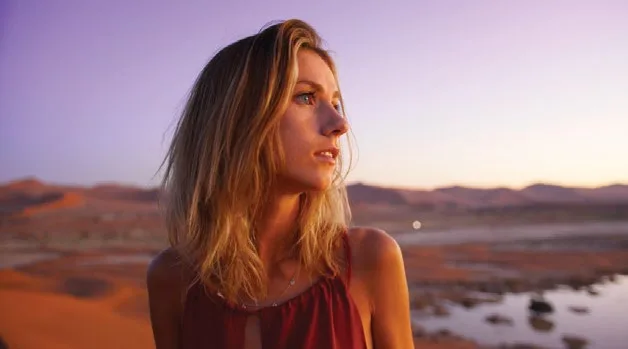
左侧是饱和度调整前的效果,右侧是调整后的效果。Before the saturation shift (left) and after the saturation shift (right).
接下来想让天空再带一点品红,接近上一节课用 HDR wheels 调过的 07 号片段里的天空。Now we want the sky to have a little more magenta in it so it looks a little more like the sky in clip 07 that we adjusted in the previous lesson with the HDR wheels.
- 在 Node Editor 中选中 01 号节点,右键选择
Add Node > Add Serial,或按 Option-S(macOS)/ Alt-S(Windows)。With node 01 selected in the Node Editor, right-click it and choose Add Node > Add Serial or press Option-S (macOS) or Alt-S (Windows). - 将 03 号节点命名为 SKY COLOR。Label node 03 SKY COLOR.
- 进入曲线窗口,选择 Hue vs Hue 曲线。Go into the curves window and select the Hue vs Hue curve.
- 像之前一样,从色彩菜单中选择蓝色通道。Select the blue channel from the color menu as you did before.
- 把曲线中点稍稍往下拖一点,让天空显得更偏洋红一些。Drag the middle point of the curve down ever so slightly so the sky looks a little more magenta.
可以看到,曲线能让你快速对特定区域的 hue、saturation 和 luminance 进行调整。不过正如你已经了解的,DaVinci Resolve 的工具集非常丰富,调整特定区域色彩的方式远不止这一种。As you can see, curves allow you to quickly adjust specific areas of hue, saturation, and luminance. As you have already seen, however, Davinci Resolve has a deep tool set, and there are many different ways of adjusting specific areas of color.
本卡术语Terms in this card
调色页Color page 曲线Curves HDR 色轮HDR Wheels 偏移Offset 饱和度Saturation HSL 曲线HSL Curves 窗口Power Window 调色Grade 节点Node
相关知识卡Related Cards
自定义曲线调色Custom Curves HDR 色轮HDR Wheels HSL 曲线HSL Curves 节点编辑器Node Editor