录制画外音Recording a Voiceover
9 steps
简介Overview
有时你可能需要录制音频加入项目,最常见的情况就是自己录一段画外音。接入麦克风后,就能用 DaVinci Resolve 的 Voiceover 工具直接录制。Occasionally, you may need to record some audio to add to your project. Most often, this might be a simple voiceover that you might record yourself. If you have a microphone attached to your computer, you can record directly into DaVinci Resolve using the new Voiceover tool.
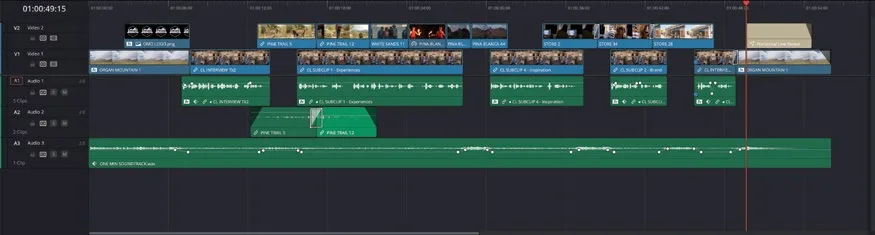
- 在时间线上把播放头放到 Horizontal Line Reveal 标题的起点,稍后就在这里录制一段简短的画外音,配合行动号召(call-to-action)图文使用。In the timeline, place the playhead at the start of the Horizontal Line Reveal title. This is where you’ll record a short voiceover for the call-to-action graphic.
- 点击界面左上角的
Media Pool按钮,重新打开媒体池。Click the Media Pool button at the top left of the interface to reopen the media pool. - 选中 Master bin,然后选择
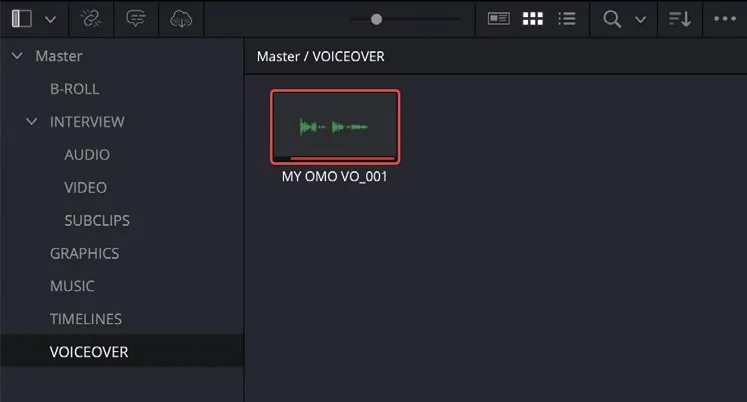
File > New Bin。Select the Master bin and choose File > New Bin. - 把新建的 bin 重命名为 VOICEOVER 并选中它。Rename the new bin VOICEOVER and select it.
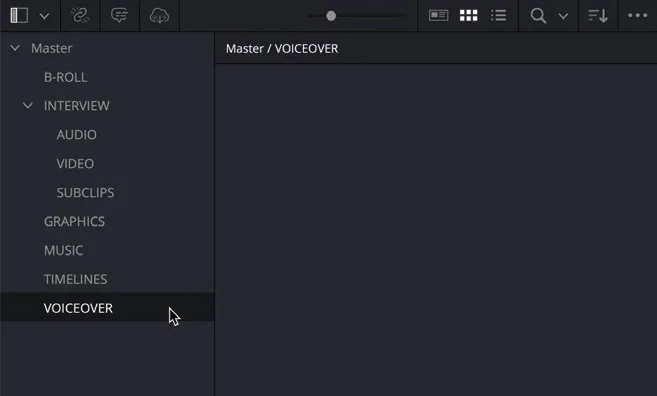
保持这个 bin 选中状态,画外音就会录制到这里。With the bin currently selected, this will be where you’ll record your voiceover in the project.
- 选择
Timeline > Record Voiceover,或点击时间线顶部的Voiceover按钮。Choose Timeline > Record Voiceover or click theVoiceoverbutton at the top of the timeline.
Voiceover 工具会随之打开。The Voiceover tool opens.
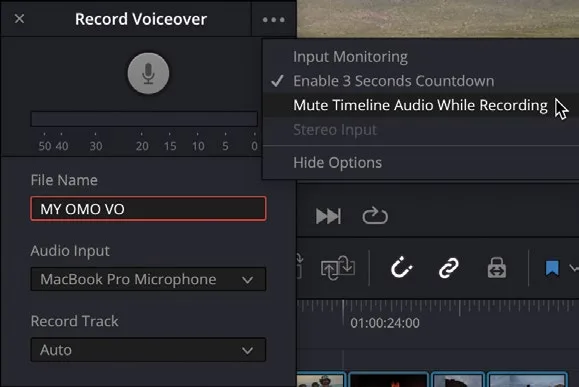
- 在 File Name 字段中选中已有文件名,键入 MY OMO VO。In the File Name field, highlight the existing filename and type MY OMO VO.
如果系统有多个输入设备(例如内置麦克风和外接 USB 麦克风),可在 Audio Input 菜单中选择录制所用的输入。Record Track 菜单用来指定当前时间线上要录制到哪条轨道。保持 Record Track 为 Auto 时,DaVinci Resolve 会根据当前轨道布局自动选择最合适的轨道。If you have multiple inputs on your system (for example, a built-in microphone and a USB microphone), the Audio Input menu allows you to select which input you wish to use for the recording. The Record Track menu allows you to target which track you want to record onto in the current open timeline. Leaving the Record Track set to Auto will allow DaVinci Resolve to choose the most appropriate track based on your current track layout.
- 点击 Options 菜单(…),勾选 Mute Timeline Audio While Recording,避免录制过程中出现回授啸叫。Click the Options menu (…) and choose Mute Timeline Audio While Recording to prevent audio feedback during the recording process.
NOTE · 注意默认录制的音频为单声道。若使用立体声麦克风并希望以立体声录制,可启用 Stereo Input 选项…
默认录制的音频为单声道。若使用立体声麦克风并希望以立体声录制,可启用 Stereo Input 选项。By default, the audio recorded will be a mono recording. If you have a stereo microphone and wish to record in stereo, you can enable the Stereo Input option.
- 准备就绪后,点击
Record按钮,倒计时开始。When you are ready, click theRecordbutton to begin the countdown. - 倒计时结束后,朗读以下台词:"Organ Mountain Outfitters. In store and online now."Once the countdown is complete, record the following line of dialogue: “Organ Mountain Outfitters. In store and online now.”
再次点击 Record按钮或按 Esc(Escape)即可停止录制。Click the Record button again or press Esc (Escape) to stop the recording.
录制内容会作为新片段添加到时间线的一条新轨道上。The recording is added as a new clip to a new track in the timeline.
该片段也会出现在媒体池(media pool)中当前选中的 bin(文件夹)里。You will also find the clip has been added to the selected bin in the media pool.
NOTE · 注意如果想录制更多 take,直接再次点击 Record 按钮即可。新的录制会覆盖时间线中已有的片段,并和之前的 take…
如果想录制更多 take,直接再次点击 Record按钮即可。新的录制会覆盖时间线中已有的片段,并和之前的 take 一起保存到媒体池中选中的 bin 里。If you wish to record additional takes, simply click the Record button again. Additional recordings will overwrite the existing clip in the timeline and be added to the selected bin in the media pool alongside all your previous takes.
接下来可以在时间线上裁剪该片段、标准化电平(normalize levels),必要时为其添加 Noise Reduction 滤镜。You can now trim the clip in the timeline, normalize the levels, and, if necessary, add a Noise Reduction filter to the clip.
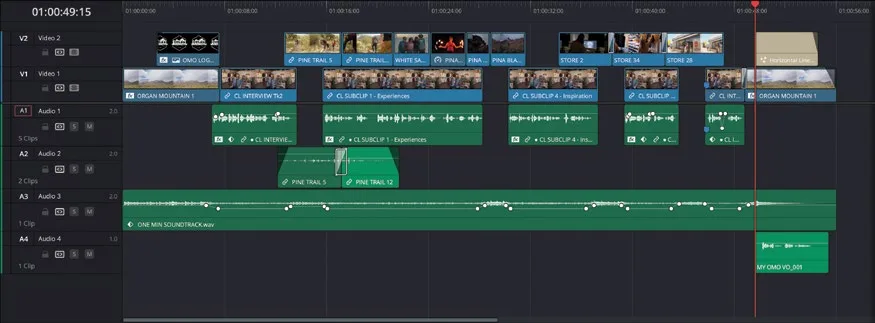
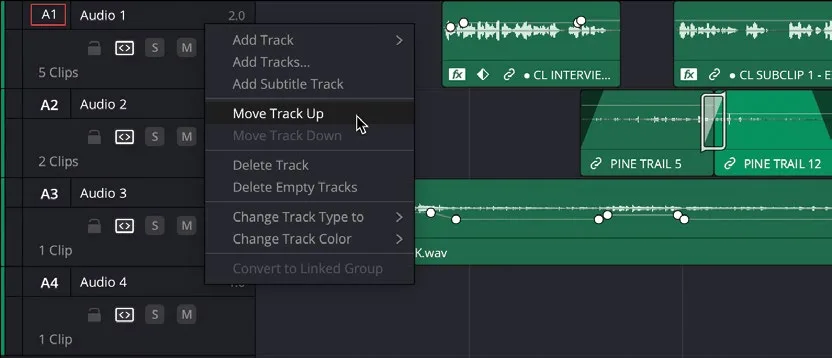
改变时间线轨道顺序:右键点击任意轨道的控制区域,选择 Move Track Up / Down 即可调整音频轨道顺序。Changing Timeline Track Order To change the order of the audio tracks in the timeline, you can right-click any track’s controls and choose Move Track Up/Down.
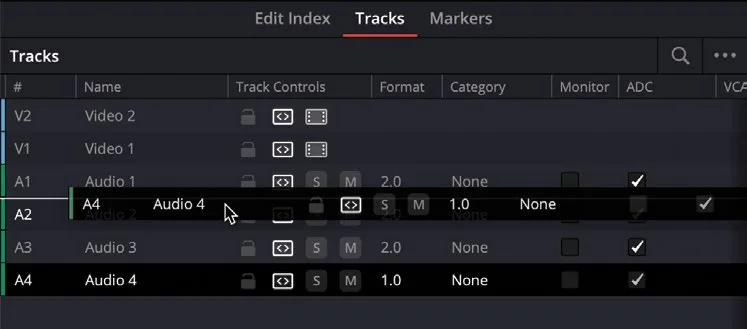
也可以从界面左上角打开 Index,切换到 Tracks 标签,直接拖动轨道来改变它们在时间线中的顺序。Alternatively, open the Index from the top left of the Interface, select the Tracks tab, and drag the tracks to change their order in the timeline.
本卡术语Terms in this card
媒体夹Bin 顶层媒体夹Master Bin 媒体池Media Pool 时间线Timeline 覆盖Overwrite 播放头Playhead 修剪Trim 降噪Noise Reduction 标准化音量Normalize 配音Voiceover