滑动编辑点Slide Edit Point
6 steps
简介Overview
创建分离剪辑:滚动编辑点最常用的场景就是制作分离剪辑(split edit)。分离剪辑指画面和声音在不同时间点切换的剪辑方式,是全球各类型剪辑师都会使用的技巧。Creating Split Edits Rolling edit points is most useful when it comes to creating split edits. Split edit is the term used to refer to an edit for which the sound and picture cut at different times and is a technique employed by editors in all genres around the world.
接下来示范分离剪辑的具体做法:对开场镜头和第一条采访片段之间的视频编辑点做滚动,让 Chris 的介绍先出声,但画面还停在 Organ Mountain 上。To see how split edits are created, you will roll the video edit between the opening shot and the first interview clip so that Chris starts his introduction while the viewer is still looking at Organ Mountain.
NOTE · 注意严格来说,你之前把 PINE TRAIL 5 片段后移一秒、让 Chris 还没说完话时就与 CL INTERVIEW…
严格来说,你之前把 PINE TRAIL 5 片段后移一秒、让 Chris 还没说完话时就与 CL INTERVIEW Tk2 的尾部交叠,已经完成了一个基本的分离剪辑。Technically, you have already made a basic split edit when you moved the PINE TRAIL 5 clip back a second, overlapping the end of CL INTERVIEW Tk2 before Chris finishes speaking.
- 在时间线上,把播放头放在开场延时镜头 ORGAN MOUNTAIN 1 与 CL INTERVIEW Tk2 之间的编辑点上。In the timeline, place the playhead on the edit of the opening timelapse shot of Organ Mountain, ORGAN MOUNTAIN 1 and CL INTERVIEW Tk2.
- 点击
Detail Zoom按钮放大时间线,方便聚焦处理这个编辑点。Click the Detail Zoom button to increase the timeline zoom so it’s easier to concentrate on this edit.
这一步只调整视频编辑点,不动音频。At this point, you will only want to adjust the video edit, not the audio edit.
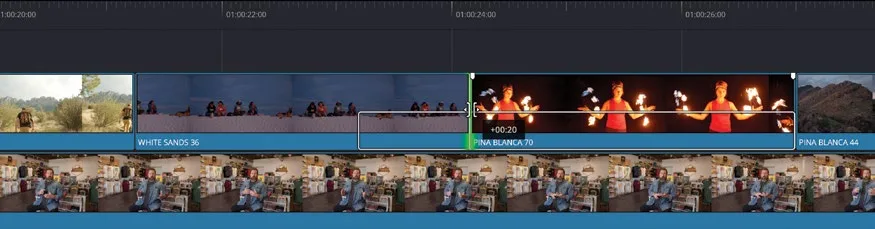
- 在时间线工具栏中点击
Linked Selection按钮。In the timeline toolbar, click theLinked Selectionbutton.
Linked Selection 会同时自动选中链接片段的视频和音频部分,方便对两部分一起修剪。已链接的片段在时间线中会显示片段名前的链状图标。Linked Selection is used for automatically selecting both the video and audio parts of linked timeline clips and makes it easy to quickly trim both parts of a clip together. Linked clips are indicated by the presence of the chain icon before the clip name in the timeline.
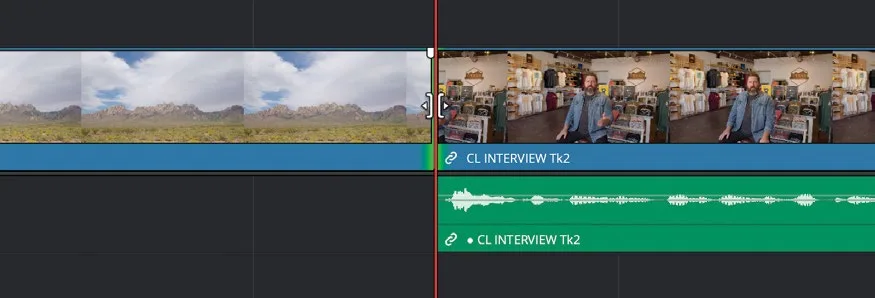
- 点击 ORGAN MOUNTAIN 1 与 CL INTERVIEW Tk2 之间的编辑点,只选中视频编辑点。Click the edit point between the ORGAN MOUNTAIN 1 and CL INTERVIEW Tk2 clips to select just the video edit point.
NOTE · 注意可以把播放头移开,方便看清剪辑点…
可以把播放头移开,方便看清剪辑点。You can move the playhead out of the way so it’s easier to see the edit point.
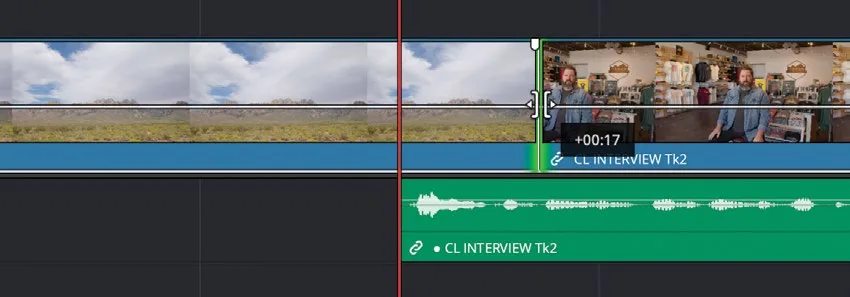
- 把当前选中的剪辑点向前拖动约 15 帧(tooltip 显示 +00:15)。Drag the Selected edit point forward by about 15 frames (+00:15 in the tooltip).
也可以在 timeline viewer 中使用两屏对比显示,同时查看剪辑点前后的画面,这样就能在入点镜头里 Chris 把手放下到膝盖时,对剪辑点做可视化调整。You can also use the two-up display in the timeline viewer to view the outgoing and incoming sides of the edit, so you can adjust the edit visually when Chris has lowered his hand to his knee in the incoming shot.
NOTE · 注意这种分剪(split edit)因为视频与音频剪辑之间形成的隐含形状,通常被称为 J-cut。把视频剪辑点拖到音频剪辑点…
这种分剪(split edit)因为视频与音频剪辑之间形成的隐含形状,通常被称为 J-cut。把视频剪辑点拖到音频剪辑点左边,就形成 L-cut。This type of split edit is often referred to as a J-cut because of the implied shape it creates between the video and audio edits. Rolling the video edit to the left of the audio edit creates an L-cut.
这样 ORGAN MOUNTAIN TIMELAPSE 片段的画面和音频会略微延伸到 CL INTERVIEW Tk2 之上。This results in the ORGAN MOUNTAIN TIMELAPSE clip extending slightly into the CL INTERVIEW Tk2 visuals and over the audio.
- 完成后,回看一下刚才做的修改。Once complete, review the change you’ve just made.
这类分剪非常实用,能让剪辑衔接得更顺畅。原本生硬的声音和画面同时切换,现在变成了更精致的处理:Chris 的声音先于画面切入,过渡不再那么突兀。Split edits like this are very powerful since they help an edit knit together better. Rather than a clumsy sound and picture cut, you now have a sophisticated edit in which Chris’s audio preempts the visual cut, making it feel a little less abrupt.