滑动调整素材Slide Adjust Clips
4 steps
简介Overview
滑动片段(Sliding Clips)Sliding Clips
Trim Edit 模式下的第四种修剪类型是 slide(滑动)编辑。slide 编辑可能是最少用到的一类修剪操作,但了解它可以使用,也仍然很有用。The fourth type of trim that you can make in Trim Edit mode is the slide edit. Slide edits are probably the least used type of trimming operation, but it’s still useful to know that they’re available to you.
和 slip 编辑一样,slide 编辑作用于选中的片段,但会影响它两侧的出点和入点片段。净效果是:该片段在左右两个片段之间整体滑动。Like a slip edit, slide edits are made to selected clips, but they affect the outgoing and incoming clips on either side of the selected clip(s). The net result is that the clip slides between the two clips on either side.
- 把时间线播放头放到 Video 2 上最后三个 cutaway 中间的位置,然后点击
Detail Zoom按钮。Place the timeline playhead over the middle of the final three cutaways on Video 2 and click theDetail Zoombutton. - 如果需要,重新调整时间线的缩放和滚动位置,让你能舒适地看到 Video 2 上的这三个片段。If necessary, readjust the timeline zoom and scroll so you can comfortably see the three clips on Video 2.
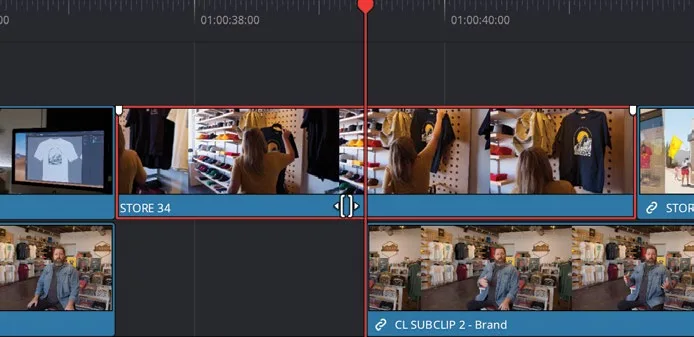
- 确保时间线仍处于 Trim Edit 模式,把鼠标指针移到 Video 2 上最后三个 cutaway 中第二个片段的下半部分——也就是可以看到片段名称 STORE 34 的位置。Ensure that the timeline is still in Trim Edit mode and place your mouse pointer over the lower part of the second of the final three middle cutaways, where you can read the name of the clip, STORE 34.
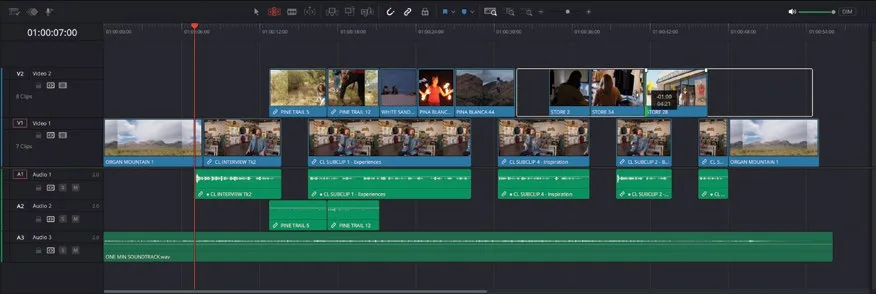
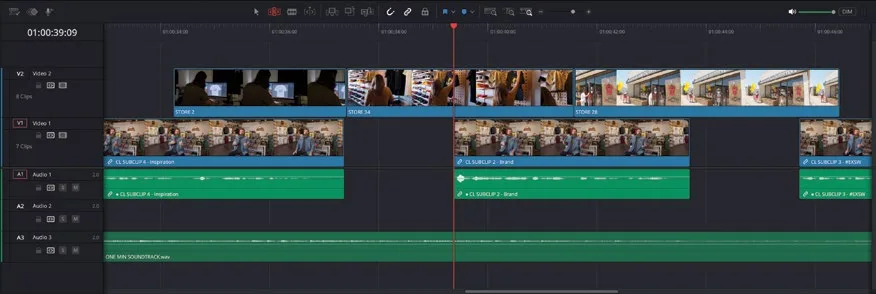
在 Trim Edit 模式下,当鼠标悬停在片段的名称栏上时,光标会变成 slide 图标。When in Trim Edit mode, the cursor changes to the slide icon when placed over a clip’s name bar.
- 在显示 slide 图标时,按住 STORE 34 向右拖动,如有必要按 N 关闭吸附,使片段滑动 1 秒(tooltip 显示 +01:00)。With the slide icon displayed, click and hold STORE 34 and drag right, pressing N to disable snapping if necessary to slide the clip by 1 second (+01:00 in the tooltip).
TIP · 提示在像这样调整片段的过程中按 N 关闭吸附后,松开鼠标按钮时吸附会自动重新启用…
在像这样调整片段的过程中按 N 关闭吸附后,松开鼠标按钮时吸附会自动重新启用。When you disable snapping by pressing N when in the middle of adjusting a clip like this, snapping will be automatically re-enabled when you release the mouse button.
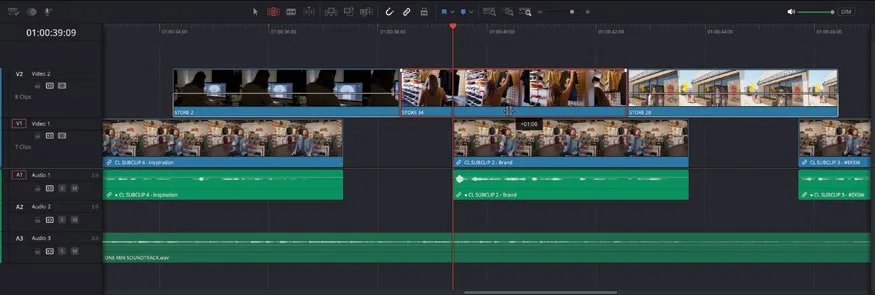
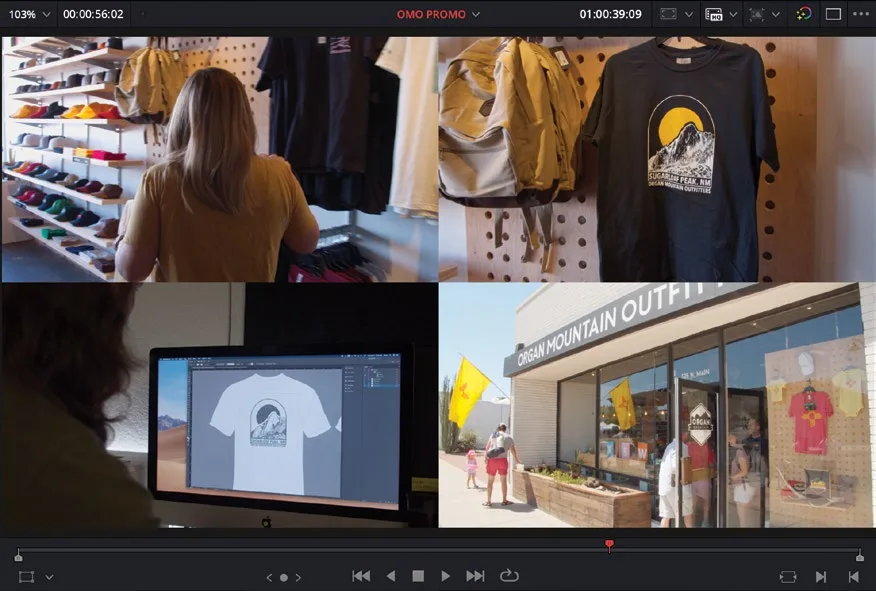
在滑动片段时,你会注意到四联预览窗口中下方的两个画面也在随之调整。When sliding the clip, you’ll notice in the four-up preview viewer that the two lower clips are being adjusted.
这两个画面分别对应时间线中 STORE 34 左右两侧 STORE 2 的出点和 STORE 28 的入点。These are the outgoing and incoming frames of the two clips on either side of STORE 34 in the timeline: STORE 2 and STORE 28, respectively.
到这里,你应该对 DaVinci Resolve 修剪编辑(Trim Edit)模式的实际运作方式有了更深入的理解。Excellent! You should now have a fuller appreciation of how DaVinci Resolve’s Trim Edit mode functions in practice.
NOTE · 注意如果需要先追上进度再进入下一步,可选中 TIMELINES smart bin,然后选择 File > Import>…
如果需要先追上进度再进入下一步,可选中 TIMELINES smart bin,然后选择 File > Import > Timeline,定位到 R20 Beginners Guide / Lesson 02 / Timelines / OMO PROMO CATCHUP 06.drt,点击 Open 即可。If you need to catch up before moving to the next step, select the TIMELINES bin and choose File > Import > Timeline, navigate to R20 Beginners Guide / Lesson 02 / Timelines / OMO PROMO CATCHUP 06.drt and click Open.
本卡术语Terms in this card
媒体夹Bin 切出镜头Cutaway 时间线Timeline 播放头Playhead 滑动Slide Edit 滑移Slip Edit 修剪Trim 窗口Power Window 静帧Still
相关知识卡Related Cards
时间线Timeline 滑动编辑Slide Edit 滑移编辑Slip Edit 修剪编辑模式Trim Edit Mode 修剪Trimming