应用滤镜Apply Vignette
13 steps
简介Overview
添加视频滤镜:转场是为剪辑增添风格化和视觉表现力的一种方式,另一种常用手法是为整段剪辑添加视频滤镜(video filter),以实现统一的风格处理。Adding Video Filters Transitions are one way in which you can add stylization and visual flair to your edits. Another commonly employed technique is to add video filters to stylize an entire clip.
很多 NLE 系统把调色工具归在视频特效和滤镜里,Resolve 虽然也提供了一些,但比同类工具更专业。Resolve 设有专门用于调色和调光的页面,从第 4 课「Primary Color Correction」开始深入讲解。在 Edit page 中,依然可以使用大量创意滤镜。Many NLE systems often have color correction tools included in their video effects and filters and, while Resolve has some of these, they are more specialized than other systems’ tools. As you’re no doubt aware, Resolve has a page entirely dedicated to color correction and grading, which you will explore starting with Lesson 4, “Primary Color Correction.” Nevertheless, there are a number of creative filters you can apply in the edit page.
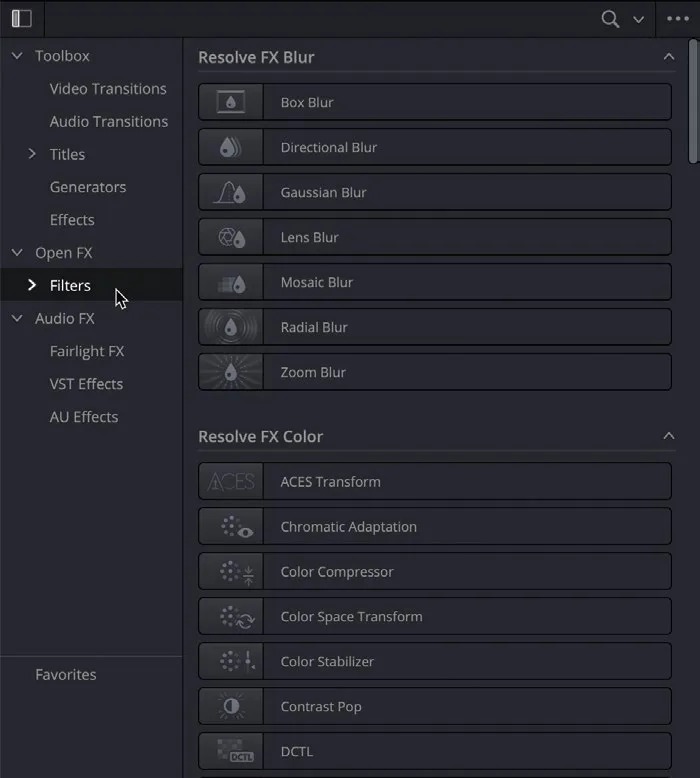
和转场一样,滤镜也通过 Effects Library 访问。As with transitions, filters can be accessed in the Effects Library.
- 在 Effects Library 中选择
Open FX > Filters组。In the Effects Library, select the Open FX > Filters group.
和转场一样,视频滤镜按描述性分类列出(如 Resolve FX Blur、Resolve FX Key、Resolve FX Light 等),将鼠标悬停在滤镜上左右移动即可实时预览。As with transitions, video filters are listed here in descriptive categories (e.g., Resolve FX Blur, Resolve FX Key, Resolve FX Light, etc.) and can be live previewed by hovering your mouse pointer and moving it left and right over a filter.
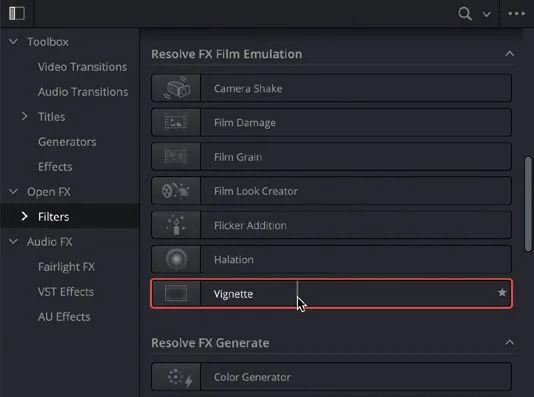
- 在滤镜列表中向下滚动到 Resolve FX Film Emulation 分类,把鼠标放在 Vignette 滤镜上。In the list of Filters, scroll down to the Resolve FX Film Emulation category and place your mouse pointer over the Vignette filter.
NOTE · 注意在摄影和电影拍摄中,vignetting(暗角)指画面边缘区域亮度和/或饱和度的降低。传统上由镜头类型、焦距、光圈以及镜…
在摄影和电影拍摄中,vignetting(暗角)指画面边缘区域亮度和/或饱和度的降低。传统上由镜头类型、焦距、光圈以及镜头遮光罩或滤镜的遮挡造成。现在通常在后期添加,用来把观众的注意力引向画面中心,或营造梦幻、怀旧的氛围。In photography and cinematography, vignetting refers to a reduction in brightness and/or saturation of the image around the edge of the frame. It was traditionally a result caused by the type of lens used, its focal length, and the aperture selected, or obstructions like lens hoods or filters. These days it tends to be added in post-production to draw the viewer’s attention to the center of the frame or to create a dreamy or nostalgic atmosphere.
- 双击 Vignette 滤镜,或直接拖到片段上,以其默认(相当强烈)设置应用。Double-click the Vignette filter or drag it directly to the clip to apply it using its default (and rather intense) settings.
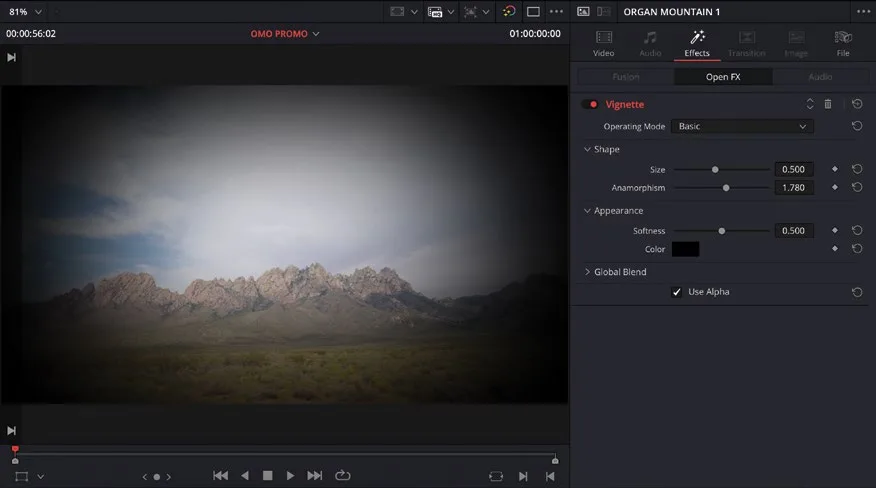
Inspector 的 Effects 标签变为可用,显示应用到当前时间线片段上的效果参数。The Effects tab of the Inspector becomes active and displays the parameters for the effects applied to the selected timeline clip.
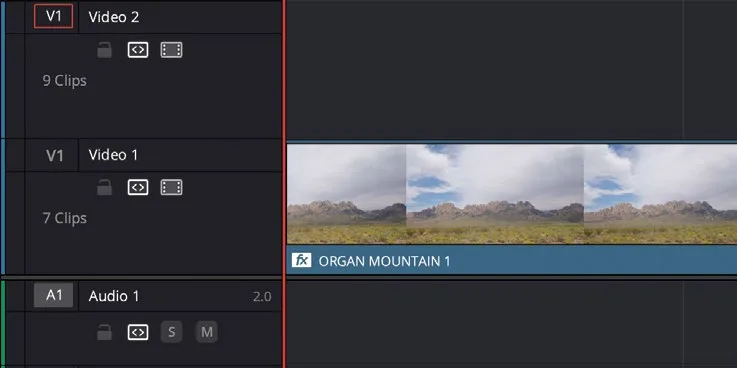
时间线上的片段同时显示 FX 标记,表示已应用滤镜。The clip in the timeline also displays the FX badge to indicate that a filter is applied.
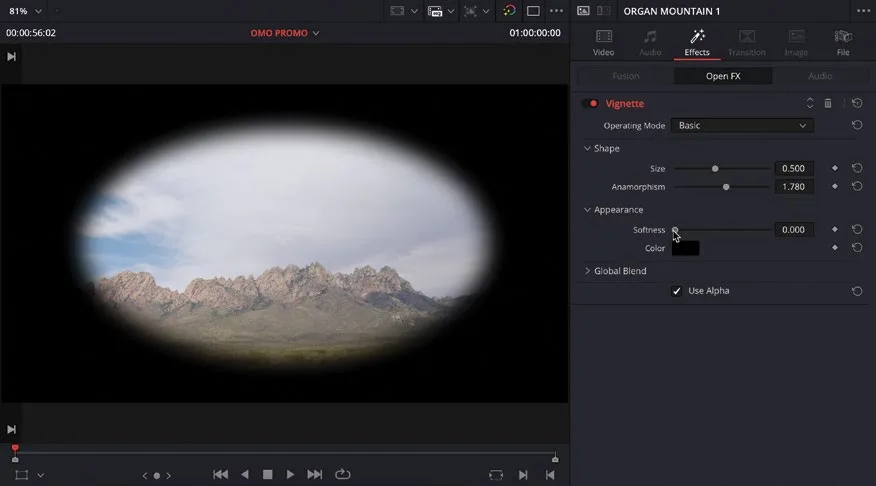
- 在 Inspector 中将 Softness 值改为 0.0,便于看清暗角的形状。In the Inspector, change the Softness value to 0.0 to better see the shape of the vignette being applied.
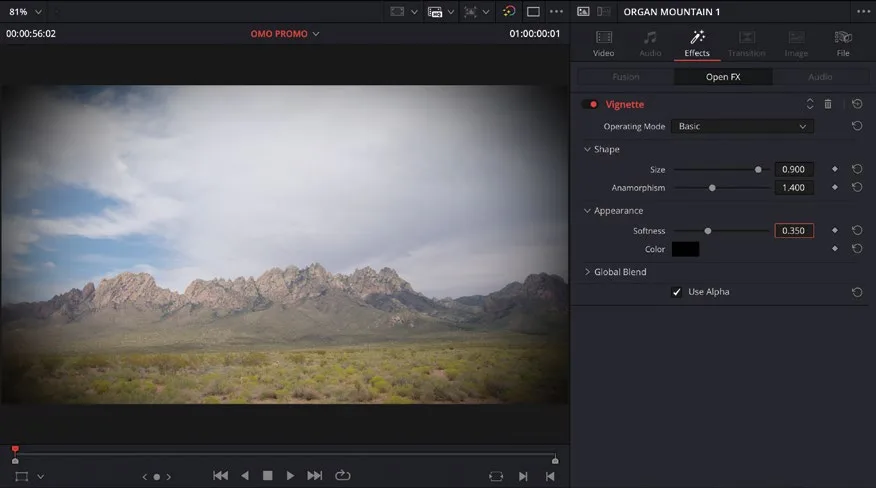
- 将 Size 增加到约 0.9,Anamorphism 减小到约 1.4。Increase the Size to around 0.9 and reduce the Anamorphism to around 1.4.
TIP · 提示注意:Size 滑块最多只能调到 1。要想继续增大数值,可以在数值字段上点击并拖动,或者选中字段后直接输入想要的值…
注意:Size滑块最多只能调到 1。要想继续增大数值,可以在数值字段上点击并拖动,或者选中字段后直接输入想要的值。The Size slider only allows you to adjust the value to a maximum of 1. To increase it further, click and drag in the value field, or select the field and type in the desired value.
- 把 Softness 调回约 0.35,使画面边缘变暗。Increase the Softness back to around 0.35 to darken the sides of the frame.
- 点红色
Enable按钮关闭 Vignette 滤镜,查看剪辑原本的样子;再点一下重新开启 Vignette 滤镜。Click the red Enable button to disable the Vignette filter to see what the clip looked like originally, and then click it again to re-enable the Vignette filter.
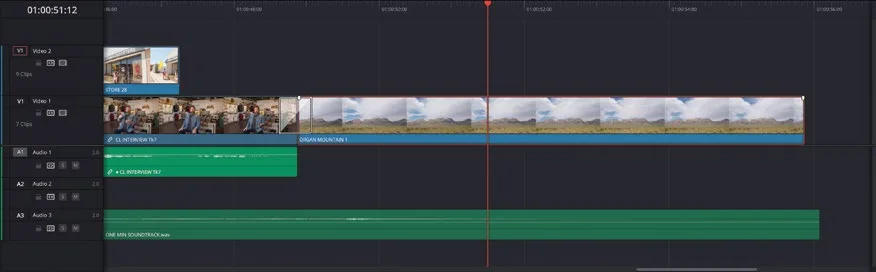
为了保持一致,你需要把同一个滤镜、同样的设置应用到当前剪辑末尾那个同样的镜头上。方法是先复制第一个剪辑,然后把滤镜及其设置单独粘贴到另一个剪辑上。For consistency, you now need to apply this same filter, with the same settings, to the same shot you’re using at the end of the current edit. To do that, you will copy the first clip and then choose to paste just the filter and its settings to the other clip.
- 在时间线中选中第一个剪辑,选择
Edit > Copy,或按 Command-C(macOS)/ Ctrl-C(Windows)。In the timeline, select the first clip and choose Edit > Copy or press Command-C (macOS) or Ctrl-C (Windows). - 点击
Full Extent Zoom按钮,把播放头移到最后一个剪辑上。Click the Full Extent Zoom button and move the playhead over the final clip. - 点击
Detail Zoom按钮,选中播放头下方的剪辑。Click the Detail Zoom button and select the clip under the playhead.
- 选择
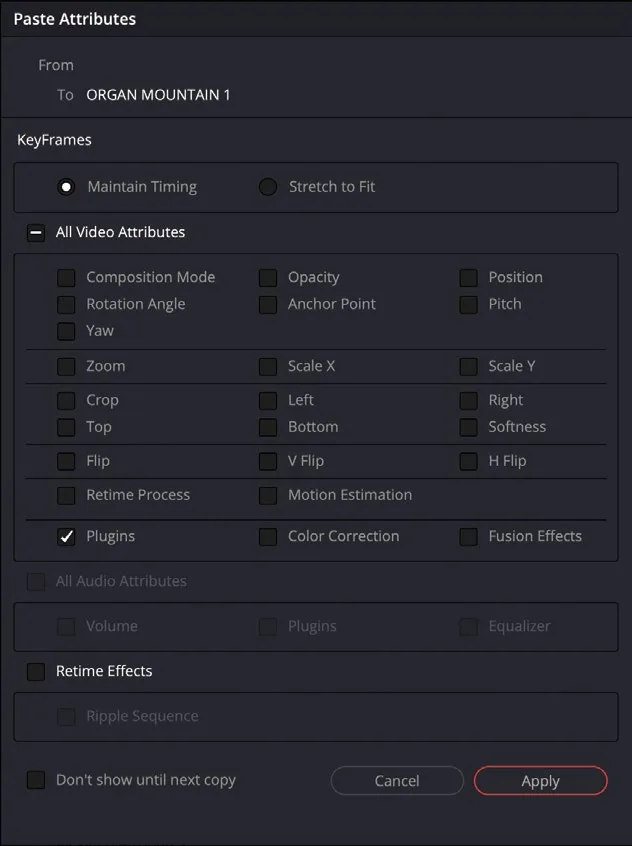
Edit > Paste Attributes,或按 Option-V(macOS)/ Alt-V(Windows),打开Paste Attributes窗口。Choose Edit > Paste Attributes or press Option-V (macOS) or Alt-V (Windows) to open thePaste Attributeswindow.
Paste Attributes窗口可以让你选择要把复制剪辑的哪些属性应用到目标剪辑上。由于最初复制的剪辑已经应用了 Vignette 滤镜,Plugins 选项会被自动勾选。The Paste Attributes window allows you to choose which specific attributes from the copied clip you want to apply to the selected clip(s). Since the clip you initially copied had the Vignette filter applied, the Plugins option has been selected automatically.
- 点击
Apply按钮。Click the Apply button.
Vignette 滤镜会从第一个剪辑粘贴到最后一个剪辑,并保持相同的设置,这样就不用从头重新调效果了。The Vignette filter is pasted from the first clip to the last clip, using the same settings. This means you don’t have to re-create the effect from scratch.
Studio 专属滤镜:如果你用的是免费版 DaVinci Resolve,在实时预览 Open FX 滤镜时,某些滤镜会在画面上出现 DaVinci Resolve Studio 水印。这些滤镜只在 DaVinci Resolve Studio 中才能完整使用。Studio Only Filters If you’re using the free version of DaVinci Resolve to work through this book, as you are live previewing the Open FX filters, you will no doubt come across filters that bring up the DaVinci Resolve Studio watermark in the viewer. These filters are only fully available in DaVinci Resolve Studio.
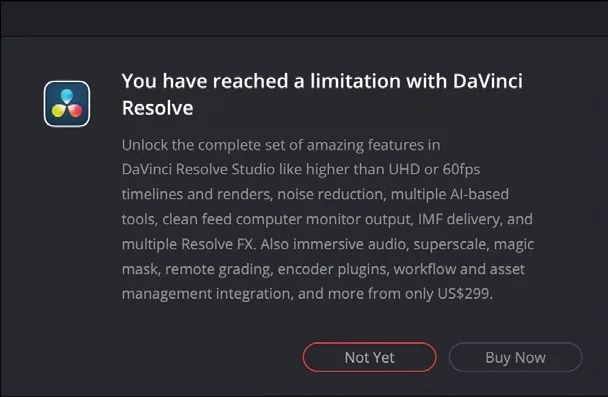
你仍然可以添加这些滤镜,但会弹出一个对话框,提示你已经达到了 DaVinci Resolve 免费版的限制。You can still apply these filters, but you will see a dialog informing you that you have reached the limitation of the free version of DaVinci Resolve.
如果选择不升级就继续操作,那么播放该片段时,时间线查看器中会一直显示水印。不过,用 DaVinci Resolve Studio 打开同一个项目,水印就会消失。If you choose to continue without upgrading, the watermark will continue to display in the timeline viewer when playing that clip. However, if you open the same project in DaVinci Resolve Studio, the watermark will disappear.

本卡术语Terms in this card
时间线Timeline 编辑页Edit page 检查器Inspector 标记Marker 播放头Playhead 转场Transition 晕影Vignette 饱和度Saturation 窗口Power Window 调色Grade Resolve FXResolve FX 静帧Still 模糊Blur