添加 LogoAdding the Logo
18 steps
简介Overview
画面上剪辑已经初具雏形,接下来需要添加一些图形元素——具体来说,是在开场镜头中加入 Organ Mountain Outfitters 的 Logo,并在结尾镜头中加入引导观众访问该品牌网站的行动号召标题。Visually, the edit is coming along nicely, but now it’s time to add some graphic elements— specifically, the Organ Mountain Outfitters logo—to the opening shot and some titles to the closing shot featuring a “call to action” to encourage the viewer to visit the Organ Mountain Outfitters website.
- 在时间线上按 Home 键,将播放头移回开头,定位到 ORGAN MOUNTAIN 1 片段上。In the timeline, press Home to move the playhead to the start, over the ORGAN MOUNTAIN 1 clip.
- 点击 Detail Zoom(细节缩放)按钮。Press the Detail Zoom button.
- 选择 Playback > Go To > Last Frame,或按 '(撇号)键跳到 ORGAN MOUNTAIN 1 片段的最后一帧,然后按 O 键在该帧设置 Out 点。Choose Playback > Go To > Last Frame or press ’ (apostrophe) to jump to the last frame of the ORGAN MOUNTAIN 1 clip, and press O to set an Out point at this frame in the timeline.
- 在 GRAPHICS smart bin 中打开 OMO LOGO.png,在源检视器中显示。From the GRAPHICS bin, open the clip OMO LOGO.png in the source viewer.
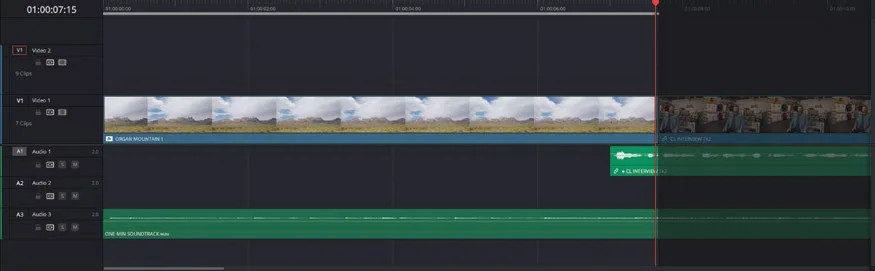
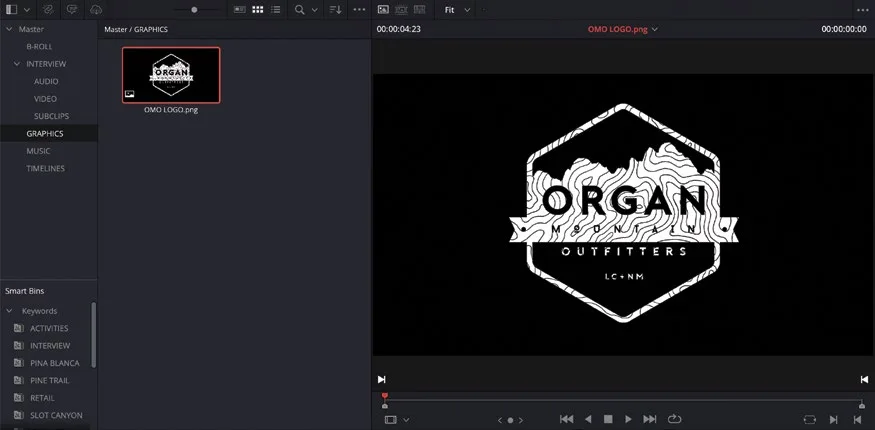
DaVinci Resolve 中的图形片段默认时长为 5 秒,对本例来说已经够用。由于图形文件本质上是同一帧的重复,片段长度可以根据需要自由裁剪。When using graphic files in DaVinci Resolve, the clips have a default “duration” of 5 seconds, which will be enough for this graphic. However, because graphic files are simply the same frame repeated, the clip can be trimmed to be as long or as short as needed.
NOTE · 注意提示:在 User Preferences > Editing类别下,可以调整 Standard still dura…
提示:在 User Preferences > Editing类别下,可以调整 Standard still duration 来更改图形或静帧的默认时长。具体设置方法将在第 7 课中讲解。You can adjust this default “duration” used for graphics or still images in the User Preferences > Editing category under “Standard still duration.” You will learn more about adjusting preferences in Lesson 7.
DaVinci Resolve 支持多种图形文件格式以及视频、音频格式。本例中的图片是 PNG(portable network graphics)格式,并带有 alpha 通道——这是一个独立于 RGB 画面信息之外的通道,用于决定图像的透明区域。这一特性非常实用,因为带有 alpha 通道的图形可以叠加在时间线上的其他片段之上,而不会完全遮挡底层画面,与之前使用的 cutaway 手法类似。DaVinci Resolve can work with various graphic file formats as well as video and audio files. This image is a PNG (portable network graphics) file that contains an alpha channel, a separate channel from the RGB picture information that determines which portions of the image are transparent. This is useful since it can be composited on top of other clips in the timeline without completely blocking the other images, as the cutaways have been doing.
为了确认 alpha 通道是否被正确识别,可以在检视器中切换为棋盘格背景来查看。To verify that this channel is being used correctly, you can view a checkerboard background in the viewers.
- 点击 Timeline View Options 菜单,选择
Viewer Background > Checkerboard。Click the Timeline View Options menu and choose Viewer Background > Checkerboard.
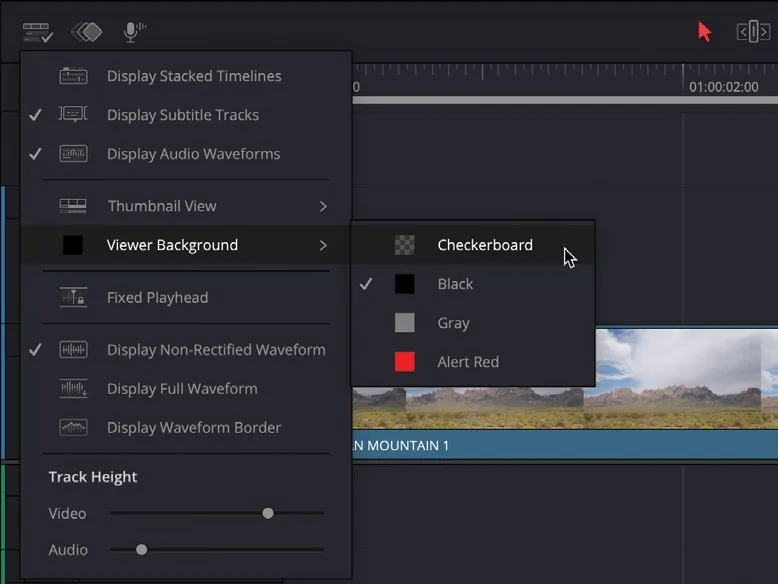
原本的黑色检视器背景变为棋盘格背景,这表示该图像带有 alpha 通道。图片中这些区域在放入时间线后仍会保持透明,使其能够叠加在底层片段之上。The black viewer background is replaced with a checkerboard background, indicating an alpha channel. These parts of the image will remain transparent when the clip is edited into the timeline, allowing the image to be composited over the background clip.
- 再次点击 Timeline View Options 菜单,选择
Viewer Background > Black,将背景恢复为黑色。Click the Timeline View Options menu again and choose Viewer Background > Black.
现在把图形素材反向插入时间线。You will now backtime the graphic into the timeline.
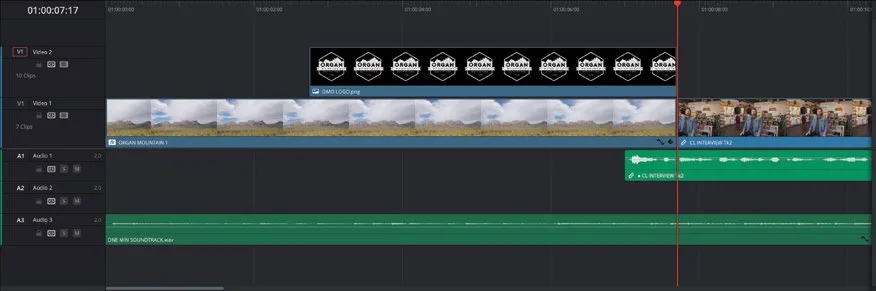
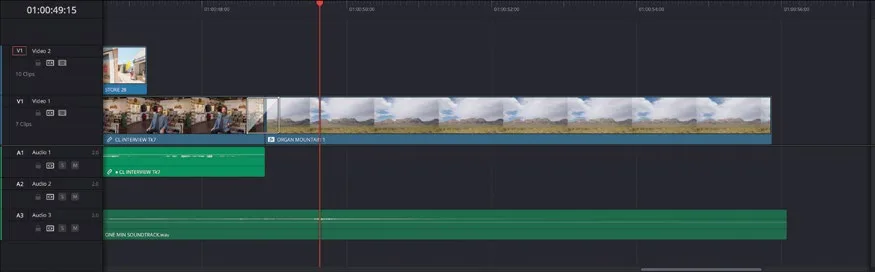
- 把源查看器里的片段拖到时间线查看器,从编辑工具栏里选 Place on Top,或按 F12,把片段编到 Video 2 轨道上。Drag the clip in the source viewer to the timeline viewer and choose Place on Top from the editing overlays, or press F12, to edit the clip to the Video 2 track.
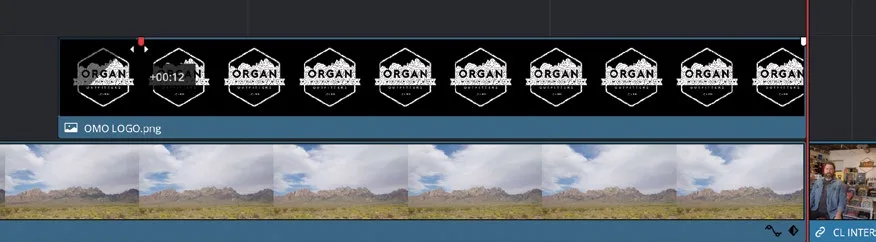
- 在时间线里把片段头部的淡入手柄向右拖,给片段加 12 帧的淡入(提示框显示 +00:12)。In the timeline, drag the fade handle at the start of the clip to the right to apply a 12-frame fade in (+00:12 in the tooltip).
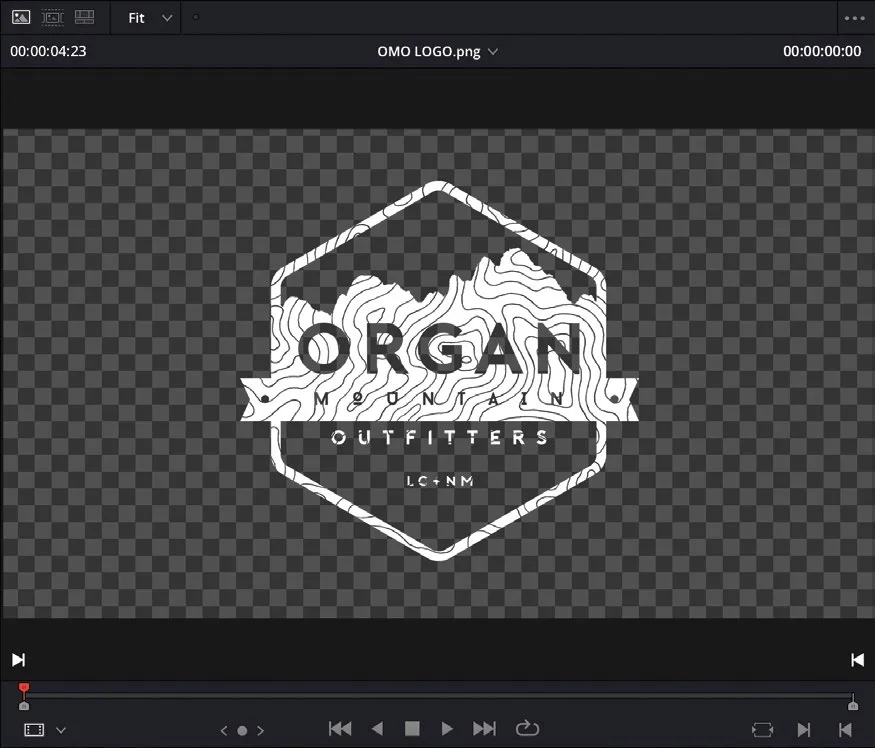
时间线里每个视频片段都有淡入淡出手柄,可以代替交叉叠化(cross-dissolve)转场,快速把片段淡入到下方任何视频轨道上的片段之上。The fade handles appear on every video clip in the timeline and can be used in lieu of a cross-dissolve transition to quickly fade the clip over any clips in video tracks below.
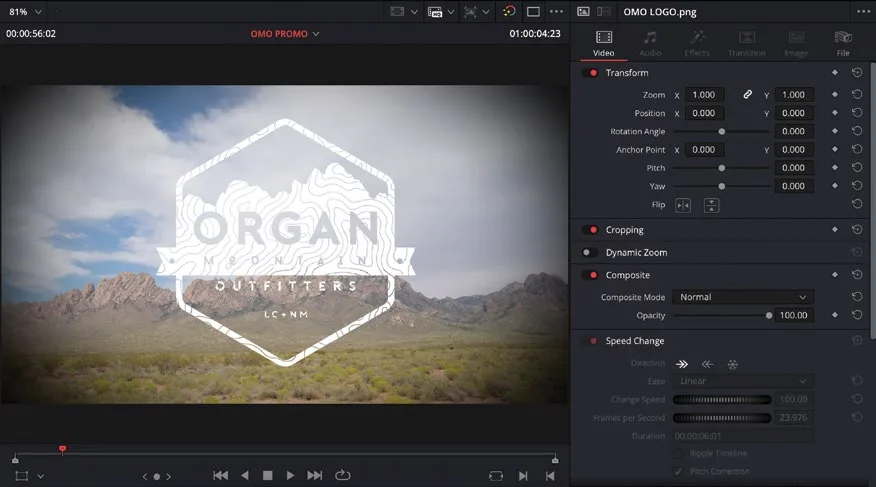
- 把时间线播放头移到 OMO LOGO.png 片段上,在时间线查看器里就能看到叠加在背景上的图形。Place the timeline playhead over the OMO LOGO.png clip to see the graphic over the background in the timeline viewer.
此时白色图形在亮色背景上有点不够突出,虽然背景的延时镜头已经加了暗角(vignette)。At the moment, the white graphic is getting a little lost against the bright background, despite the vignette applied to the timelapse shot in the background.
- 在 Effects Library 里选
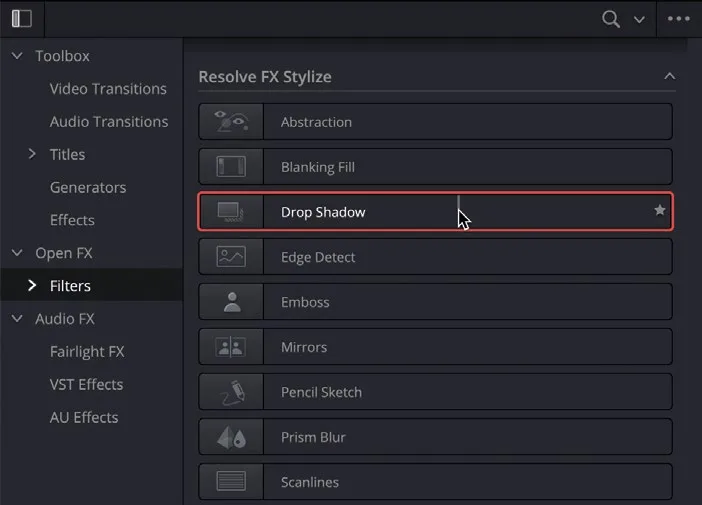
Open FX > Filters,往下翻到 Resolve FX Stylize 分类,找到 Drop Shadow 滤镜。In the Effects Library, select Open FX > Filters, scroll down to the Resolve FX Stylize group, and locate the Drop Shadow filter. - 双击 Drop Shadow 应用效果,或者直接把滤镜拖到时间线里的 OMO LOGO.png 片段上。Double-click the Drop Shadow filter to apply the effect or drag the filter directly to the OMO LOGO.png clip in the timeline.
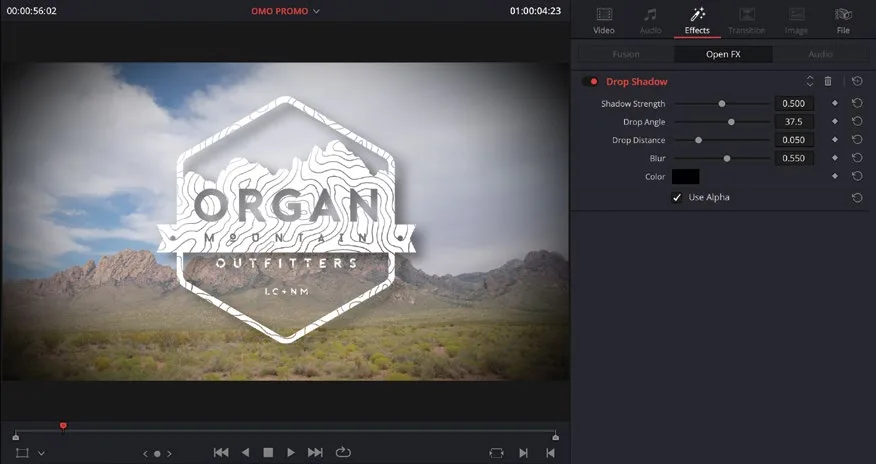
投影(drop shadow)能让 Logo 从 V1 背景片段上凸显出来。要调整这个片段的参数,需要使用 Inspector 里的控件。The drop shadow helps the logo stand out from the background clip on V1. To adjust the settings for this clip, you will need to use the controls available in the Inspector.
NOTE · 注意提示:DaVinci Resolve 会自动“选中”时间线里最高轨道的片段,你不用手动点击。手动点击选中片段会覆盖这个默…
提示:DaVinci Resolve 会自动“选中”时间线里最高轨道的片段,你不用手动点击。手动点击选中片段会覆盖这个默认行为,让你自行决定效果应用到哪个片段。另外,你也可以把滤镜直接拖到时间线里任意一个或多个已选中的片段上。DaVinci Resolve automatically “selects” the clip on the highest track in the timeline without the need for you to physically click and select it. Clicking and selecting a clip will override this behavior, allowing you to manually choose which clip the effect will be applied to. Alternatively, you can drag the filter directly to any clip or selected clips in the timeline.
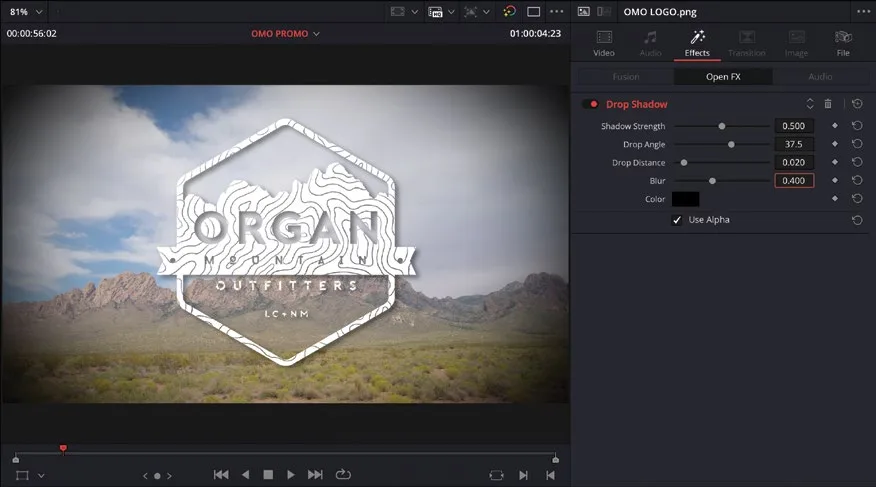
- 在 Inspector 里把 Drop Distance 调到约 0.020,Blur 调到约 0.40,让阴影更清晰。In the Inspector, reduce the Drop Distance to about 0.020 and the Blur to about 0.40 to create a more defined shadow.
投影调好之后,还有最后一个有用的效果可以加到这个图形上,让画面更有视觉吸引力。With the drop shadow applied and finessed, there’s one more useful effect you can apply to this graphic to provide some much needed visual interest.
- 在 Inspector 中点击
Video选项卡。In the Inspector, click the Video tab.
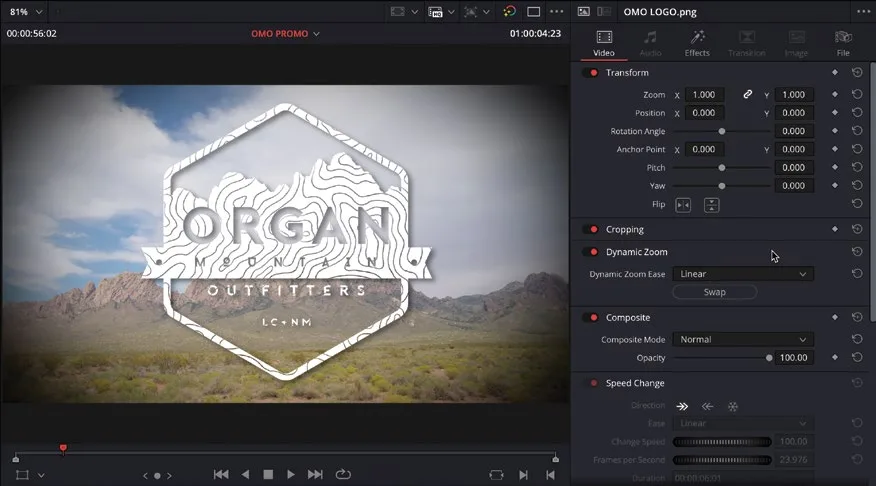
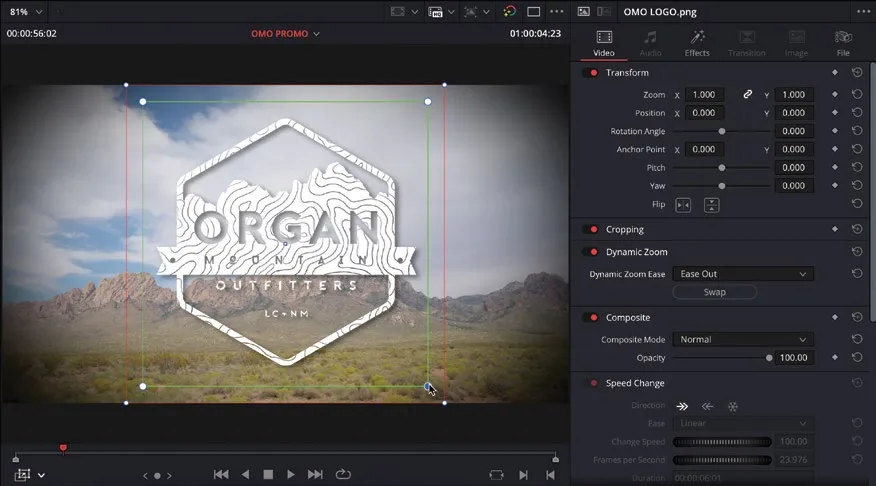
- 启用 Dynamic Zoom 并点击展开控制选项。Enable the Dynamic Zoom and click to reveal the controls.
Dynamic Zoom 会对当前片段施加自动运动,使其产生推入画面的效果。Dynamic Zoom applies an automatic movement to the current clip so it appears to move into the frame.
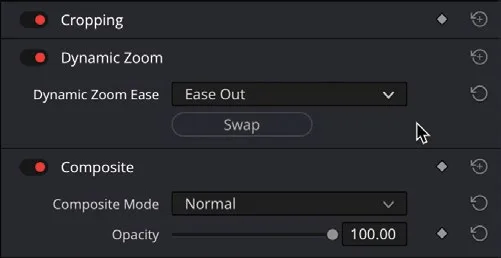
- 将 Dynamic Zoom Ease 下拉菜单改为 Ease Out。Change the Dynamic Zoom Ease dropdown menu to Ease Out.
在时间线上播放 OMO LOGO.png 片段以查看 Dynamic Zoom 效果:静态图像先淡入再推近,临近片段末尾时轻柔地停下。Play the OMO LOGO.png clip in the timeline to review the dynamic zoom results, and notice how the still image fades and zooms, coming to a gentle rest toward the end of the clip.
你也可以进一步微调 Dynamic Zoom 的起始和结束画面构图。You can also choose to refine the start and end framing for the Dynamic Zoom.
- 在时间线查看器的 Transform Mode 菜单中选取 Dynamic Zoom 控制项,或选择
View > Viewer Overlay > Dynamic Zoom,显示出 Dynamic Zoom 的屏幕控件。In the timeline viewer’s Transform Mode menu, select the Dynamic Zoom controls or choose View > Viewer Overlay > Dynamic Zoom to reveal the onscreen controls for the Dynamic Zoom. - 拖动绿色框的角点向图像边缘外侧略微外扩,调整 Dynamic Zoom 的起始构图。Adjust the starting framing for the dynamic zoom by dragging the corners of the green box out slightly, away from the edges of the graphic.
- 当起始与结束构图都满意后,选择
View > Viewer Overlay > Toggle On/Off,或点击时间线查看器的Transform Mode按钮,关闭查看器叠加层。Once you’re happy with the starting and ending framing of the Dynamic Zoom, choose View > Viewer Overlay > Toggle On/Off or click the timeline viewer’sTransform Modebutton to turn off the viewer overlays.
借助 Inspector 自带的特效与控制,把一张简单的静态图片做成了吸睛的宣传片开场。By utilizing some of the built-in effects and controls in the Inspector, you have taken a simple still image and used it to create an eye-catching opening for the promo.
NOTE · 注意你也可以使用关键帧(keyframes)为该图形制作动画。关键帧能提供比 Dynamic Zoom 更精细的动画控制,你…
你也可以使用关键帧(keyframes)为该图形制作动画。关键帧能提供比 Dynamic Zoom 更精细的动画控制,你将在第 10 课“交付与媒体管理”中学习如何添加与调整关键帧。You can also animate this graphic using keyframes. You might prefer to use keyframes since they offer a greater level of control over the animation than the Dynamic Zoom option. You will learn more about adding and adjusting keyframes in Lesson 10, “Delivery and Media Management.”
本卡术语Terms in this card
媒体夹Bin 切出镜头Cutaway 置顶插入Place on Top 源检视器Source Viewer 时间线Timeline 媒体管理Media Management 检查器Inspector 关键帧Keyframe 覆盖Overwrite 播放头Playhead 转场Transition 晕影Vignette 淡入淡出Fade Resolve FXResolve FX 静帧Still 模糊Blur 变换Transform