添加音乐Adding the Music
7 steps
简介Overview
音乐是许多剪辑中至关重要的元素。口头语言(对白、采访或旁白)通常传达事实信息,而音乐则更多传递我们对场景或主题应有的感受。音乐选错,整条片子的情绪传达就可能完全跑偏。Music is such an important part of many edits. Whereas the spoken word (scripted dialogue, interviews, or narration) will often convey what we need to know about a subject, music will most often convey what we should feel about a scene or subject. Get the music wrong and the whole edit might communicate the wrong impression completely!
好在这次的配乐已经为你精心挑选好了,你只需要把它添加到当前时间线即可。Thankfully, in this case the music has been carefully chosen for you. All you have to do is add it to the current timeline.
- 确认选中了 timeline viewer(时间线检视器),然后按 Home 键把播放头回到时间线起始位置。Ensure that the timeline viewer is selected and press Home to return the playhead to the start of the timeline.
- 在时间线中,点击 A1 目标控制按钮,确保可以往时间线里编辑音频。In the timeline, click the A1 destination control to ensure you can edit audio into the timeline.
- 在 Media Pool(媒体池)的 bin 列表中选中 MUSIC bin,然后在 source viewer(源检视器)中打开 ONE MIN SOUNDTRACK.wav 片段。Select the MUSIC bin from the bin list in the media pool and open the ONE MIN SOUNDTRACK.wav clip in the source viewer.
NOTE · 注意查看纯音频片段时,source viewer 会自动切换到 Audio Track(音频轨道)模式…
查看纯音频片段时,source viewer 会自动切换到 Audio Track(音频轨道)模式。When viewing audio-only clips such as this, the source viewer automatically switches to Audio Track mode.
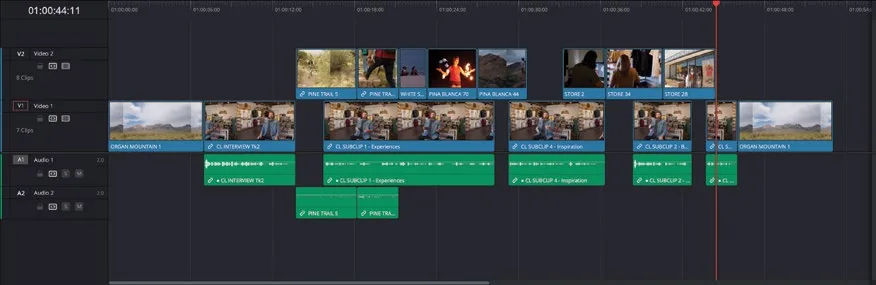
音频片段也可以像之前那样打 In 点和 Out 点,但这次没必要——这段音乐时长刚好不到一分钟,正好是整条片子所需的总长度。You can add In and Out points to audio clips just as you’ve done throughout this lesson. In this case, though, it’s unnecessary because the music is already just under a minute in length, which is the desired duration for the whole edit.
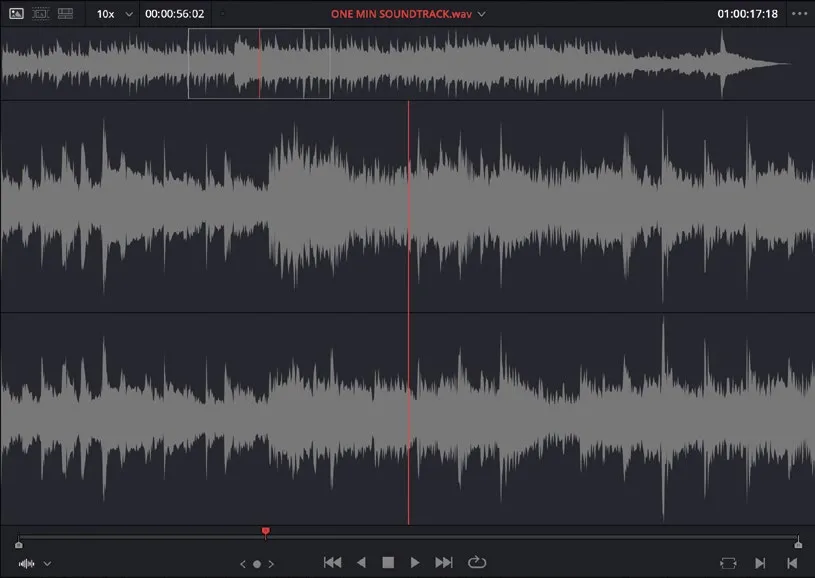
- 按 F12 执行 Place on Top(置顶插入),把音乐片段添加到一条新的音频轨道上。Press F12 to make a Place on Top edit to add the music clip to a new audio track.
接下来还需要把这段音频的音量衰减(降低)一些,让它和片子里其他音频的响度更接近。此时不需要调到理想值,只要低到不会盖过时间线里其他声音就行,下一节课还会继续精修。The only thing left to do now is attenuate (reduce) the volume of the audio clip so that it more closely matches the rest of the audio in the timeline. It doesn’t have to be the ideal level at this time—just low enough that it doesn’t overpower the other elements in the timeline as you continue to refine it in the next lesson.
- 把鼠标移到时间线里该音频片段的音量叠层上——就是横穿整段片段的那条细白线。Place your mouse over the volume overlay for the audio clip in the timeline, which is represented by a thin white line running through the length of the clip.
- 按住音量叠层向下拖动,降低片段音量,直到 tooltip 显示大约 -18 dB。Click and hold the volume overlay and drag down to reduce the volume of the clip until the tooltip reads about -18 dB.
TIP · 提示调整音量叠层时按住 Shift 键可以获得更精细的控制…
调整音量叠层时按住 Shift 键可以获得更精细的控制。Hold Shift while adjusting the volume overlay for more precise control.
- 按 Home 键把播放头回到时间线起点,然后播放并配合音乐检查粗剪效果。Press Home to return the playhead to the start of the timeline and play back to review the rough cut with the music.
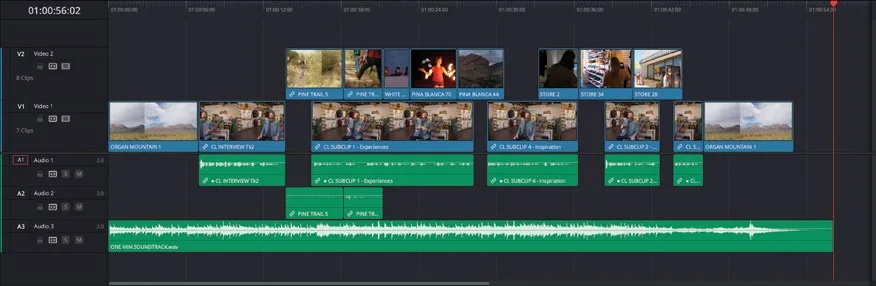
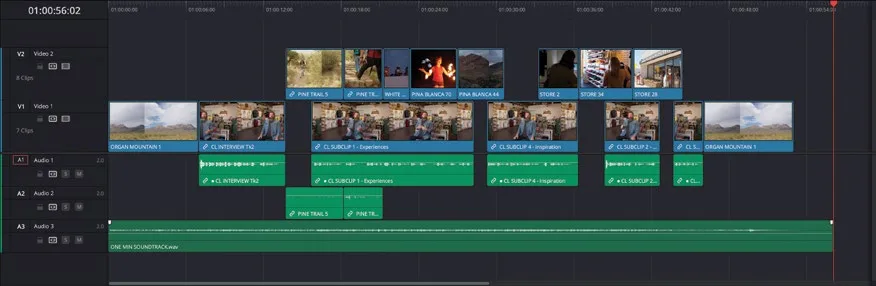
恭喜!你已完成本节课的学习,并成功粗剪了 Organ Mountain Outfitters 的宣传片。本节的核心目标是快速运用 Edit page 的剪辑工具搭出粗剪版本。但在交付给 Organ Mountain Outfitters 客户之前,这条时间线还有大量细节需要打磨,这将是下节课的重点。Congratulations! You have completed this first lesson and successfully assembled a rough cut of the Organ Mountain Outfitters promo. Remember, this lesson was about being able to quickly put together a rough cut using the editing tools available in the edit page. However, there is still much, much more to do to refine this timeline before it’s ready to show to the client at Organ Mountain Outfitters. This will be the focus of the next lesson.
本卡术语Terms in this card
媒体夹Bin 媒体池Media Pool 置顶插入Place on Top 源检视器Source Viewer 时间线Timeline 响度Loudness 编辑页Edit page 播放头Playhead 静帧Still