同步音画素材Syncing the Dailies
8 steps
简介Overview
音频配置完成后,就可以将视频与音频片段同步到一起,并挑选最合适的通道进行后续工作。Now that you have correctly configured the audio, you can sync the video and audio clips together and choose the most appropriate channels to work with.
- 右键点击所选的 AUDIO 和 VIDEO 媒体夹,选择 Auto Sync Audio。Right-click the selected AUDIO and VIDEO bins and choose Auto Sync Audio.
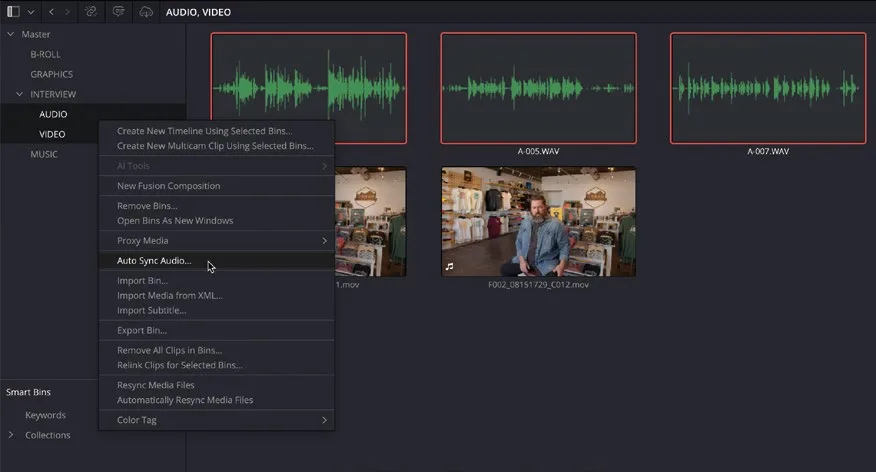
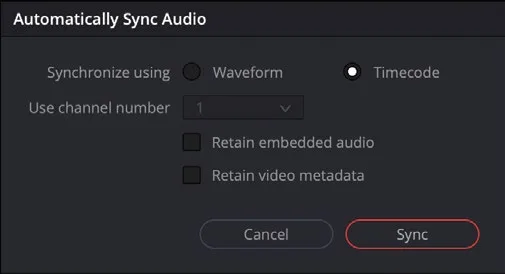
弹出 Automatically Sync Audio窗口,其中包含多种音画同步方式供你选择。The Automatically Sync Audio window opens, displaying several options for how you want the audio synced with your video clips.
优先使用匹配 timecode 同步,速度更快、结果更可靠。如果片段的 timecode 无法精确匹配,可以改用波形比对,这也是大多数需要同步的片段都会同时录制一段 scratch 或参考音的原因。Synchronizing audio using matching timecode is always preferable because it’s quicker and much more reliable. However, if your clips don’t have exactly matching timecodes, using the waveforms is the next best option. This is why most clips that need synchronizing like this will also contain some kind of “scratch” or reference audio to make this process easier.
- 在 "Synchronize using" 选项中选择 Waveform,并勾选 "Retain embedded audio" 和 "Retain video metadata"。Select Waveform for the “Synchronize using” option and select the “Retain embedded audio” and the “Retain video metadata” options.
NOTE · 注意选择用波形同步时,"Use channel number" 选项可以指定用于同步的音频通道。如果某条通道的音频质量更好…
选择用波形同步时,"Use channel number" 选项可以指定用于同步的音频通道。如果某条通道的音频质量更好,这个选项就非常实用。When choosing to sync using waveforms, the “Use channel number” option can be used to specify which audio channel you want to use for syncing. This is useful if one audio channel has better audio than another.
勾选 Retain embedded audio 意味着 Resolve 会保留片段上所有激活的音频通道,便于核对同步是否正确。即便不勾选,原有的内嵌音频也不会被删除,可以在 Clip Attributes 中找到(见下文)。后续步骤还要用到视频片段的 metadata,因此勾选 Retain video metadata 可以避免音频文件的 metadata 覆盖视频片段的 metadata。Retaining the embedded audio means that Resolve will keep all the audio channels active on the clip. This can be useful for verifying that the audio is in sync with the original. However, if you don’t choose this option, the original embedded audio is not deleted and is accessible through Clip Attributes (see below). You will use the metadata of the video clip in later steps, so retaining the video metadata means that the metadata of the audio files won’t override those of the video clips.
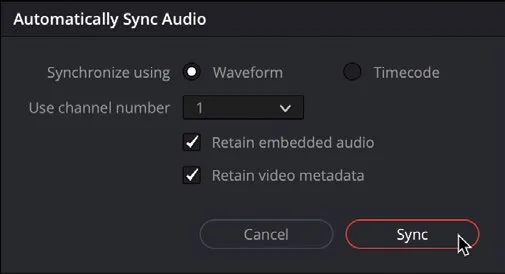
- 点击 Sync,Resolve 开始分析音频。Click Sync, and Resolve analyzes the audio.
表面上看似乎什么都没发生,但 Resolve 已经成功把音频与视频片段同步了。如果 Auto Sync 失败,会弹出警告对话框,提示哪些片段未能同步。Although nothing appears to happen beyond this, Resolve has successfully synchronized the audio with the video clips. If the Auto Sync hadn’t been successful, a warning dialog would have appeared indicating which clips couldn’t be synced.
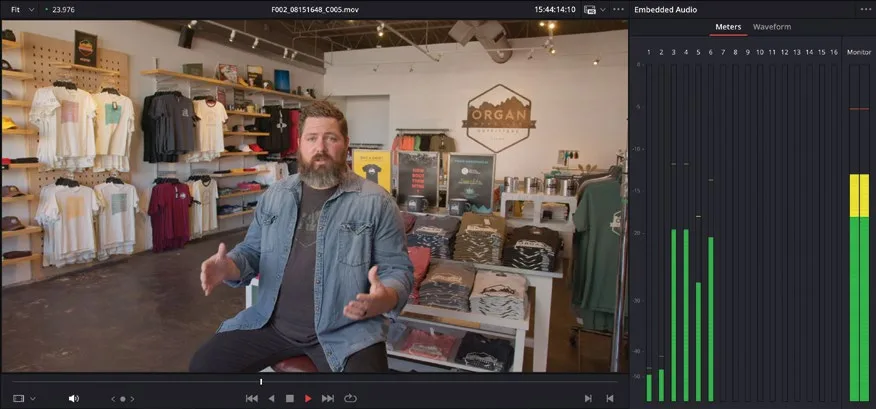
- 再次选中第一个视频片段 F002_08151648_C005.mov 并播放。Select the first video clip again, F002_08151648_C005.mov, and play it.
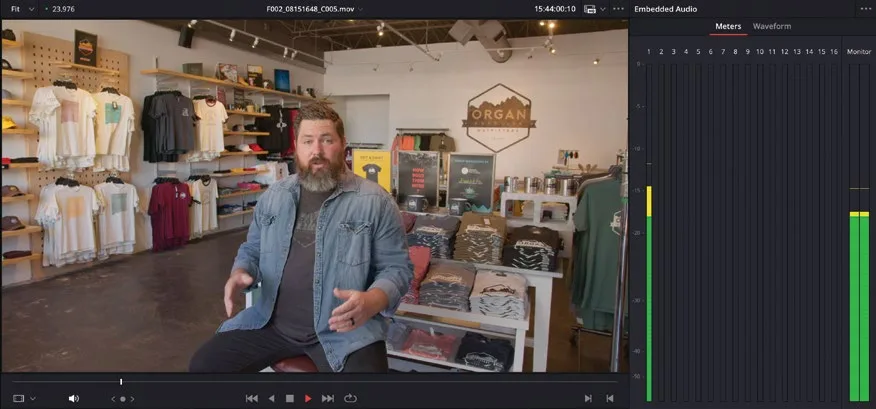
此时该片段共有六个音频通道,最后四个通道的电平明显高于前两个,它们就是刚才同步进来的音频片段。Now this clip has six audio channels, the last four of which are much higher in the meters than the first two. These are the four channels of the audio clip that you have just synced.
TIP · 提示在 List View 的 Synced Audio 列中可以查看每个片段是否已成功同步音频…
在 List View 的 Synced Audio 列中可以查看每个片段是否已成功同步音频。You can verify that there is synced audio with each of the clips in List View in the Synced Audio column.
当然也可以直接使用这些片段自带的音频。一个片段带多条音轨的好处是,你可以随时切换使用不同麦克风的声音。但这样会导致时间线上要管理的音轨数量过多,更简洁的做法是按需配置片段的音频,只保留真正需要的那几条音轨。You could continue using the audio of these clips as is. Having multiple audio tracks on a clip allows you to choose which microphone to use at any given time. However, this would result in you having to manage many more audio tracks in the timeline than is necessary, so it can be just as simple to configure the audio of a clip so that it uses just the track(s) you need.
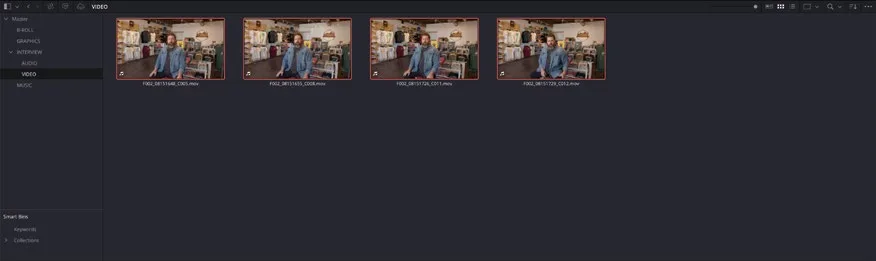
- 按住 Command(macOS)或 Ctrl(Windows)并点击 AUDIO bin 取消选中,让 media pool 中只显示 VIDEO bin 的内容,然后选中所有采访片段。Command-click (macOS) or Ctrl-click (Windows) the AUDIO bin to deselect it and leave just the contents of the VIDEO bin displayed in the media pool, and select all the interview clips.
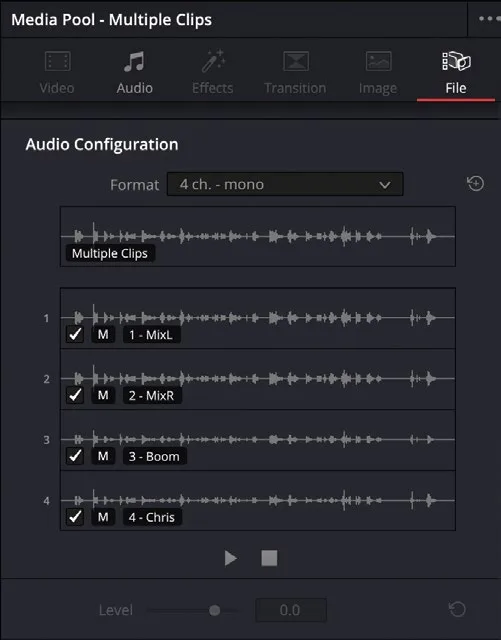
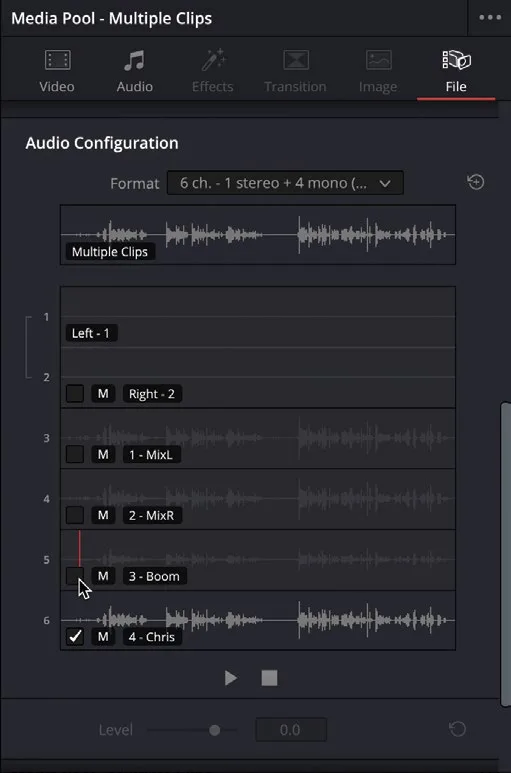
Inspector 中会显示这些片段更新后的音频配置。The Inspector shows the updated audio configuration for these clips.
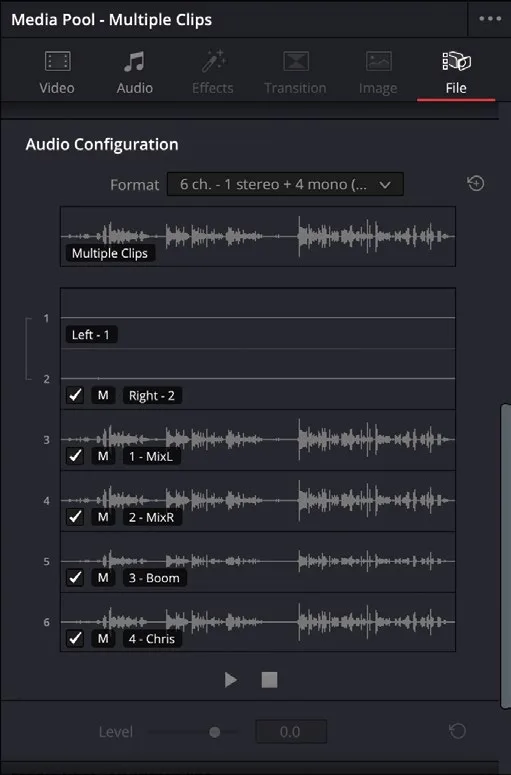
可以看到这些片段都共有六个音频通道:前两个是内嵌音频(仍为立体声配置),后四个是链接进来的音频片段(配置为单声道)。由于只需要 Chris 个人麦克风录到的那条音频,可以把不需要的音频通道移除。Now you can see that these clips all have a total of six audio channels: the first two being the embedded audio channels (still configured as stereo), and the last four being the linked audio clips (configured as mono). Since you only need the audio recorded from Chris’s personal mic, you can remove the audio channels you don’t need.
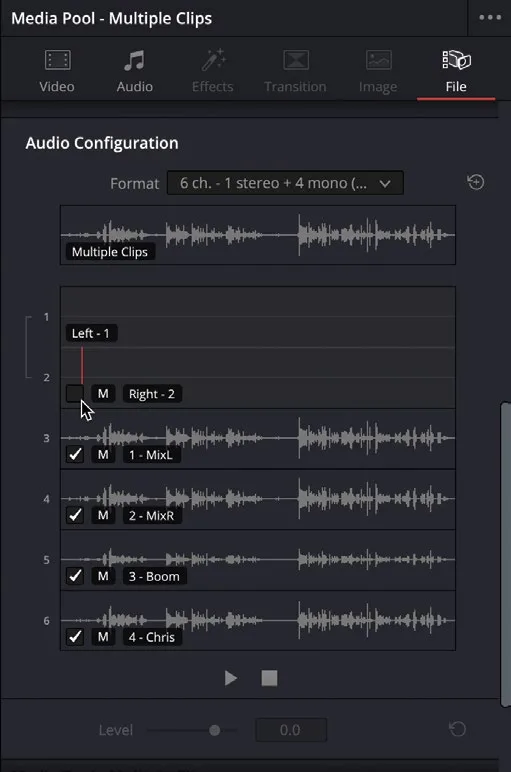
- 取消勾选前两个音轨。这两轨是采访片段里原始嵌入的音频,由于当前设置为立体声轨道,一个复选框就能同时禁用两轨。Deselect the first two audio channels. As these are the original audio embedded in the interview clips, there is one checkbox to disable both channels since they are currently configured as a stereo track.
- 继续取消勾选第 3、4、5 轨,只保留 Chris 最终那条音频轨道。Continue to deselect tracks 3, 4, and 5, leaving just Chris’s final audio track active.
- 再次在检视器中播放 F002_08151648_C005.mov,这次留意只有一条音轨在播放。Once again, play F002_08151648_C005.mov in the viewer, this time noting how only one track is playing.
NOTE · 注意在 Audio Configuration 面板中静音(Mute)和禁用(Disable)轨道是两件不同的事——尤其在片…
在 Audio Configuration面板中静音(Mute)和禁用(Disable)轨道是两件不同的事——尤其在片段被编辑进时间线之后。禁用音频轨道意味着该轨道被“隐藏”,不会被编辑进时间线;而在 Audio Configuration面板中静音,则轨道仍会被编辑进时间线,但进入时间线后会被自动禁用。如果想在时间线中重新启用被这样禁用的轨道,可以右键点击该轨道并选择 Enable Clip(快捷键 D)。Muting and disabling tracks in the Audio Configuration panel results in two different things when the clips are edited into a timeline. Disabling the audio track means the track is effectively “hidden,” so these tracks will not be edited into a timeline. Muting an audio track in the Audio Configuration panel means that that track will still be edited into the timeline but will be automatically disabled. Disabled tracks like this can be re-enabled in the timeline by right‑clicking them and choosing Enable Clip (or by pressing D).
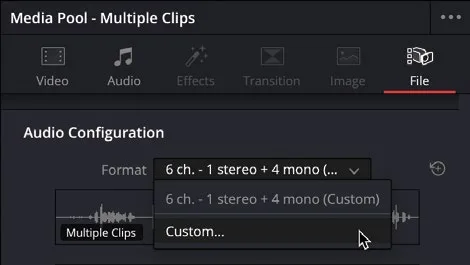
使用 Clip Attributes 进行高级音频配置:若想进一步设置片段的各个音频通道,可在 Audio Configuration面板的 Format 菜单中选择 Custom。Advanced Audio Configuration Using Clip Attributes Further configuration of the individual audio channels of a clip can be made by choosing Custom from the Format menu in the Audio Configuration panel.
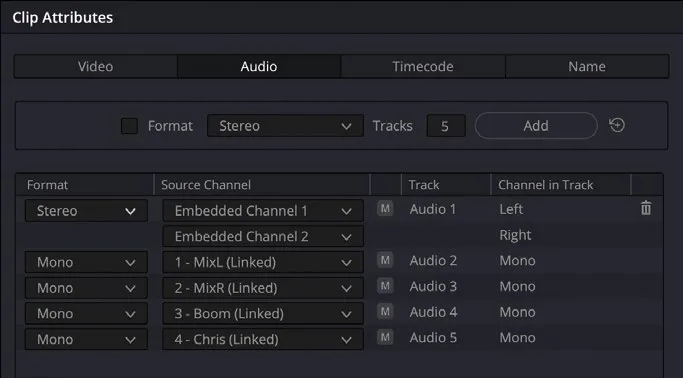
这会打开 Clip Attributes窗口,你可以在其中将音频通道按任意组合设置为 mono、stereo 或多种多通道格式(如 5.1 和 Adaptive track)。This opens the Clip Attributes window, where you can set the audio channels in any combination of mono, stereo, or various multi-channel configurations such as 5.1 and Adaptive tracks.
对音频通道配置所做的更改,不会影响任何时间线中正在使用的通道。Changes made to the configuration of audio channels will not affect any channels currently in use in any timeline.
本卡术语Terms in this card
媒体夹Bin 媒体池Media Pool 时间线Timeline 检查器Inspector 覆盖Overwrite 窗口Power Window 静帧Still 元数据Metadata 时间码Timecode
相关知识卡Related Cards
音频通道配置Audio Channel Configuration 自动同步音频Auto Sync Audio 媒体池Media Pool 时间线Timeline