TASK 2Task 2
替换白沙镜头Replace White Sands Shot
9 steps
这个镜头还可以,但可能存在另一个更合适的镜头。再做一次替换编辑吧。This shot is OK, but there’s another shot that might work better instead. Time for another replace edit.
- 选中 WHITE SANDS 关键词 smart bin,查看该地点的素材。Select the WHITE SANDS keyword smart bin to view the clips for this location.
- 双击 WHITE SANDS 11,在 source viewer(源检视器)中打开该片段。Double-click WHITE SANDS 11 to open the clip in the source viewer.
- 在 source viewer 中,把播放头放到画面左侧女孩抬头微笑的位置。In the source viewer, place the playhead at the point where the girl on the left raises her head and smiles.
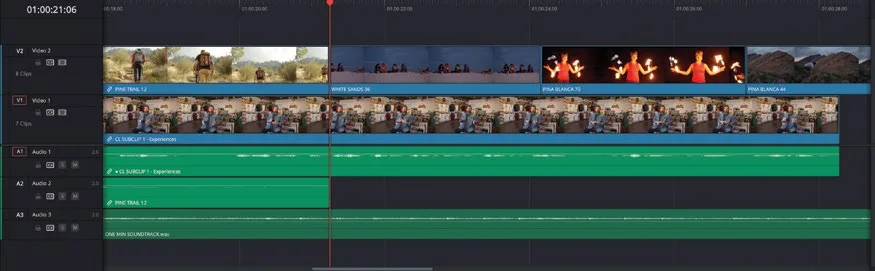
因为要替换的片段位于 V2 轨,所以需要修改 timeline(时间线)的目标轨道控件,指定编辑到 V2 轨。Because the clip you want to replace is on Video 2, you’ll need to change the timeline destination controls to specify that you want to edit that track.
- 在时间线中,点击 V2 source control(源控件),将 V1 目标控件切换到 Video 2 轨。In the timeline, change the V1 destination control to the Video 2 track by clicking the V2 source control.
- 点击 A1 destination control,关闭音频编辑,避免目标轨上的音频也被一并替换。Click the A1 destination control to disable audio editing and prevent the audio on the destination track from being replaced as well.
TIP · 提示NOTE:有关各种视频和音频目标控件切换的系列命令,可在菜单栏选择 Timeline > Track Destinati…
NOTE:有关各种视频和音频目标控件切换的系列命令,可在菜单栏选择 Timeline > Track Destination Selection 查看。A series of commands for changing the various video and audio destination controls can be found by choosing Timeline > Track Destination Selection.
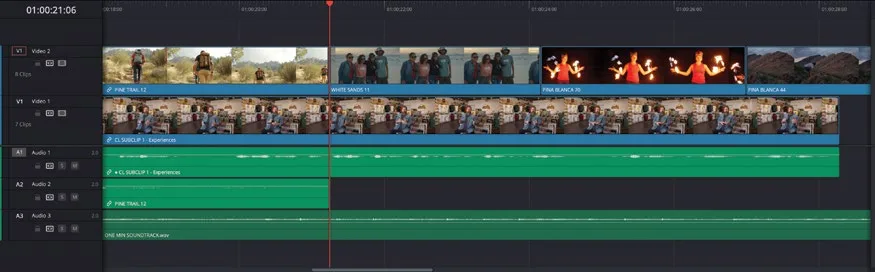
- 点击时间线工具栏中的 Replace Clip(替换剪辑)按钮,或按 F11 键执行 replace edit(替换剪辑),用 WHITE SANDS 11 替换 WHITE SAND 36。Click the Replace Clip button in the timeline toolbar or press F11 to perform a replace edit and replace WHITE SAND 36 with WHITE SANDS 11.
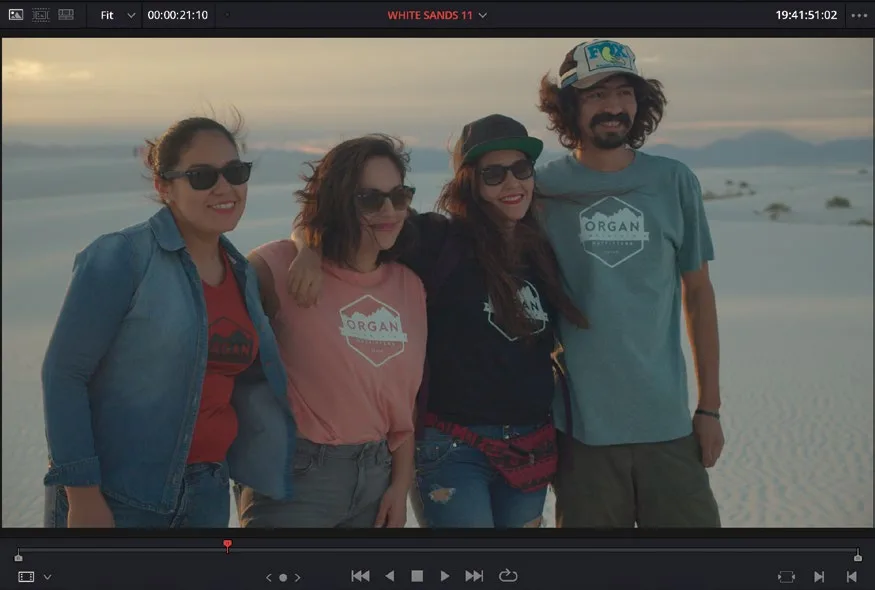
Replace edit 非常高效快捷。你还可以借助 In 点和 Out 点精确控制时间线上被替换的范围。Replace edits are so powerful and quick. You can also use In and Out points to refine the portion of the timeline being replaced.
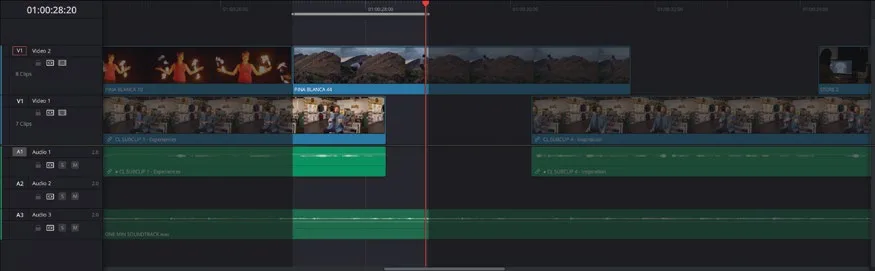
- 把时间线播放头移到 VIDEO 2 轨上第五个片段 PINA BLANCA 44 的起始处,添加一个 In 点。Place the timeline playhead at the start of the fifth clip on VIDEO 2, PINA BLANCA 44, and add an In point.
大约 2 秒后,也就是男子即将登顶时,添加一个 Out 点。Add an Out point about 2 seconds later, as the guy reaches the top of the rock.
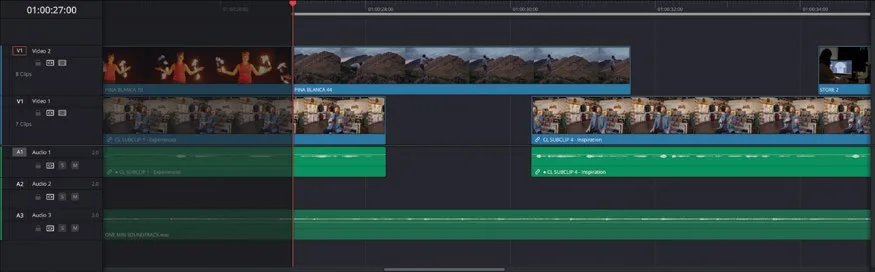
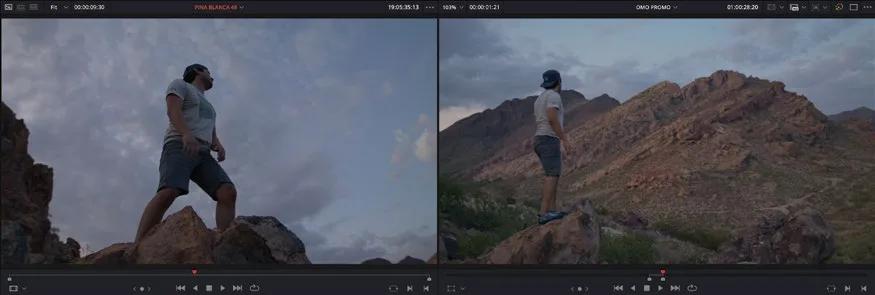
从 PINA BLANCA 关键词 smart bin(智能剪辑箱)中,把 PINA BLANCA 48 拖到 source viewer 打开,并定位到大约片段中点的位置,选取与时间线检视器画面最匹配的一帧。From the PINA BLANCA keyword smart bin, open the clip PINA BLANCA 48 in the source viewer and locate a frame about halfway through the clip that most closely matches the frame in the timeline viewer.
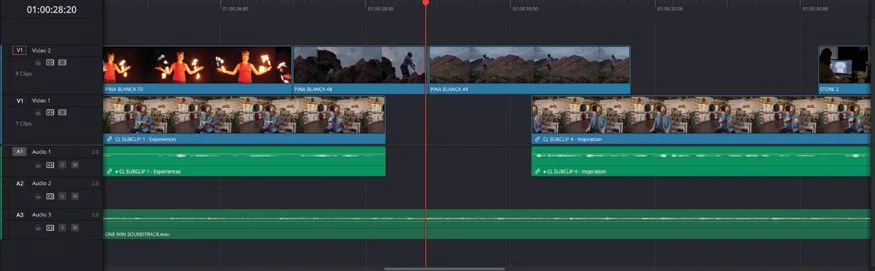
按 F11 键,在时间线上设定的 In 点和 Out 点之间执行一次 replace edit。Press F11 to perform a replace edit between the In and Out points you set on the timeline.
查看刚才所做的修改。Review the change you’ve just made.
相比回切式 overwrite 剪辑,replace edit 的优势在于不需要在 source viewer(源检视器)中设置任何 In/Out 点——实际上,执行 replace edit 时源检视器中的 In/Out 点会被忽略。另外,replace edit 允许 source 和 timeline 播放头停在时间线 In/Out 点之外的帧上,替换的素材长度会根据播放头与 In/Out 点之间的偏移量自动计算。这种特性让 replace edit 在此类场景下比 overwrite 剪辑灵活得多。An advantage of using the replace edit, rather than a backtimed overwrite edit, is that you don’t need to add any In or Out points in the source viewer. Indeed, any In or Out points in the source viewer will be ignored whenever you make a replace edit. Also, when you perform replace edits, the source and timeline playheads can be placed on frames outside the In and Out points in the timeline, but the portion of the source footage replaced within the In and Out points will be calculated from the offset of the In and Out points from the playheads. This makes it a much more flexible editing function in this situation.
NOTE · 注意如果需要追赶上进度再进入下一步,可打开 TIMELINES bin,选择 File > Import > Timelin…
如果需要追赶上进度再进入下一步,可打开 TIMELINES bin,选择 File > Import > Timeline,找到 R20 Beginners Guide / Lesson 02 / Timelines / OMO PROMO CATCHUP 07.drt,点击 Open。If you need to catch up before moving to the next step, select the TIMELINES bin and choose File > Import > Timeline, navigate to R20 Beginners Guide / Lesson 02 / Timelines / OMO PROMO CATCHUP 07.drt and click Open.
本卡术语Terms in this card
媒体夹Bin 覆盖编辑Overwrite Edit 源检视器Source Viewer 时间线Timeline 覆盖Overwrite 播放头Playhead 替换编辑Replace Edit 偏移Offset 关键词Keywords