添加平移关键帧Adding Pan Keyframes
12 steps
简介Overview
用关键帧重新构图:当镜头无论如何都无法完整适配新画幅时,就需要用关键帧随时间动态调整构图。Reframing Shots Using Keyframes Sometimes, you’ll need to use keyframes to adjust the framing over time, especially for shots that will never fit the new aspect ratio properly.
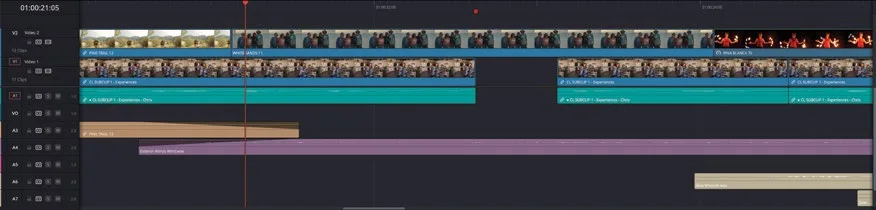
- 在 markers index 中,点击 PAN 1 标记,放大时间线,将时间线播放头放到 WHITE SANDS 11 片段靠近开头的位置。In the markers index, click the PAN 1 marker, zoom in on the timeline, and place the timeline playhead near the start of the WHITE SANDS 11 clip.
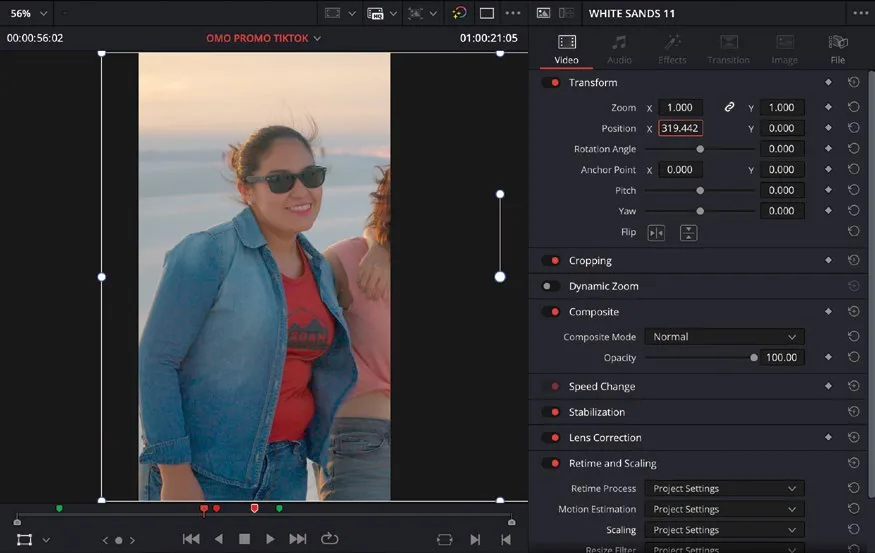
- 在 timeline viewer 中,使用屏幕上的控件,或 Inspector 中的 Position X 参数,重新构图画面,让你能看到群体最左边的女孩。In the timeline viewer, use the onscreen controls, or the Position X parameter in the Inspector, to reframe the shot so you can see the girl on the far left of the group.
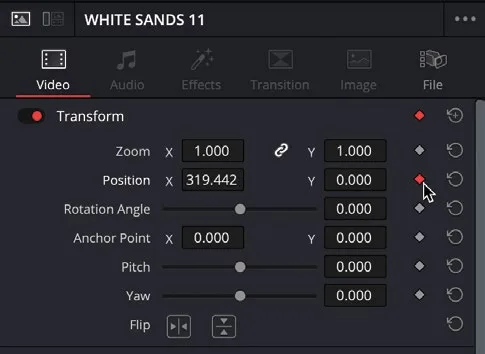
- 在 Inspector 中,点击 Position 的关键帧按钮,在当前播放头位置为该片段添加一个关键帧。In the Inspector, click the
Position keyframebutton to add a keyframe to this clip at the current playhead position. - 将时间线播放头移到 WHITE SANDS 11 片段靠近结尾的位置。Move the timeline playhead toward the end of the WHITE SANDS 11 clip.
- 在新位置上,使用屏幕上的控件调整构图,把画面中的情侣框在群体右侧。With the playhead in the new position, adjust the onscreen controls to frame the couple on the right side of the group.
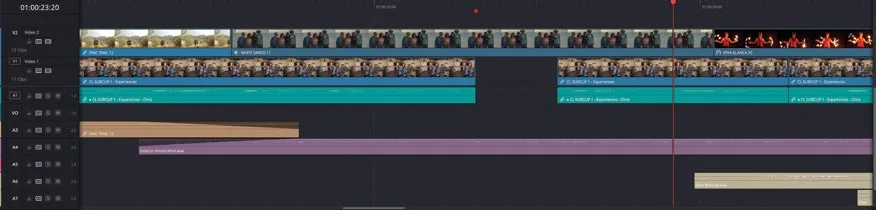
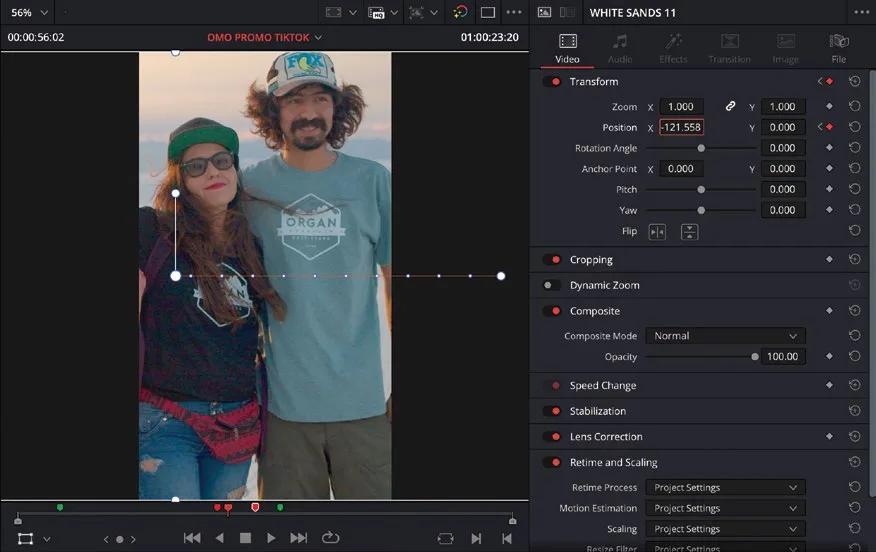
这次调整会在当前播放头位置为片段添加第二个关键帧,并应用调整后的 Position 参数。This adjustment adds a second keyframe to the clip at the current playhead position with the adjusted Position parameter.
NOTE · 注意NOTE:viewer 中出现的红色线条表示片段在两个关键帧之间将要沿其运动的路径…
NOTE:viewer 中出现的红色线条表示片段在两个关键帧之间将要沿其运动的路径。The red line that appears in the viewer indicates the motion path that the clip will travel along between the two keyframes.
- 在时间线上播放片段,回看通过 Position 关键帧为镜头添加的“摇镜”效果。Play back the clip in the timeline to review the “pan” you have added to the shot using the Position keyframes.
NOTE · 注意NOTE:可以在时间线中片段名称右侧的菱形图标上看到该片段已应用了关键帧…
NOTE:可以在时间线中片段名称右侧的菱形图标上看到该片段已应用了关键帧。You can see that this clip has keyframes applied by the diamond icon to the right of the clip’s name in the timeline.
你可以使用 Keyframe Tray 调整这两个关键帧的时间。You can use the Keyframe Tray to adjust the timing of the two keyframes.
- 点击时间线左上角的
Show Keyframe Tray按钮。In the top left corner of the timeline, click theShow Keyframe Traybutton.
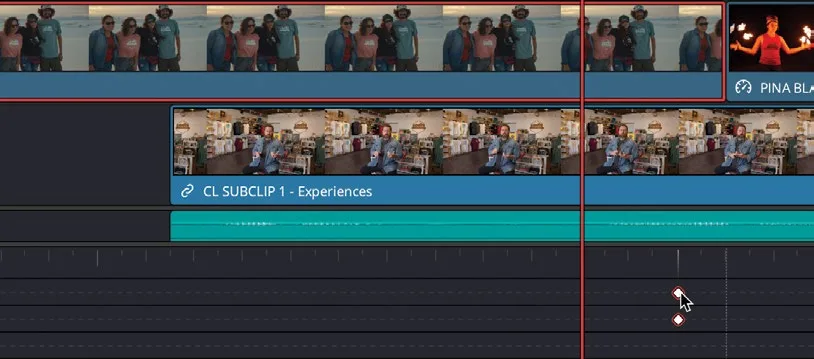
Keyframe Tray 会在时间线下方打开,显示当前选中片段的关键帧位置。The Keyframe Tray opens below the timeline, displaying the keyframe locations relative to the currently selected clip.
NOTE · 注意NOTE:虽然 WHITE SANDS 11 这条片段并未被手动选中,但因为它位于时间线上最上层,仍会被视为“已选中”状…
NOTE:虽然 WHITE SANDS 11 这条片段并未被手动选中,但因为它位于时间线上最上层,仍会被视为“已选中”状态。Although the WHITE SANDS 11 clip is not physically selected, it is still deemed to be “selected” as it’s the uppermost clip in the timeline.
通过 Keyframe Tray(关键帧托盘)可以调整关键帧的时间位置。Using the Keyframe Tray, you can adjust the timing of the keyframes.
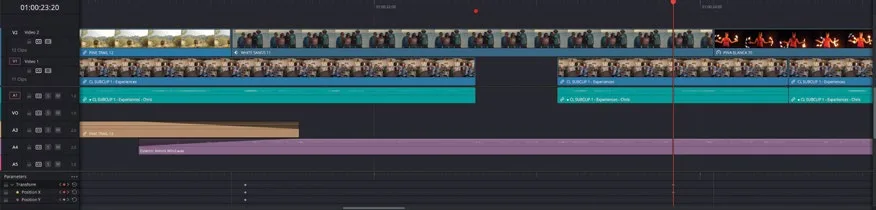
- 选中 Position(位置)关键帧,拖动它即可改变动画的时间点,方法是将关键帧分别向 WHITE SANDS 11 片段的起点和终点方向拖动。Select the Position keyframe and drag it to change the timing of the animation by dragging it closer to the start and end of the WHITE SANDS 11 clip.
TIP · 提示NOTE:可以调整 Keyframe Tray(关键帧托盘)的高度,以便更清晰地查看关键帧与片段之间的对应关系…
NOTE:可以调整 Keyframe Tray(关键帧托盘)的高度,以便更清晰地查看关键帧与片段之间的对应关系。You can adjust the height of the Keyframe Tray to better see the keyframes in relation to the clip.
动画的插值(interpolation)可以通过 Keyframes面板进行调整。To adjust the interpolation of the animation, you can use the Keyframes panel.
- 打开
Keyframes面板,然后关闭 Index。Open the Keyframes panel and close the Index.
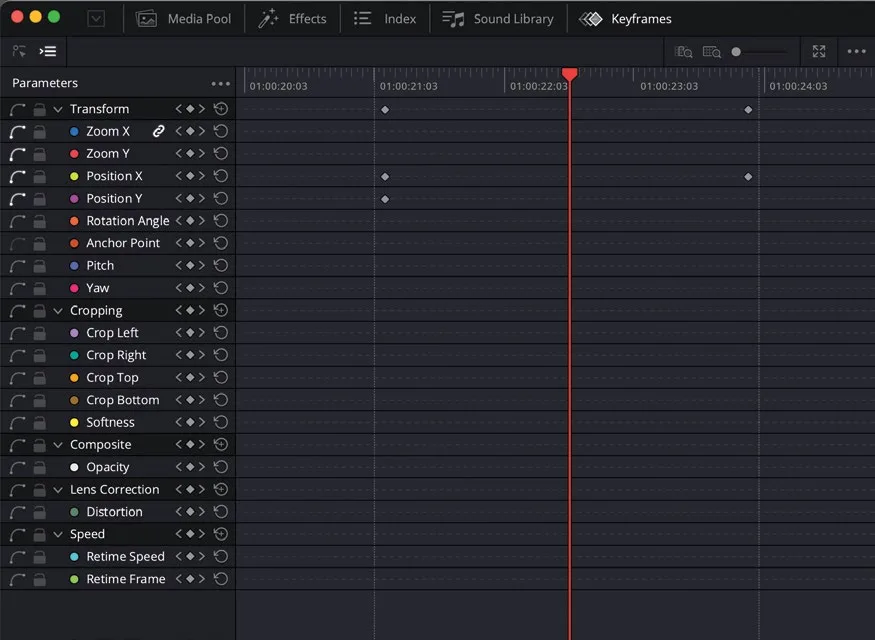
Keyframes面板的 Parameters 视图会列出当前时间线片段上所有的关键帧,便于你相对于该片段时长来重新摆放关键帧位置。The Keyframes panel’s Parameters view shows all the keyframes available for the selected timeline clip, allowing you to reposition the keyframes relative to that clip’s duration.
- 点击
Keyframes面板左上角的Keyframe Curves按钮。Click the Keyframe Curves button in the top left of theKeyframespanel.
Keyframe Curves 视图可调整片段沿运动路径的加速度,原理和在 Fusion页面用 Spline窗口调速类似。The Keyframe Curves display allows you to adjust the acceleration of the clip along the motion path, similarly to how you adjusted the speed of the animation in the Fusion page using the Spline window.
- 在黄色的 Position X 曲线上,用 Command-click(macOS)或 Ctrl-click(Windows)同时选中两个关键帧。Command-click (macOS) or Ctrl-click (Windows) the two keyframes on the yellow Position X curve.
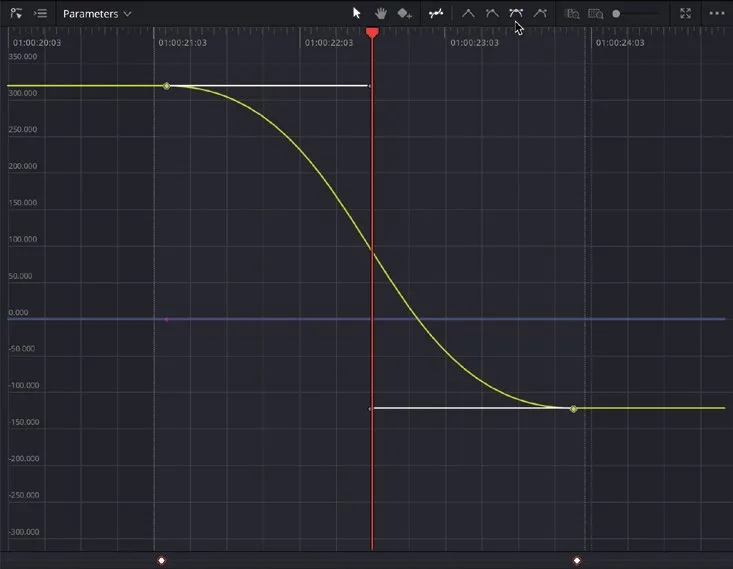
- 保持两个关键帧选中状态,点击
Keyframes面板顶部的 Ease In and Out 按钮。With the two keyframes selected, click the Ease In and Out button at the top of theKeyframespanel.
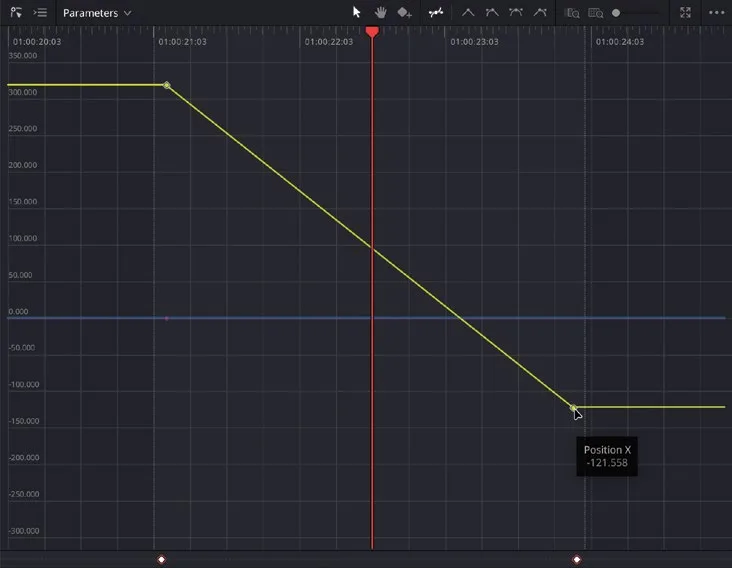
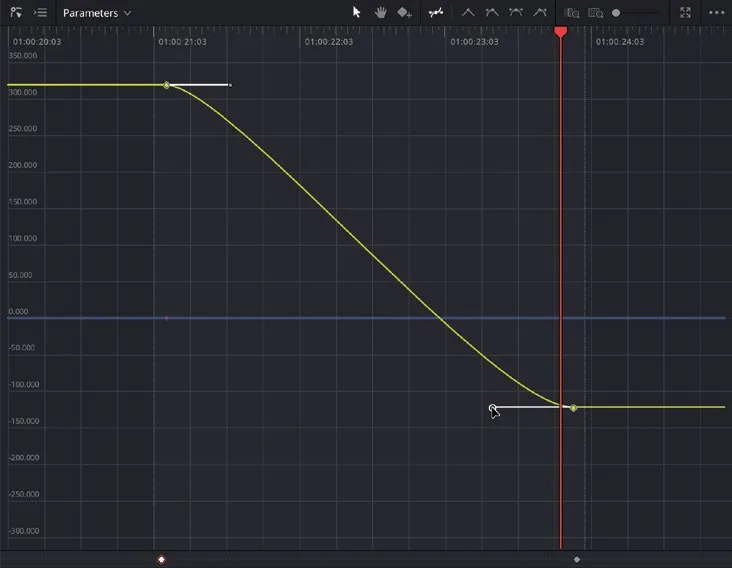
选中的关键帧上会添加贝塞尔(Bézier)手柄,用于调节动画的加速度。Bézier handles are added to the selected keyframes, adjusting the acceleration of the animation.
调整关键帧贝塞尔手柄的大小,细化动画速度直到满意。Adjust the size of the handles to refine the speed of the animation to your liking.
本卡术语Terms in this card
时间线Timeline 检查器Inspector 关键帧Keyframe 标记Marker 播放头Playhead 变速Speed 曲线Curves 窗口Power Window 静帧Still Fusion 合成Fusion