使用 AI Dialogue Leveler(AI 对白电平器)Using the AI Dialogue Leveler
9 steps
简介Overview
在第 3 课处理 OMO PROMO 时间线的音频时,你用 Normalization 加一连串音频关键帧来平衡对白轨道的电平。这是一种保证所有对白片段电平一致的方法,但显然非常耗时。When you worked on the audio for the OMO PROMO timeline in Lesson 3, you used Normalization and a series of audio keyframes to balance the dialogue track levels. That is one way of ensuring a consistent level of all the dialogue clips; however, you no doubt found this time-consuming.
Fairlight页面提供了一些专门工具,能帮你在时间线里美化音频。我们先用 AI Dialogue Leveler 平衡 DIALOGUE(对白)轨道上各片段的电平。The Fairlight page includes some dedicated tools that you will find helpful when sweetening the audio in your timeline. You will start by balancing the levels of the clips in the DIALOGUE tracks using the AI Dialogue Leveler.
- 点击
Mixer按钮,重新打开混音器面板。Click the Mixer button to reopen the mixer panel. - 拖动混音器左边缘,显示每条轨道的声道条,然后按 Shift+Z 让时间线适配窗口。Drag the left edge of the mixer to display the channel strips for each track, and press Shift-Z to fit the timeline.
- 播放时间线,单独监听(solo)DIALOGUE 轨道上的片段,留意不同片段的电平差异(看哪个表头都行,显示的信息都一样)。Play the timeline, listen to the clips on the solo’d DIALOGUE track, and pay attention to the levels of the different clips (it doesn’t matter which meter you look at; they all show the same information).
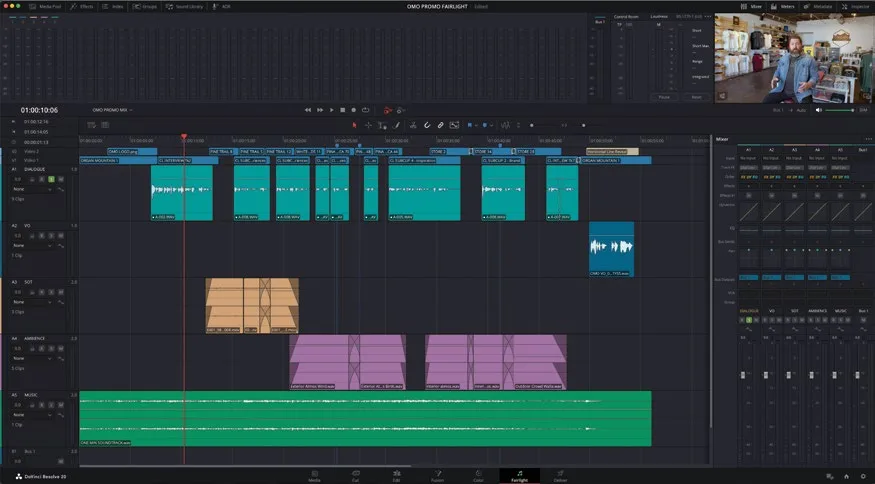
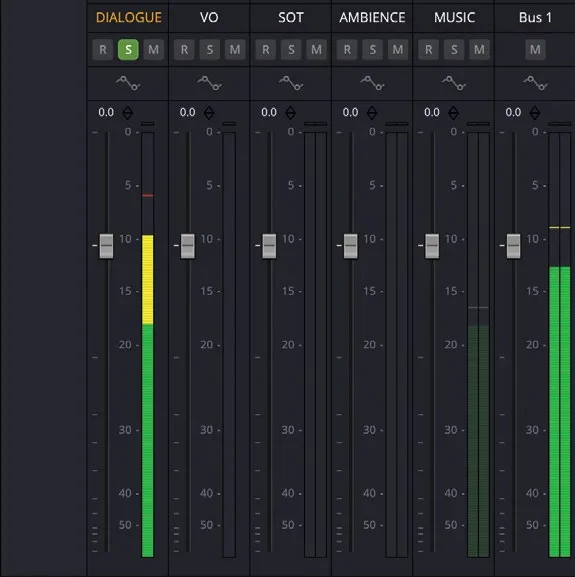
你大概已经看到(听到)了:整段采访的电平在约 -6 dBFS 到 -20 dBFS 之间起伏!这个差值叫做 dynamic range(动态范围)。通常需要压缩对白等音频的动态范围,让电平更稳定,可能要把响的部分压低、把弱的部分抬高,或两者结合。As you can see (and no doubt hear), the levels throughout this interview fluctuate from around -6 dBFS to as low as 20 dBFS! The difference between these values is called the dynamic range. You’ll generally want to reduce the dynamic range of certain audio clips, such as dialogue, for a more consistent level. This might mean making louder parts of the audio quieter, vice versa, or a combination of both.
作为经验值,对白电平应落在混音器黄色区间(-18 dBFS 到 -9 dBFS):轻声细语靠近下沿,喊叫靠近上沿,常规对白大约在 -12 dBFS 左右。As a rule of thumb, you want your dialogue audio to sit in the yellow area of the mixer (between -18 dBFS and -9 dBFS). Quiet, softly spoken lines might be toward the bottom of this range, and shouted lines will be toward the higher end. Normal dialogue levels are set around -12 dBFS.
第 3 课里你是靠 normalization 和关键帧配合实现的,这次我们让 Fairlight 工具代劳。In Lesson 3, you achieved this using a combination of normalization and keyframes. This time, you’ll let the Fairlight tools do the heavy lifting.
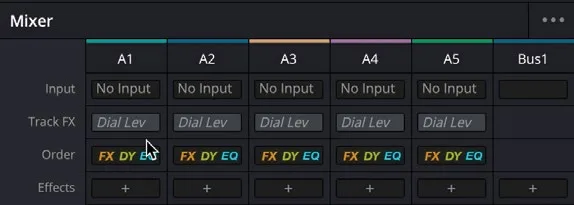
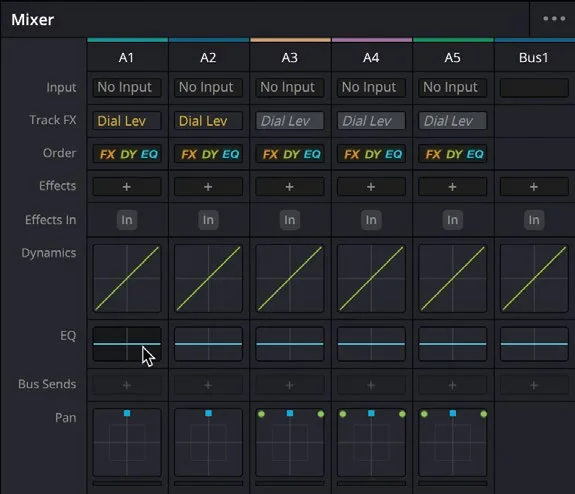
- 在混音器顶部找到 Track FX 一排控件。At the top of the mixer, locate the Track FX row of controls.
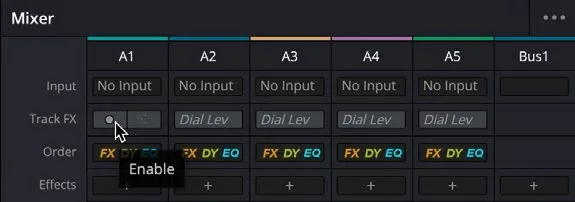
- 在 A1 那一列的 Dial Lev Track FX 上悬停鼠标,点击 Enable 启用 AI Dialogue Leveler。Move your mouse over the Dial Lev Track FX for the A1 controls and click the Enable option to enable the AI Dialogue Leveler.
- Dialogue Leveler 启用后,把指针移回该 Track FX,点击
Controls按钮。With the Dialogue Leveler enabled, move your mouse pointer back over the Track FX and click the Controls button.
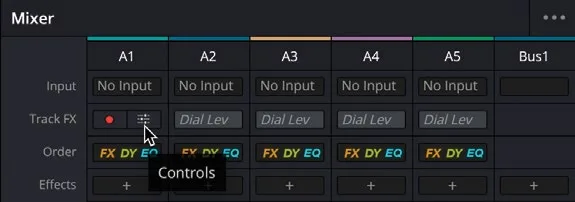
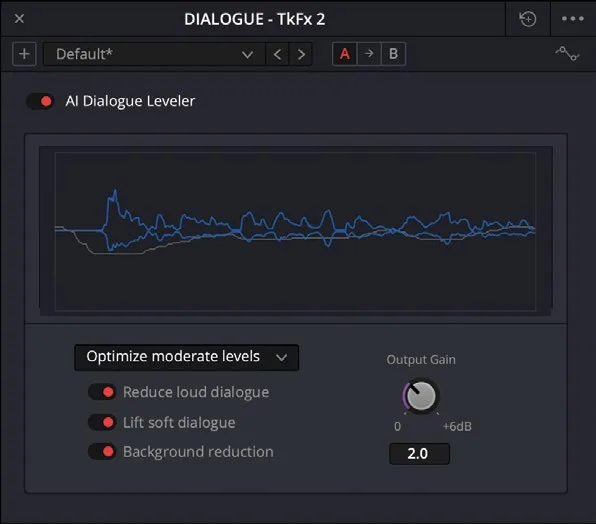
DIALOGUE 轨道的 AI Dialogue Leveler 控件随即打开。The AI Dialogue Leveler controls open for the DIALOGUE track.
- 再次播放时间线,注意 DIALOGUE 轨道上各片段音量(尤其是较安静的片段)的整体变化,以及 AI Dialogue Leveler 中白线所代表的实时音量调整。Play the timeline again, noting overall changes in the DIALOGUE track clips’ levels (particularly the quieter clips) and the graph in the AI Dialogue Leveler where the white line represents the real-time adjustments to the levels.
你会发现这条轨道上较安静的片段音量比之前略有提升,AI Dialogue Leveler 的曲线图也反映了这一点。You should notice that the quieter clips on this track are a little higher than before, as indicated by the graph in the AI Dialogue Leveler.
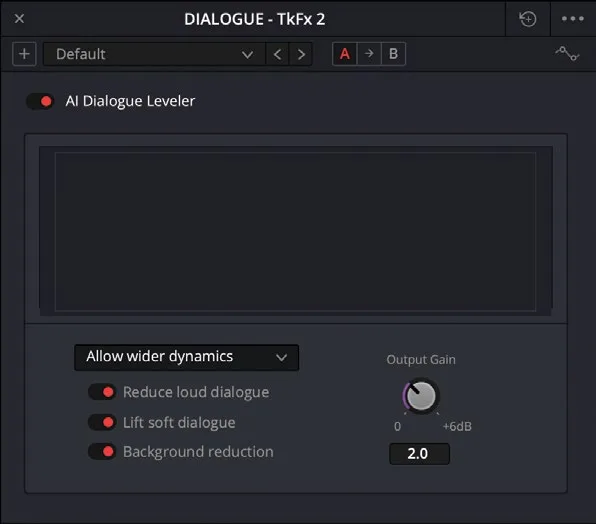
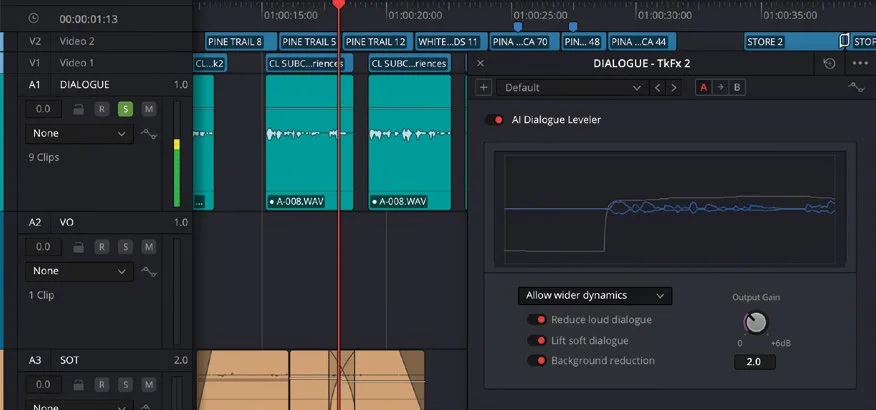
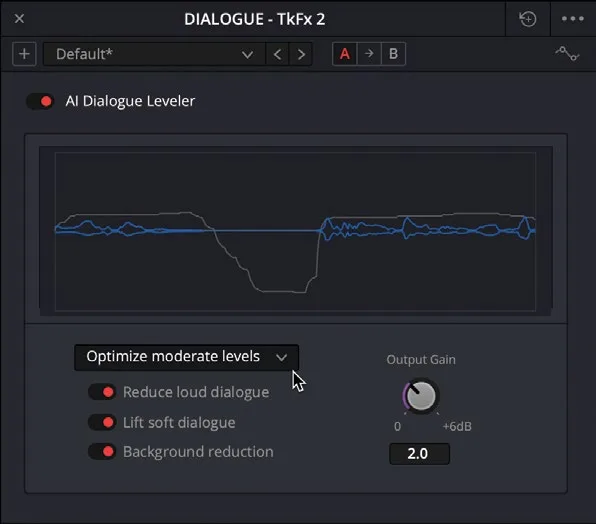
- 在 AI Dialogue Leveler 中,将下拉菜单切换为 “Optimize moderate levels”。In the AI Dialogue Leveler, change the menu to “Optimize moderate levels.”
- 再次播放时间线,注意响的片段音量被压低,安静的片段音量被提升,整条轨道的响度变得更加均衡——而你无需逐个调节各片段的电平!Play the timeline again, this time noting how the louder clips have been lowered while the quieter clips have been raised. This results in a more consistent audio level across the track without you having to adjust the levels of each individual clip!
听完 DIALOGUE 轨道后,关闭 AI Dialogue Leveler 控件。After listening to the DIALOGUE track, close the AI Dialogue Leveler controls.
点击 VO 轨道的 Solo按钮,以便与 DIALOGUE 轨道一起监听,然后播放该轨道末尾的片段,注意其音量。Click the Solo control for the VO track so you can hear this track alongside the DIALOGUE track, and play the clip at the end of this track, noting the audio levels.
显然,这个片段的音量需要调整,以和 Chris 的对白保持平衡;否则观众会被突如其来的音量吓到,伸手去调音量旋钮!Obviously, this clip’s levels need to be adjusted to balance against Chris’s dialogue; otherwise, you’ll shock your audience and have them reaching for the volume controls!
虽然你也可以单独调整这一个片段的音量,但把 AI Dialogue Leveler 作为 Track FX 应用仍然有优势:正如在 DIALOGUE 轨道上看到的,一组控件会影响同一轨道上的所有片段。因此,日后若在 VO 轨道上添加新片段,它们会自动沿用该轨道的 AI Dialogue Leveler 设置。While you could adjust the levels of this clip independently (it is only one clip after all), there’s still an advantage to applying the AI Dialogue Leveler as a Track FX. As you’ve seen from the DIALOGUE track, one set of controls affects all clips along the same track. Therefore, if you were to add additional clips to the VO track later, they would automatically fall under the track’s AI Dialogue Leveler settings.
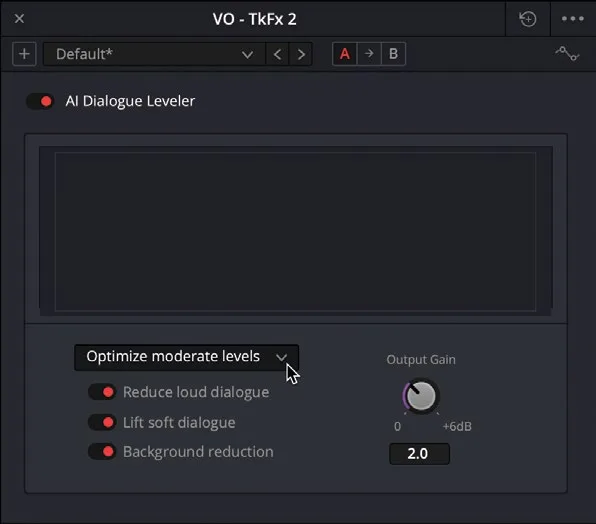
在调音台中为 VO 轨道启用 Dialogue Leveler Track FX,打开控件,将下拉菜单设置为 “Optimize moderate levels”,与 DIALOGUE 轨道的操作相同。Enable the Dialogue Leveler Track FX for the VO track in the mixer, open the controls, and set the menu to “Optimize moderate levels” as you did with the DIALOGUE track.
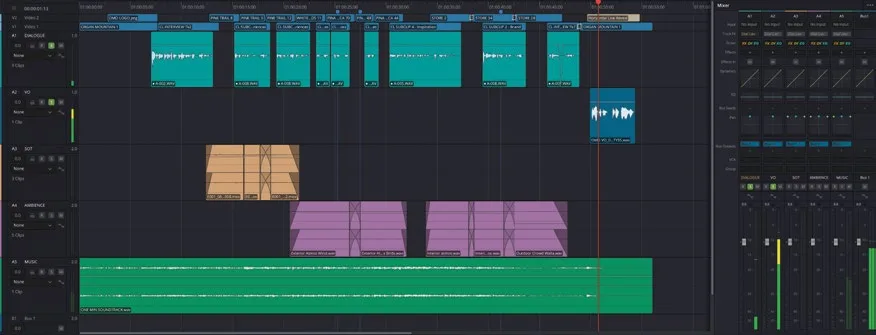
再次播放时间线,聆听 VO 录音与整体对白音量之间更佳的平衡效果。Play the timeline again, listening to how the VO recording is now better balanced with the overall dialogue levels.
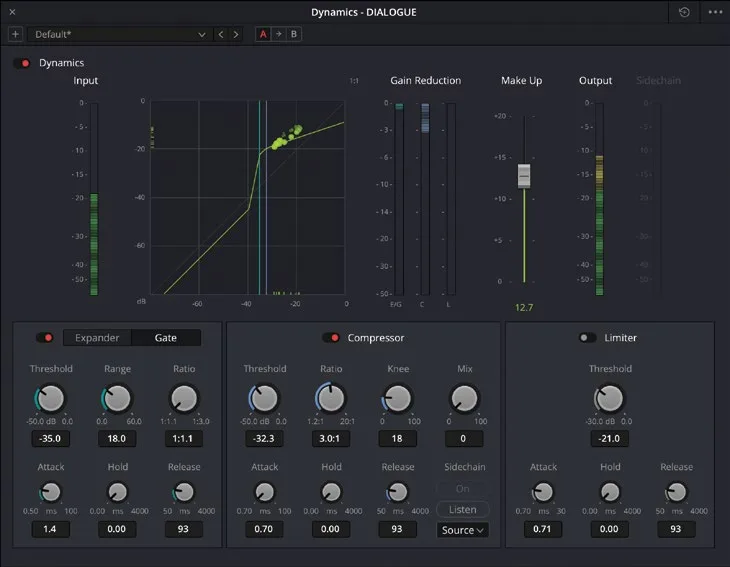
使用 Dynamics 工具。如果熟悉音频处理技术,Fairlight 同样提供了相应工具。若你希望自行调整轨道上片段的动态范围,可使用内置的 Dynamics 控件:只需在调音台中双击 Dynamics 控件,即可在独立窗口中打开,通过 Expander/Gate、Compressor 和 Limiter 对音频进行动态处理。Using Dynamics If you are familiar with audio processing techniques, Fairlight has tools for you too. If you prefer to apply your own adjustments to the dynamic range of clips on a track, you can use the built-in Dynamics controls. Simply double-click the Dynamics controls in the mixer to open them in a separate window, allowing you to apply adjustments to the audio using an Expander or Gate, a Compressor, and a Limiter.
更多信息请参阅《The Fairlight Audio Guide to DaVinci Resolve 20》。For more information, see The Fairlight Audio Guide to DaVinci Resolve 20.
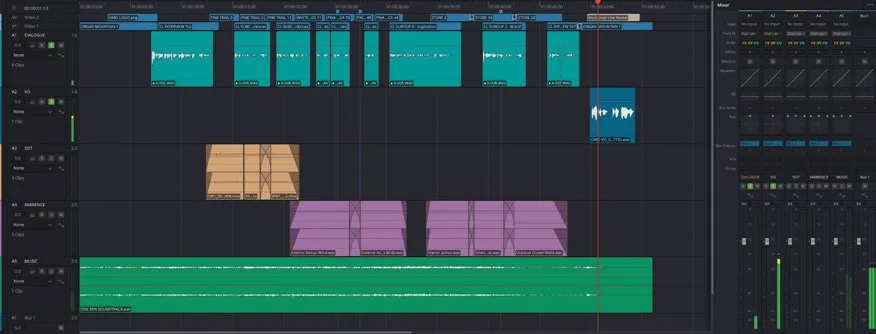
NOTE · 注意NOTE:如果在进入下一步之前需要先跟上进度,请打开 Media Pool,选择 TIMELINES smart bin…
NOTE:如果在进入下一步之前需要先跟上进度,请打开 Media Pool,选择 TIMELINES smart bin,然后执行 File > Import > Timeline,定位到 R20 Beginners Guide / Lesson 08 / Timelines / OMO PROMO MIX CATCHUP 02.drt 并点击 Open。If you need to catch up before moving to the next step, open the media pool, select the TIMELINES bin, and choose File > Import > Timeline, navigate to R20 Beginners Guide / Lesson 08 / Timelines / OMO PROMO MIX CATCHUP 02.drt and click Open.
本卡术语Terms in this card
媒体夹Bin 媒体池Media Pool 时间线Timeline 响度Loudness 关键帧Keyframe 调音台Mixer 曲线Curves 窗口Power Window 静帧Still 音频关键帧Audio Keyframes AI 对白电平器AI Dialogue Leveler 动态处理Dynamics Fairlight 音频Fairlight