导入媒体Importing Media
5 steps
简介Overview
了解项目所用文件的类型并完成项目设置后,就可以把文件导入到项目中开始下一步操作了。Now that you have a better idea about the files you’ll be working with and have set up the project accordingly, it’s time to import the files into your project so you can start working with them further.
DaVinci Resolve 项目有多种导入文件方式。在任何带 Media Pool 的页面(即除 Deliver页面以外的所有页面),可以选择 File > Import > Media。也可以直接从 Finder(macOS)或 File Explorer(Windows)把文件拖拽到 Media Pool。但这两种方式的选项有限,而 Media页面在导入片段时提供了更高的灵活性。There are numerous ways to import files into a DaVinci Resolve project. For instance, you could choose File > Import > Media on any page that has access to the media pool (that is, every page except the deliver page). You can also simply drag and drop files from the Finder (macOS) or File Explorer (Windows) directly into the media pool! However, both techniques offer limited options, whereas the media page provides much more flexibility when it comes to importing clips.
NOTE · 注意注意:导入媒体时,DaVinci Resolve 只会创建到硬盘上原始片段的链接,不会对源媒体进行复制、移动、转换或任何…
注意:导入媒体时,DaVinci Resolve 只会创建到硬盘上原始片段的链接,不会对源媒体进行复制、移动、转换或任何修改。Whenever you import media, DaVinci Resolve creates a link to the original clips on your hard drive. At no point does this import process copy, move, convert, or in any way alter the source media.
- 在 Media Storage 浏览器中,导航到 R20 Beginners Guide/Media/OMO 文件夹,选中 B-ROLL 文件夹。In the media storage browser, navigate to the R20 Beginners Guide/ Media/OMO folder and select the B-ROLL folder.
- 右键点击 B-Roll 文件夹,弹出导入选项。Right-click the B-Roll folder to reveal the import options.
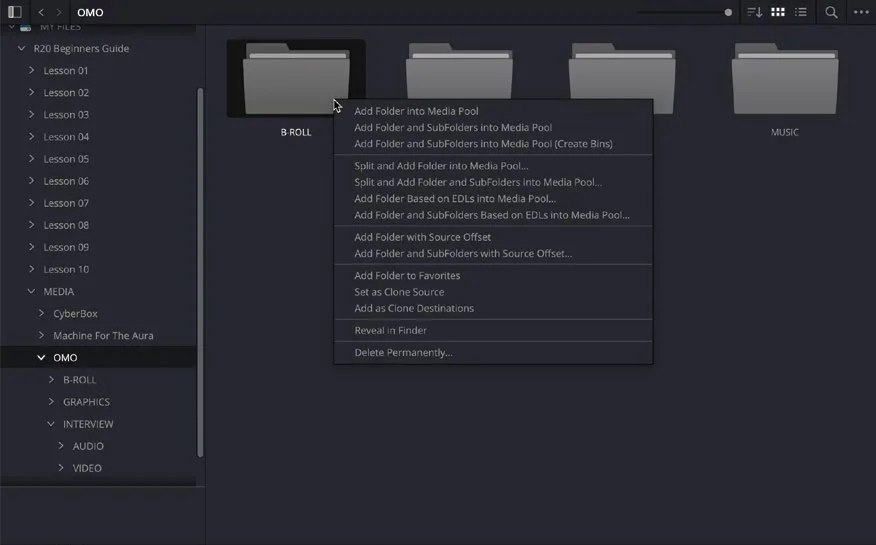
从 Media Storage 浏览器导入片段主要有三种方式:There are three main options for importing clips from the media storage browser:
— Add Folder into Media Pool:导入当前文件夹下一级的内容。 — Add Folder and SubFolders into Media Pool:导入当前文件夹及其所有子文件夹的内容,效果与从 Media Storage 浏览器或 Finder(macOS)/File Explorer(Windows)直接拖入文件夹相同,适合从使用复杂目录结构的相机存储卡中导入来自不同文件夹的大量文件。 — Add Folder and SubFolders into Media Pool (Create Bins):导入当前文件夹及其所有子文件夹的内容,并在 Media Pool 中以 smart bin 形式保留原有文件夹结构,适合硬盘上已经分文件夹整理好的批量素材导入。— Add Folder into Media Pool will import the contents from one level inside the current folder. — Add Folder and SubFolders into Media Pool will import the contents of the current folder and any additional folders contained within it. This is the same as when you drag a folder into the media pool either from the media storage browser or from the Finder (macOS) or File Explorer (Windows). This is a useful option when importing numerous files from different folders from a camera card that uses a complex directory structure. — Add Folder and SubFolders into Media Pool (Create Bins) will import the contents of the current folder and any additional folders contained within it, preserving the folder structure as a series of bins in the media pool. This option is most useful when you want to import several clips that are already organized into folders on your hard drive.
- 选择 Add Folder and SubFolders into Media Pool (Create Bins)。Choose Add Folder and SubFolders into Media Pool (Create Bins).
弹出窗口,询问是否要更改项目帧率。A window appears asking whether you want to change the project frame rate.
出现该提示是因为文件夹中第一个片段的帧率与项目设置的不同,当然这种情况下不能更改项目帧率。This is because the first clip in this folder has a different frame rate than the one you’ve set for the project. Of course, you wouldn’t want the project frame rate to change in this case.
只有当项目导入的第一个片段帧率与 Project Settings 中的 Timeline Format 不一致时,才会触发此警告,后续文件不会再次出现该提示。This warning occurs only if the first clip imported into a project has a different frame rate than the Timeline Format in the Project Settings. Subsequent files will not trigger this behavior.
NOTE · 注意注意:若不小心更改了项目帧率,只要还没创建任何 timeline,都可以在 Project Settings 中改回。但…
注意:若不小心更改了项目帧率,只要还没创建任何 timeline,都可以在 Project Settings 中改回。但一旦在项目中创建了 timeline,Project Settings 里的 Timeline Frame Rate 就无法再更改;之后新建的 timeline 可以拥有各自的帧率设置,需要在创建时单独指定。If you inadvertently change the project frame rate, you can always change it back in the Project Settings before creating any timelines. Once you’ve created a timeline in a project, the Timeline Frame Rate in Project Settings cannot be changed, although timelines you create subsequently can have their own individual settings, which you will need to set when you create the new timelines.
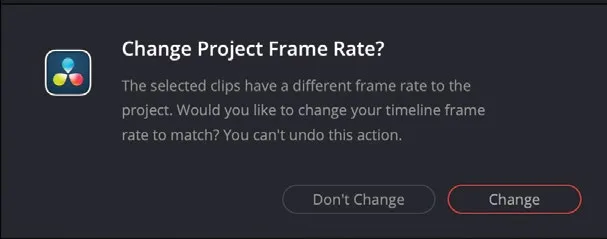
- 点击 Cancel 保持当前工程帧率。B-Roll 素材会被加入 Media Pool 中的 B-ROLL bin 里。Click Cancel to keep your current project’s frame rate. The B-Roll clips are added to the media pool in the B-ROLL bin.
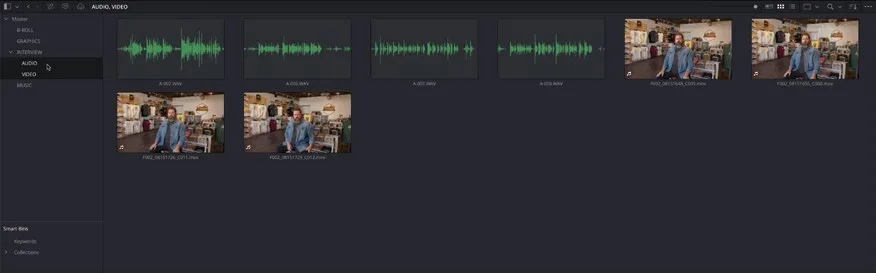
- 在 Media Storage 浏览器中选中 GRAPHICS、INTERVIEW 和 MUSIC 三个文件夹,拖到 Media Pool 的 bin 列表中。In the media storage browser, select the GRAPHICS, INTERVIEW, and MUSIC folders and drag them to the bin list in the media pool.
其余素材会按 Organ Mountain Outfitters 源文件夹的目录结构,以一系列 bin 的形式加入 Media Pool。The rest of the media is added to the media pool in a series of bins that reflect the folder structure of the Organ Mountain Outfitters source folder.
TIP · 提示Media Pool 会按 bin 的创建顺序自动排序,新建 bin 出现在 bin 列表底部。如需更改排序,可在 bi…
Media Pool 会按 bin 的创建顺序自动排序,新建 bin 出现在 bin 列表底部。如需更改排序,可在 bin 列表中右键点击某个 bin,选择 Sort By > Name、Date Created、Date Modified 或 User,并按升序或降序排列。The media pool automatically sorts bins in the order they were created, with newly created bins appearing at the bottom of the bin list. You can change the sort order by right-clicking a bin in the bin list and choosing Sort By > Name, Date Created, Date Modified, or User, in an ascending or descending order.
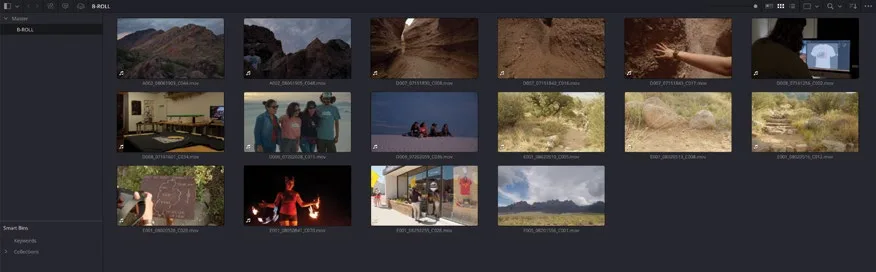
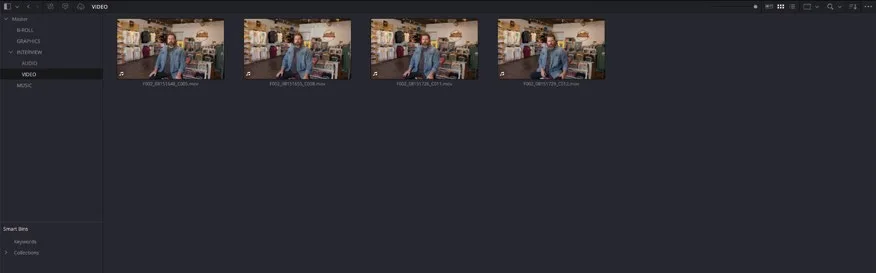
Resync Media Files(重新同步媒体文件):如果导入媒体时直接用硬盘上的文件夹为工程创建了 bin,那么可以使用 Resync Media Files 选项,自动把这些硬盘文件夹中新增的媒体文件导入进来。Resyncing Media Files If you choose to import media using the folders on your system’s hard drives to create the bins in your projects, then you can use the Resync Media Files option to automatically import any newly added media files to those folders on your hard drive.
只需右键点击一个 bin,选择 Resync Media Files。自上次导入或同步之后,源文件夹里新增的所有文件都会自动加入该 bin。Simply right-click a bin and choose Resync Media Files. Any files that have been added to the source folder since import or the last resync operation will be automatically added to the bin!
另外,也可以启用 Automatically Resync Media Files,让同步过程全自动进行——源文件夹里新增的媒体文件会被自动导入工程中的对应 bin,无需手动操作。Alternatively, you can choose to enable Automatically Resync Media Files. This automates the resyncing process, importing any new media files to the bin in your project that are added to the source folder without you having to do anything else!
本卡术语Terms in this card
B-roll 素材B-roll 媒体夹Bin 媒体池Media Pool 媒体存储浏览器Media Storage Browser 同步媒体文件Sync Bin 时间线Timeline 交付页Deliver page 帧率Frame Rate 窗口Power Window 项目设置Project Settings
相关知识卡Related Cards
媒体页面Media Page 媒体池Media Pool 媒体存储浏览器Media Storage Browser 同步媒体文件Sync Bin 时间线Timeline