使用 HDR 色轮Using the HDR Wheels
13 steps
简介Overview
前面的课程里你已经大量使用过 Lift、Gamma 和 Gain 三个色轮。正如之前讲过的,这三个色轮之间有很大的重叠区域——调整高光时,中间调也会受到连带影响。长期以来这些控件一直是平衡画面影调的主要工具,但随着相机技术发展,现在能拍摄更高动态范围和更广色域的画面。这意味着只靠一个影响高光的控件已经不够了,因为高光本身也分成了多个层次。HDR 色轮正是为了解决这个问题:它把三个控件扩展成六个,让你可以分别、更精确地调整阴影、中间调和高光的不同区域。So far, you have used your Lift, Gamma, and Gain wheels quite a lot. As already explained, there is a large overlap between the three wheels, meaning that when you move something in the highlights, it will affect some of the midtones as well. These controls have been used for a long time to balance shots; however, cameras have been developed to shoot higher dynamic ranges and wider color gamuts. This means that just having a tool that affects the highlights may no longer be enough since the highlights have multiple ranges. This is where HDR color wheels come in. Rather than having three controls, the HDR wheels have six and allow you to adjust more precisely areas of shadows, midtones, and highlights.
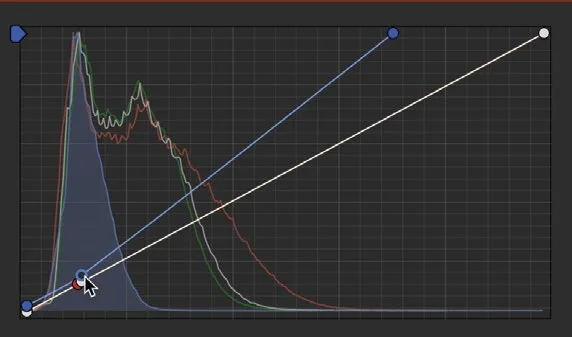
- 在时间线上选中片段 07。Select clip 07 in the timeline.
- 把 Offset 主控轮向左拖动,让片段的整体亮度略微降低,数值大约到 18.00。Drag the Offset master wheel left just to bring the overall level of the clip down slightly, to around 18.00.
- 按 Option-S(macOS)或 Alt-S(Windows)添加第二个节点。Add a second node by pressing Option-S (macOS) or Alt-S (Windows) on the keyboard.
- 在左侧窗口中点击 HDR 工具按钮。In the left window, click the
HDR toolsbutton.
窗口中会显示四个色轮,外观和你之前用的色轮很像。窗口顶部有一排六个圆形图标,用来切换显示哪六个控件。默认情况下,Global 色轮始终可见,它的作用和之前用的 Offset 色轮非常接近。The window shows four wheels that look similar to the controls you have been using. Along the top are six circular icons that allow you to choose which of the six controls you see. By default, the Global wheel is always present and works very much like the Offset wheel you have been using.
TIP · 提示如果想把 Global 色轮的位置复用到另一个控件上,可以在 HDR 色轮选项中勾选 Bank Global With…
如果想把 Global 色轮的位置复用到另一个控件上,可以在 HDR 色轮选项中勾选 Bank Global With Color Wheels 来调整。If you would like to use the position of the Global wheel for another control, this can be adjusted in the HDR wheel options by choosing the Bank Global With Color Wheels setting.
- 点击
HDR窗口中最右侧的圆形图标,色轮的标签会切换为 Light、Highlight 和 Specular。Click the rightmost circular icon in theHDRwindow, and the wheel labels will change to Light, Highlight, and Specular.
这三个色轮用来影响画面中较亮的区域,但和之前只有一个高光控件不同,你现在可以分别调整三段高光。每个控件旁的 Highlight按钮可以显示该色轮正在作用的区域。These wheels will affect the brighter areas of the image, but rather than having just one control, you now have three. You can also see which area the wheel is affecting by using the Highlight button for each control.
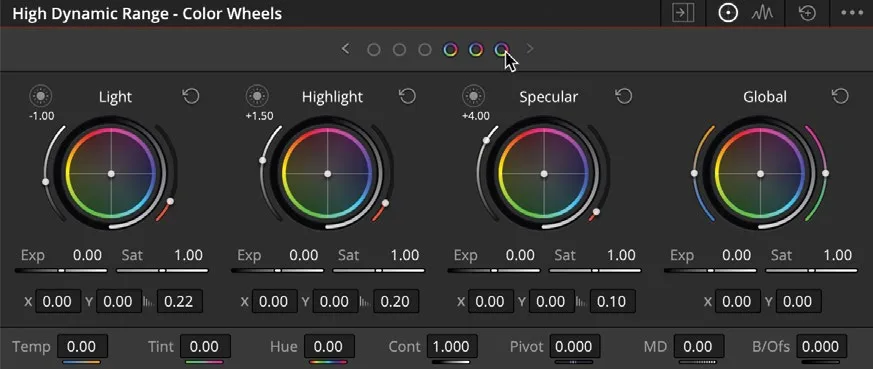
- 按住 Highlights 色轮上的
Highlight按钮不放,检视器画面会变为灰色,只有天空部分保留彩色。变为灰色的区域表示不会受到该色轮的影响。Click and hold the Highlight button on the Highlights wheel, and you will see the viewer turn gray, apart from the sky in the image. Anything that turns gray will not be affected by that color wheel. - 确认选中 02 号节点,使用 Highlights 色轮把中心点向蓝色方向拖动,几乎拖到边缘位置。Make sure node 02 is selected and, using the Highlight wheel, drag the center point toward blue almost all the way to the edge.
- 把
Saturation滑块向右拖到大约 1.10,让蓝色更加鲜艳。你可以继续加大蓝色的强度,随意调整到自己满意的程度。Drag the Saturation slider right until it is around 1.10 to make the blue more vibrant. You can continue to push the blue as much as you like.
- 向左拖动 exposure 滑块,让天空略微变暗,数值大约为 -0.80。Drag the exposure slider left until the sky becomes slightly darker, around -0.80.
NOTE · 注意提示:HDR 色轮相比标准色轮的优势在于,它能针对特定亮度范围内的颜色单独调整饱和度。要用标准色轮达到同样效果,就必须借…
提示:HDR 色轮相比标准色轮的优势在于,它能针对特定亮度范围内的颜色单独调整饱和度。要用标准色轮达到同样效果,就必须借助 secondary 工具。HDR wheels have an advantage over the standard color wheel because they can adjust the saturation of a color in a specific range of luminance. To achieve this with a standard color wheel, a secondary tool would have to be used.
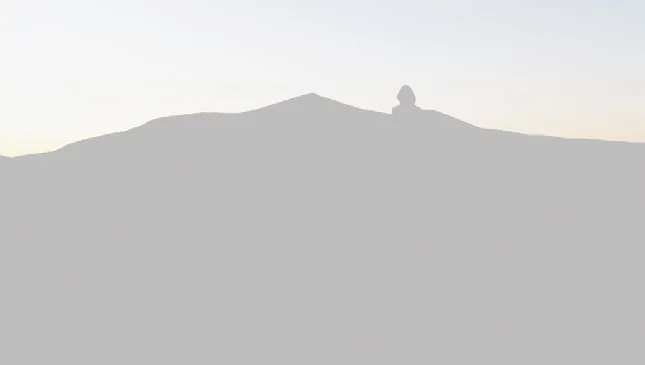
天空看上去不再发灰了,但仍然有些平淡,需要更丰富的色彩层次。The sky now looks much less washed out; however, it still looks a little flat. It needs a wider range of colors.
- 在 Specular 色轮上,将中心点直接向上拖动,给部分天空加入洋红色调。Using the Specular wheel, drag the center point straight up to add a magenta hue to part of the sky.
TIP · 提示提示:HDR 色轮之间存在重叠区域,调整时会从一个控制平滑过渡到另一个,类似标准色轮。但与标准色轮不同的是,这些分区范围…
提示:HDR 色轮之间存在重叠区域,调整时会从一个控制平滑过渡到另一个,类似标准色轮。但与标准色轮不同的是,这些分区范围可以根据需要调整。The HDR wheels have overlap between them, so adjustments have a roll-off from one control to another, much like the standard color wheels. Unlike the standard color wheels, however, these zones can be adjusted if needed.
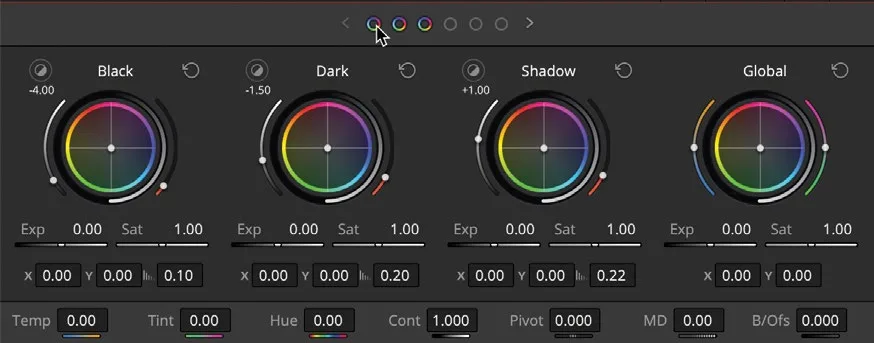
- 点击最左侧的色轮图标,直到控件显示为 Black、Dark 和 Shadow。这些色轮会影响画面中较暗的区域。Click the leftmost wheel icon until the controls show Black, Dark, and Shadow. These wheels affect the darker areas of the image.
- 在 Shadow 控件中,将 exposure 向左拖动到约 -0.60,让沙丘暗部更清晰、更有层次。如果想查看当前影响的区域,按住并保持
Highlight按钮即可。Click and drag the exposure setting to the left in the Shadow control to around -0.60 to get a more defined, darker side of the sand dune. Click and hold on theHighlightbutton if you want to see the area you are affecting. - 将 Shadow 色轮的中心点向红色方向拖动,直到沙丘右侧开始泛红。Drag the center of the Shadow wheel toward red until the right side of the dune starts to look redder.
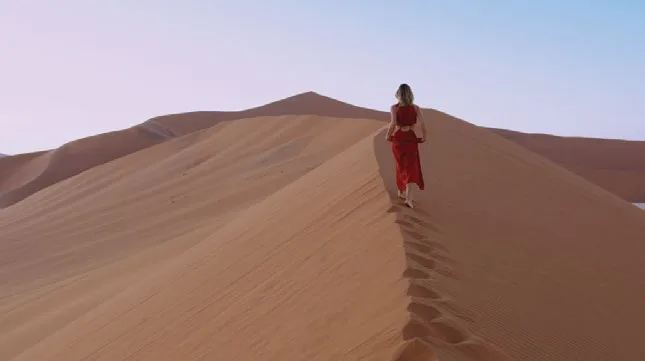
可以看到,HDR 色轮允许你选取更精确的动态范围区间,非常适合调校高动态范围摄影机拍摄的素材。如果想进一步精细化,可以结合 secondary 调色控件来隔离画面局部,这部分内容将在下一课介绍。As you can see, the HDR wheels allow you to select more focused areas of dynamic range, which can be ideal for adjusting clips from cameras that shoot a high dynamic range. You can get even more precise by isolating areas of an image using secondary grading controls that we will explore in the next lesson.
可以看到,使用 primary 控件既能平衡画面色彩,也能初步赋予画面调性。这些控件在调色中会频繁使用,熟练掌握非常有必要。如果愿意,可以复制当前时间线,应用所学继续对素材做进一步的调色练习。You can see that using the primary controls allows you to balance the color in your shots and start to give them a feel. You will use these controls a lot when you grade, so it is a good practice to get to know them. If you wish, you can duplicate this timeline and carry on grading these shots by applying what you have learned so far.
本卡术语Terms in this card
时间线Timeline 调色轮Color Wheels Gain(亮部)Gain Gamma(中间调)Gamma HDR 色轮HDR Wheels Lift(暗部)Lift 偏移Offset 饱和度Saturation 窗口Power Window 调色Grade 静帧Still 节点Node