用节点分离各项调色Using Nodes to Separate Corrections
13 steps
简介Overview
在调色过程中,有时你会发现把基础影调校正和其他调整(比如增强对比度)拆开到不同节点里更顺手。基本思路是:第一个节点负责把画面调平衡,平衡之后,再用后续节点做进一步的调整。Sometimes, as you balance shots, you may decide adjustments are best performed by separating initial tonal corrections from other adjustments, such as pushing contrast into a shot. This builds on the idea that the first node is the initial balance, and further adjustments can be made once a shot is balanced correctly.
第一条镜头之前用 Offset 做的平衡基本可用,但要达到更好的效果还需要继续调整:对比度不够,画面也有些偏蓝。For the first shot, the offset balance you did was OK, but there is more work to do in the grade to get the shot looking really good. The contrast needs to be better, and the shot still looks a little blue.
- 选中刚刚创建的节点,在左侧调色面板中把 Lift master wheel 向左拖动,使数值显示为 -0.04。On the node you just created, go into the left palette and drag the Lift master wheel to the left so the values read -0.04.
- 把 Gain master wheel 向右拖动,让高光部分刚好触及 1024 参考线,数值大约在 1.25。Drag the Gain master wheel to the right until the highlights touch the top of the 1024 line. The values should be around 1.25.
此时画面对比度会明显改善:高光部分不再发灰,暗部也更加扎实。The contrast in the image should look much better now since the brighter areas look less dull and the shadows look more defined.
接下来不要用 Bypass 关闭整条调色链路,而是只想查看刚才这步调整前后的对比效果。Rather than Bypass the grade, you now just want to see the before and after of the adjustment you have just made.
- 点击节点左下角的编号即可关闭该节点,关闭后编号会变灰。Click the number of the node in the bottom left corner to turn off the node. You will see it turn gray when it’s off.
现在画面上只剩原始平衡节点在生效。Now you will see the shot with just the original balance node on.
- 再次点击该编号,或在键盘上按 Command-D / Ctrl-D,即可把选中的节点重新打开。Click the number again or press Command-D/Ctrl-D on the keyboard to turn the selected node back on.
对比度还可以再加强一些。Contrast 工具可以在不超过之前设定的白点和黑点的前提下提升整体对比度;而 Pivot 则相当于改变对比度作用的基准点,让你能够把画面整体推得更亮或更暗。The contrast still needs punching up a little. The Contrast tool allows you to push the contrast in your shot without going beyond the set white and black points that you made. The pivot essentially changes the point from where the contrast adjustment is made to allow you to make the image brighter or darker.
- 在 Contrast 参数上,把鼠标放到数字上向右拖动,数值调到约 1.200,为画面增加更多对比度。In the Contrast parameter, place the mouse pointer over the numbers and drag to the right to around 1.200 to add more contrast to the shot.
- 画面亮度需要稍微压低,用同样的方式拖动 Pivot 参数,使数值约为 0.851。The brightness needs to come down slightly, so drag the Pivot parameter in the same way until it reads around 0.851.
TIP · 提示提示:如需重置任何参数,在界面中双击该工具标签即可…
提示:如需重置任何参数,在界面中双击该工具标签即可。To reset any of the parameters, simply double-click the tool label in the interface and the parameter will reset.
画面拍摄于沙漠环境,需要暖色调,但之前调色后仍有些偏蓝。我们再新建一个节点单独处理这一步,避免影响已有的调整。The shot now needs warming since it is in the desert, and despite the earlier correction, it still looks a little blue. Again, we want to do this on a separate node, so we don’t need to alter the other changes we’ve already made.
- 右键点击 node 02,从右键菜单中选择
Add Node > Add Serial,或按 Option/Alt-S 添加一个串行节点。Right-click node 02 and choose Add Node > Add Serial from the contextual menu or press Option/Alt-S on the keyboard to add a serial node. - 确认选中 node 3(默认应已选中)。点击 Temp 参数并向右拖动,直到数值约为 1000,或画面达到满意的暖调效果。Make sure node 3 is selected (it should be by default). Click the Temp parameter and drag it right until it reads around 1000 or you feel the image is suitably warm enough.
TIP · 提示提示:除了拖动数值字段,也可以直接输入数值。双击参数值,输入新值即可…
提示:除了拖动数值字段,也可以直接输入数值。双击参数值,输入新值即可。In addition to dragging the number fields, the values themselves can be typed in. Simply double-click the parameter value and type in a new value.
最后,画面焦点偏软,可能与热气扰动有关。我们再添加一个节点来补偿锐度,完成整个调色。Finally, the focus in the shot looks a little soft, which could be due to the amount of heat haze in the image. We will add a final node to try to compensate for this and complete the look of the shot.
- 右键点击 node 03,从右键菜单中选择
Add Node > Add Serial,或按 Option/Alt-S 添加一个串行节点。Right-click node 03 and choose Add Node > Add Serial from the contextual menu or press Option/Alt-S on the keyboard to add a serial node. - 进入界面中间的窗口。Go into the middle window of the interface.
- 在中间工具栏中选择 Blur 工具。Select the Blur tool from the middle toolbar window.
- 将 Radius Blur 控件向下拖动到约 0.40,让前景和羚羊看起来更锐利一些。Click and drag the Radius Blur control down to around 0.40 so the foreground and the antelope start to look a little sharper.
TIP · 提示提示:使用锐化时要注意,它不仅会增强画面细节,也会放大已有的噪点,可能导致画质下降。使用锐化时应精细调整,以获得最佳效果…
提示:使用锐化时要注意,它不仅会增强画面细节,也会放大已有的噪点,可能导致画质下降。使用锐化时应精细调整,以获得最佳效果。When using sharpening, keep in mind that not only will you sharpen the image, but also any noise that exists. This can start to degrade the material. When using sharpening, make fine adjustments to get the best results.
- 点击数值或按 Command-D/Ctrl-D 关闭选中节点,对比查看锐化效果。Click the number or press Command-D/Ctrl-D on the keyboard to turn off the selected node to see the results of the sharpening.
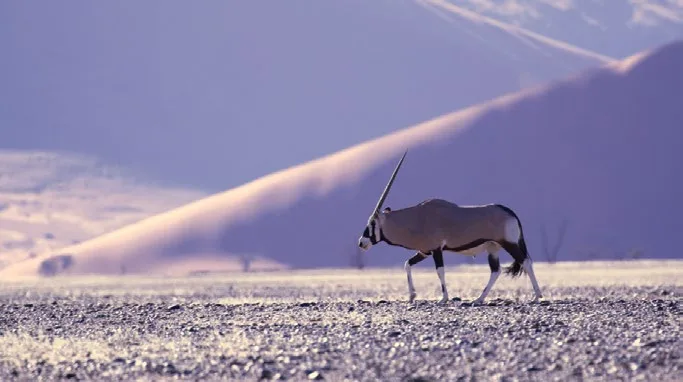
现在你应该能体会到节点的强大之处:它让你一步步搭建调色,之前的调整不会被打乱。每个节点都可以独立开关,所以和客户沟通时,你可以随时切换某个调整前后的效果,清楚地展示做了什么。比如这里你可以单独开关锐化节点,看到画面变清晰的过程,同时不影响其他调色。You can now start to understand how useful nodes are, since they allow you to build your grades a step at a time without affecting the changes you made previously. Since they can be turned on and off individually as well, when sitting with clients, you can easily toggle between before and after adjustments to show what has been done. In this case, you can toggle the sharpening on and off to see the softening being fixed without affecting any of the other grades.
TIP · 提示提示:想深入了解节点,推荐阅读 Daria Fissoun 的《The Colorist's Guide to DaVi…
提示:想深入了解节点,推荐阅读 Daria Fissoun 的《The Colorist's Guide to DaVinci Resolve 20》,里面详细讲了为什么用节点,以及不同节点类型的用途。If you want to know about nodes in more detail, The Colorist’s Guide to DaVinci Resolve 20, by Daria Fissoun, explains why you use nodes and the different types of nodes available.
本卡术语Terms in this card
对比度Contrast Gain(亮部)Gain Lift(暗部)Lift 偏移Offset 窗口Power Window 调色Grade 静帧Still 模糊Blur 节点Node