调整单个色彩通道Adjusting Individual Color Channels
7 steps
简介Overview
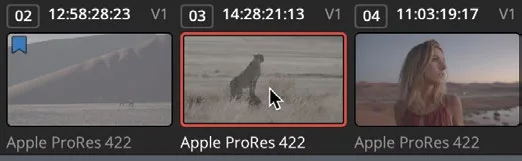
DaVinci Resolve 的强大之处在于工具集的灵活性,同一个效果往往有多种实现方式。为了进一步了解一级校色工具,我们将用另一种方法在这条新片段上做平衡校正。Much of the power of DaVinci Resolve comes from the flexibility of its toolset, which provides many ways to do the same thing. To learn more about the primary corrector toolset, you’ll explore another method for creating a balanced correction on a new shot.
这条片段需要做色调和色彩平衡,但这次不用色轮和主轮,而是使用 Lift、Gamma、Gain 下方的亮度、Red、Green、Blue 数值栏进行精细调整。The clip requires a tonal and color balance, but instead of using the color wheels and master wheels, we’ll use the individual number fields for luminance, red, green, and blue below the Lift, Gamma, and Gain to make fine-tuned adjustments.
这些控件与主轮和色轮的作用类似,但能针对红、绿、蓝分别调整,并在 Lift、Gamma、Gain 区域独立控制亮度,因此更适合在画面不同区域单独平衡某个色彩通道。做色调调整时,Y(亮度)栏可以在不改变饱和度的情况下调整亮度。These controls allow you to make color and luminance adjustments similar to the master and color wheels but provide explicit red, green, and blue controls and separate luminance adjustments in the Lift, Gamma, and Gain regions. So, you might find them more effective tools for balancing specific color channels in different regions of a shot. For tonal adjustments, the Y, or luminance bar, allows you to adjust luminance without changing saturation.
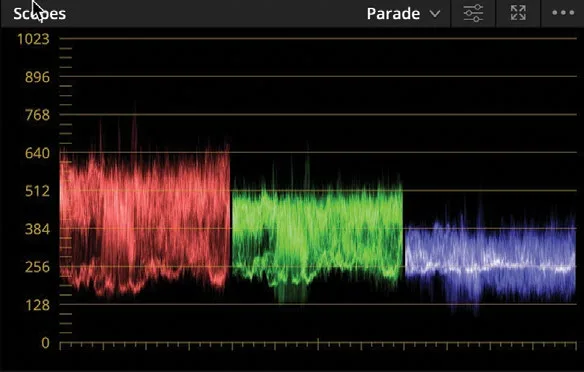
画面高光偏低、暗部略偏高,可以从示波器上确认。先从设置黑点开始。The image has low highlights as well as slightly raised shadows that can be confirmed in the scopes. Let’s start by setting our black point.
- 在 Lift 区域,把 Lift Y 数值栏向左拖动,直到 Parade 中绿色和蓝色通道的底部贴近 0 线,数值大约为 -0.08。In the Lift region, drag the Lift Y number field to the left until the bottom of the green and blue traces in the parade touch the 0 line, with the value at around -0.08.
可以看到蓝色通道比红、绿略低一点,我们来修正它。You can see the blue channel is ever so slightly lower than the red and green, so let’s rectify that.
- 把 Blue 数值栏向右拖动,让 Parade 底部对齐。只需微调一点,使通道底部都处于 0.01 左右即可。Drag the Blue number field to the right to level off the bottom of the parade. This needs only a slight adjustment until the bottom of the traces are level around 0.01
画面暗部看起来好多了,接下来调整亮部。The darker areas of the image now look better, so we can go ahead and adjust the brighter parts.
- 在 Gain 区域,把 Y 参数向右拖动,直到通道顶部刚好超过 896 线,数值大约为 1.30。In the Gain region, drag the Y parameter right until the top of the traces sit just above the 896 line and the value is around 1.30.
画面确实变亮了,但看起来有点偏暖——观察 Parade 就能发现,通道顶部并不齐平。The shot certainly looks brighter now; however, it looks a little too warm, and again, looking at the parade, you can tell this by the fact that the traces are not level at the top.
- 在 Gain 区域的 Blue 数值栏上,把参数向右拖动,直到 Parade 顶部对齐,画面看起来更冷一些。In the Gain blue number field, drag the parameter to the right until the tops of the parade traces line up and the shot looks cooler.
我们还可以进一步调整中间调。中间调本身比较主观,在示波器上很难精确测量,所以如何处理由你自己判断。We could go a step further by adjusting the midtones. Remember that midtones are more subjective and are quite difficult to measure on a scope, so this will be your judgment call on what you want to do with the shot.
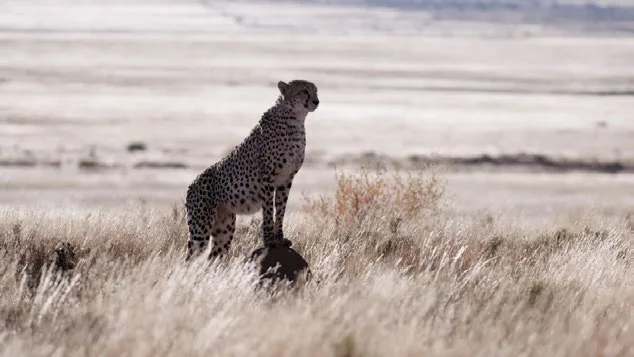
在这个画面中,猎豹看起来偏暗。In this case, it looks as though the cheetah is a little dark.
- 拖动 Gamma 调色轮下方的 Y 参数向右移动,直到你觉得猎豹的亮度合适、细节更清晰,参数值大约为 0.05。Drag the Y parameter under the Gamma wheel right until you feel the cheetah is a little brighter and you can see more detail, approximately 0.05.
- 选择 Bypass,或按 Shift-D 查看原始画面,再按一次 Shift-D 切回你调色后的效果。Choose Bypass, or press Shift-D, to see the original image, and then press Shift-D again to see your grade.
本卡术语Terms in this card
时间线Timeline 色彩管理Color Management 调色轮Color Wheels Gain(亮部)Gain Gamma(中间调)Gamma Lift(暗部)Lift 一级校色器Primary Corrector 饱和度Saturation 示波器Scopes 调色Grade 静帧Still