TASK 2Task 2
添加音量关键帧Add Volume Keyframes
9 steps
- 如有必要,先取消选中时间线上的所有片段,将播放头移到第一段采访片段的中心,点击 Detail Zoom(细节缩放)按钮,将片段居中显示在时间线中。If necessary, deselect all the clips in the timeline, move the playhead over the center of the first interview clip, click the
Detail Zoombutton, and center the clip in the timeline. - 将鼠标移到时间线的音频部分,使用 Shift+滚轮 放大音频轨道,方便观察音频片段的波形。Place your mouse pointer over the audio portion of the timeline and use Shift-scroll to increase the size of the audio tracks so it’s easier to view the waveform of the audio clip.
观察片段的波形,你就能清楚地看到音量变化:片段开头波形很大,这是峰值所在,音量最高,也是归一化过程设定的 -9 dBFS 目标点;但说完前几个词之后,波形明显下降。Looking at the waveform of the clip, you should be able to clearly see what’s happening to the audio levels. The clip starts with a large waveform, the peak of the clip, where the audio level is the highest, and this is the point of the clip that has been set to the -9 dBFS target level as part of the normalization process—but then it seems to drop considerably after the first few words have been spoken.
这是很常见的问题:无论录音师在现场多么仔细地设置电平,由于受访者通常会用力开始回答,再逐渐减弱,音量常常会出现这种波动。有时是受访者面对镜头时一开始有点紧张,也可能是This is a common enough problem: no matter how carefully the audio recordist is at setting recording levels on location, you often get these variable levels since people will generally begin their answers forcefully before dropping off slightly. Sometimes it’s due to feeling a little anxious at first in front of the camera, or possibly it’s because
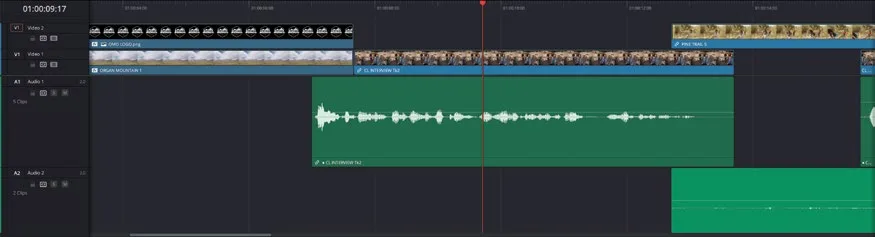
他们在回答过程中逐渐跑题。无论哪种情况,都需要把片段其余部分的峰值也拉到 -9 dBFS 左右,才能保证音量一致。they start to lose the thread of what they’re saying as they progress through an answer. Either way, you really need the rest of the audio in the clip to be peaking around -9 dBFS for a consistent level.
NOTE · 注意注意:-9 dBFS 的峰值仍然不一定是“正确”的电平。此阶段的目标只是让各段对白的音量保持一致…
注意:-9 dBFS 的峰值仍然不一定是“正确”的电平。此阶段的目标只是让各段对白的音量保持一致。This still doesn’t mean a peak level of -9 dBFS is the correct level. You’re still only concerned with getting a consistent level across the dialogue clips.
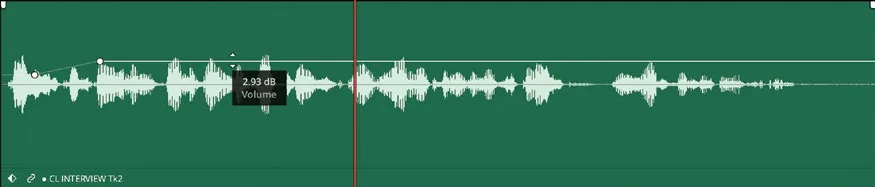
- Option-click(macOS)或 Alt-click(Windows)波形中第一个大峰值之后的位置,在音量条上添加第一个 keyframe。Option-click (macOS) or Alt-click (Windows) the volume bar to add the first keyframe just after the large initial peak in the waveform.
- Option-click(macOS)或 Alt-click(Windows)在第三个稍低峰值之前的位置,添加第二个 keyframe。Option-click (macOS) or Alt-click (Windows) to add a second keyframe just before the third, slightly lower peak.
- 按住音量条上第二个 keyframe 之后的位置,查看 normalization 流程当前应用的电平调整。Click and hold the volume bar after the second keyframe to see the current level adjustment applied by the normalization process.
tooltip 显示调整值为 -3 dB。要让片段后半段音量回到与开头峰值以及时间线上其他对白片段相当的水平,需要对这一段施加 +6 dB 的调整。The tooltip shows an adjustment of -3 dB. To bring the rest of this clip back to a level comparable to the initial peak and the other dialogue clips in the timeline, you need to apply a +6 dB adjustment to this latter portion of the clip.
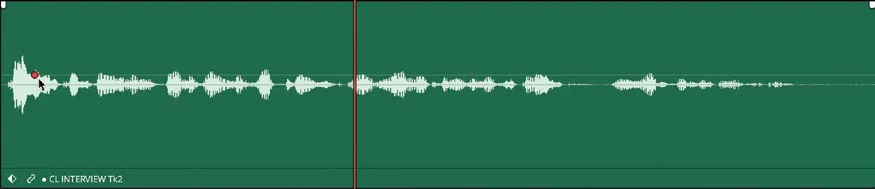
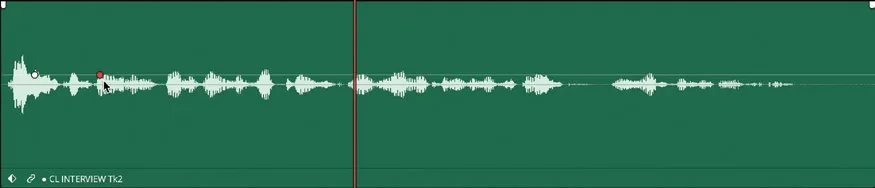
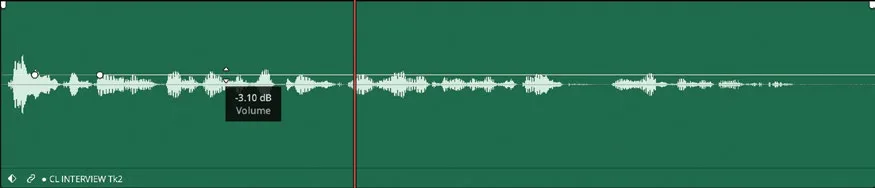
- 向上拖动音量条,直到 tooltip 显示约 3 dB。Drag the volume bar up until the tooltip reads approximately 3 dB.
TIP · 提示NOTE:如需更精确地调节音量,按住 Shift 键的同时拖动音量条…
NOTE:如需更精确地调节音量,按住 Shift 键的同时拖动音量条。For greater control over the precision of the volume level adjustment, hold the Shift key while dragging the volume bar.
- 再次播放该片段。Play the clip again.
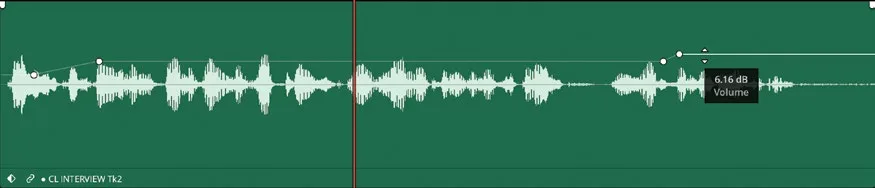
可以听到片段结尾 Chris 介绍语收尾时,电平又轻微下降。再加几个 keyframe 即可解决。Note how the levels at the end of the clip drop slightly again as Chris reaches the end of his introduction. A couple of additional keyframes will help.
- Option-click(macOS)或 Alt-click(Windows)再点击两次,在第一段音频片段末尾附近添加两个额外的 keyframe,并将这两个 keyframe 之后的电平调整到约 6 dB。Option-click (macOS) or Alt-click (Windows) twice more to add two additional keyframes to the volume bar toward the end of the first audio clip and adjust the level after these keyframes to around 6 dB.
经过这些调整,片段在整个时长内的音频电平更加一致。With these adjustments, the clip now has a more consistent audio level throughout its duration.
- 对 Audio 1 上的第五个片段 CL SUBCLIP 2 - Brand 重复上述流程:在第一个大峰值之后添加 keyframe,并把第二个 keyframe 之后的电平提升到约 4 dB。Repeat the process on the fifth clip on Audio 1, CL SUBCLIP 2 - Brand, adding the keyframes just after the first large peak and bringing the level after the second keyframe up to around 4 dB.
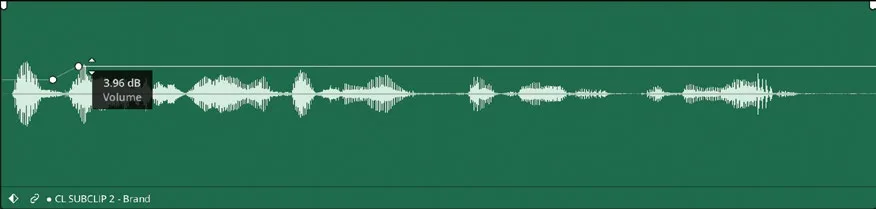
再在同一片段靠后的位置添加几个 keyframe,把之后的电平再上调约 1.5 dB,约为 5.5 dBFS。Add another couple of keyframes further through the same clip and raise the level after by about another 1.5 dB, to around 5.5 dBFS.
最后再回放一遍时间线,确认所有采访剪辑音量基本一致,没有明显偏大或偏小的片段。必要时继续添加关键帧。Finally, play back the timeline again to ensure that all the interview clips play at around the same level, and no part of the interview sounds noticeably louder or quieter than the rest. If necessary, add additional keyframes as required.
恭喜!你已经成功地对这组采访剪辑做了规范化和平衡处理。这是后续混音的良好起点。Congratulations. You have successfully normalized and balanced the interview clips for this timeline. This provides a good starting point from which to mix in the rest of the audio clips.
用关键帧去除多余声音Using Keyframes to Remove Unwanted Audio You can also use audio keyframes to help remove unwanted sounds.
也可以借助音频关键帧来去掉不需要的声音。Play the last interview clip on track Audio 1, listening carefully after Chris says, “That’s why we say….”
本卡术语Terms in this card
时间线Timeline 关键帧Keyframe 播放头Playhead 静帧Still 音频关键帧Audio Keyframes