使用 Fairlight FX 降噪Noise Reduction Using Fairlight FX
9 steps
简介Overview
用 keyframe 这样的简单技巧虽然能一定程度地清理音频,但遇到更棘手的杂音时,就需要更强力的手段。DaVinci Resolve 内置的 Fairlight FX 音频插件正是为此准备的。Using simple techniques like keyframes means you can clean up your audio edits to a certain degree, but sometimes you need to employ other methods to remove unwanted or distracting sounds. In certain circumstances, you can use Resolve’s powerful built-in Fairlight FX audio plug-ins.
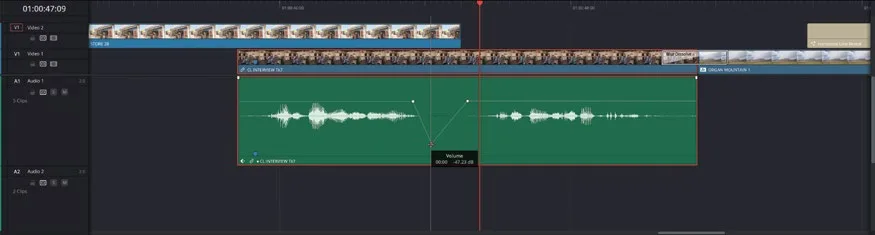
经过前面 normalize 和电平平衡的处理,音量听上去舒服多了。但副作用也随之而来:电平被推高的同时,背景噪声也被一并放大,尤其在 Chris 不说话的间隙,会听到明显的底噪 hiss。The audio level is much better due to the work you’ve done normalizing and balancing the clip’s levels. However, this has raised another issue with this clip, and possibly the interview as a whole: by increasing the levels, you have made the background noise much more prominent, which you can hear as a hissing noise, especially when Chris isn’t talking.
等把其他音轨(尤其是 Audio 3 上的音乐)混进来之后,这个问题大概率会被遮盖住。不过借此机会正好可以上手练一下 Fairlight FX 的降噪能力。Now, it’s very likely that once you start adding other parts of the mix back in (most notably the music on Audio 3), this won’t be a problem. However, this gives you the opportunity to learn how to employ the power of Fairlight FX for reducing audio noise.
- 点击界面左上角的
Effects按钮,打开 Effects Library。Click the Effects button in the top left of the interface to open the Effects Library. - 展开 Audio FX 组,选择 Fairlight FX。Open the Audio FX group and choose Fairlight FX.
Fairlight FX 插件随 DaVinci Resolve 一起安装,无需额外下载。The Fairlight FX plug-ins are installed along with DaVinci Resolve.
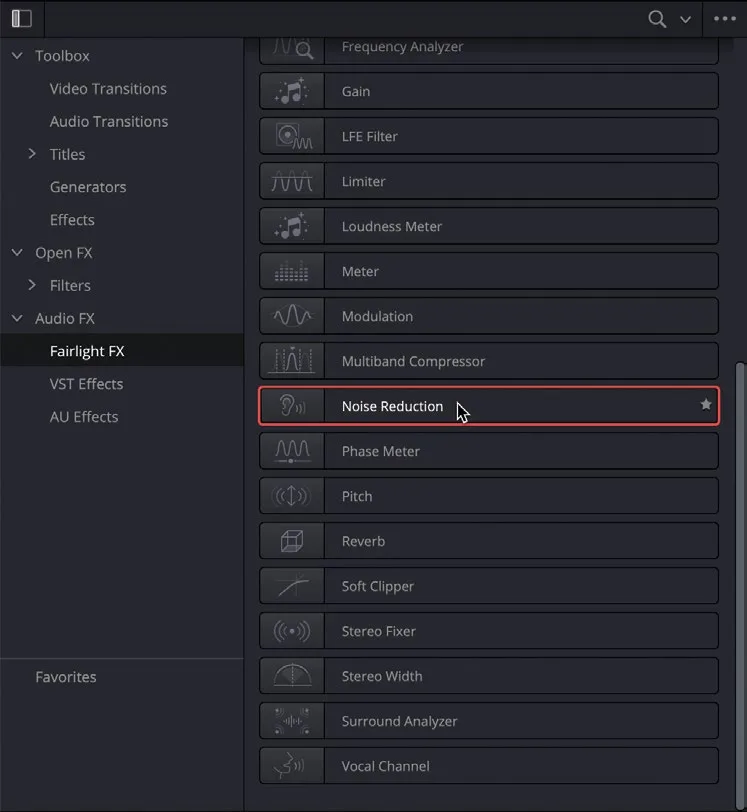
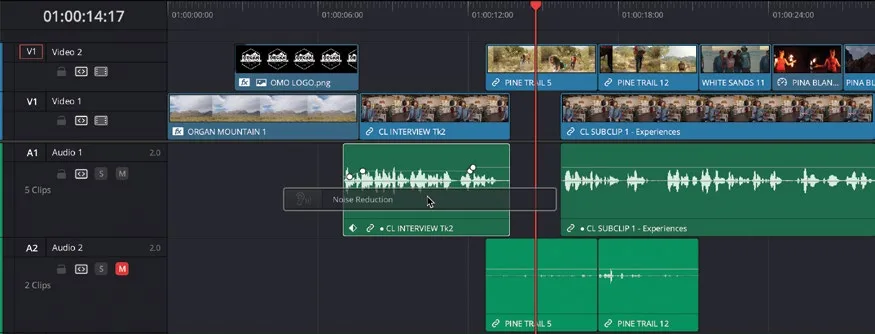
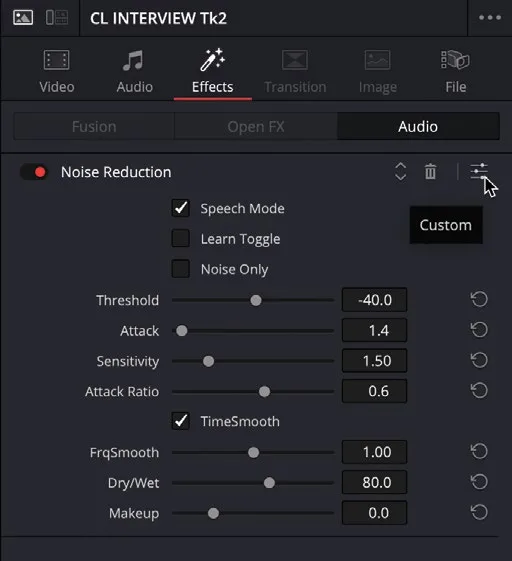
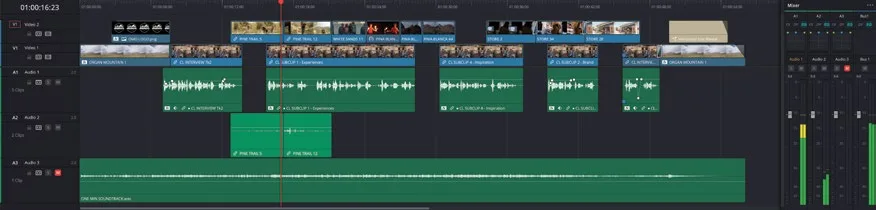
- 选中 Noise Reduction 插件,直接拖到时间线里 Audio 1 的第一条 clip 上。Select the Noise Reduction plug-in and drag it across to the first clip on Audio 1 in the timeline.
插件会被挂到这条 clip 上,并自动弹出控制窗口。The plug-in is added to the clip in the timeline, and its controls window opens.
Noise Reduction 插件支持手动和自动两种模式。作为入门,先用自动设置感受一下它的威力;想深入了解手动用法,参考 DaVinci Resolve 20 User Manual。The Noise Reduction plug-in can be used in either a manual or automatic mode. As a basic introduction to the power of this plug-in, and Fairlight FX plug-ins in general, you will use the automatic settings. For more information on using the plug-in manually, see the DaVinci Resolve 20 User Manual.
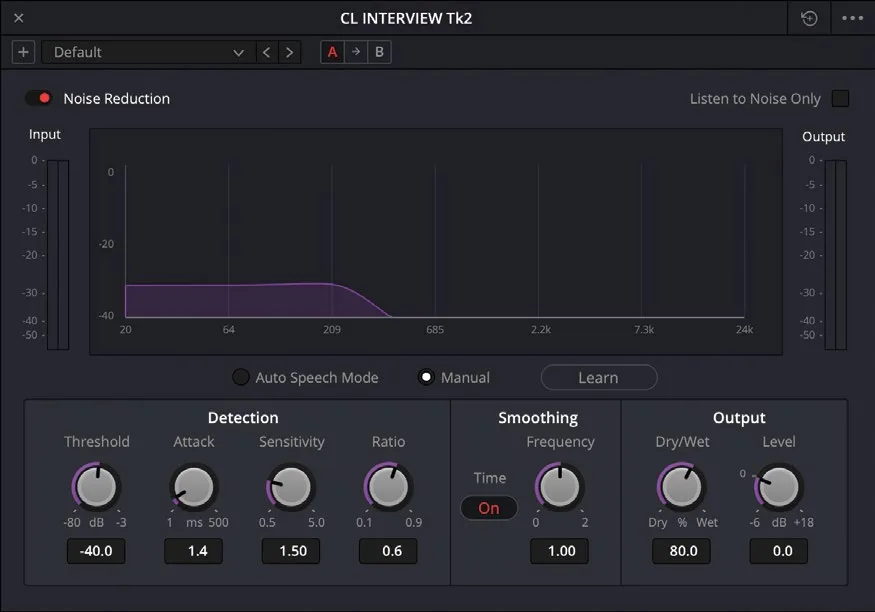
- 在 Noise Reduction 控制窗口里,选择 Auto Speech Mode。In the
Noise Reduction controlswindow, select the Auto Speech Mode. - 在时间线上播放该片段,试听 Noise Reduction 插件的处理效果。Play back the clip in the timeline to hear the results of the Noise Reduction plug-in.
- 关闭 Noise Reduction 插件窗口。Close the
Noise Reduction plug-inwindow.
NOTE · 注意提示:如需重新打开 Noise Reduction 插件的控制面板,先在时间线上选中该片段,然后打开 Effects I…
提示:如需重新打开 Noise Reduction 插件的控制面板,先在时间线上选中该片段,然后打开 Effects Inspector,再点击效果控制区右上角的 Custom按钮。To reopen the Noise Reduction plug-in’s controls, select the clip in the timeline and open the Effects Inspector, and then click the Custom button in the top right corner of the effects controls.
利用 Paste Attributes(粘贴属性)功能,可以把同一个 Noise Reduction 插件快速应用到其他所有对白片段上。You can quickly apply the same Noise Reduction plug-in to all the other dialogue clips by using Paste Attributes.
- 选中 CL INTERVIEW Tk2 音频片段,选择
Edit > Copy,或按 Command-C(macOS)/ Ctrl-C(Windows)复制该片段。Select the CL INTERVIEW Tk2 audio clip and choose Edit > Copy or press Command-C (macOS) or Ctrl-C (Windows) to copy the clip.
选中 Audio 1 轨道上的其他所有片段,选择 Edit > Paste Attributes,或按 Option-V(macOS)/ Alt-V(Windows)打开 Paste Attributes窗口。Select all the other clips in the Audio 1 track and choose Edit > Paste Attributes or press Option-V (macOS) or Alt-V (Windows) to open the Paste Attributes window.
Paste Attributes窗口顶部会显示你正在从哪个片段粘贴属性,以及要粘贴到多少个片段上。默认情况下,Volume(音量)和 Plugins(插件)两项都会被勾选。但这里你只需要把 Noise Reduction 插件粘贴到所选片段上,而不要复制音量调节!The top of the Paste Attributes window tells you which clip you are pasting attributes from and how many clips you’re pasting them to. However, by default, you’ll see that the Volume and Plugins options are both selected. In this case, you only want the Noise Reduction plug-in pasted to the selected clips, not the Volume adjustments!
在 Audio Attributes 下取消勾选 Volume,然后点击 Apply(应用)。For the Audio Attributes, deselect the Volume option and click Apply.
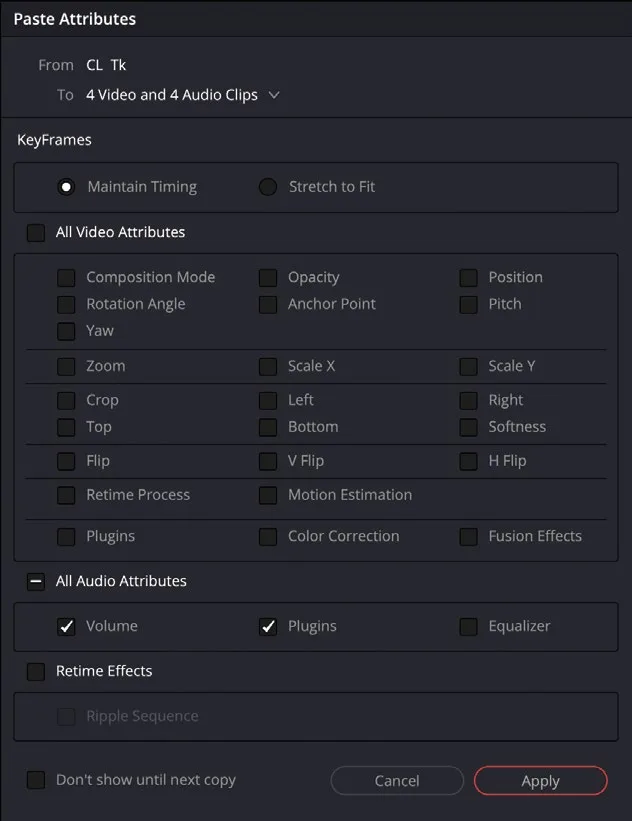
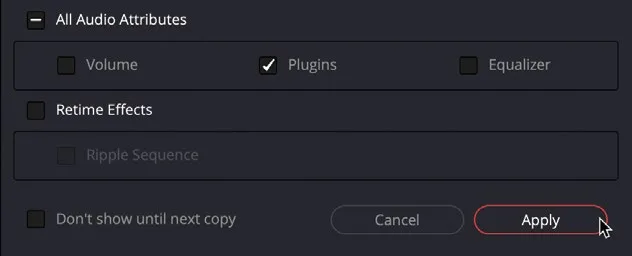
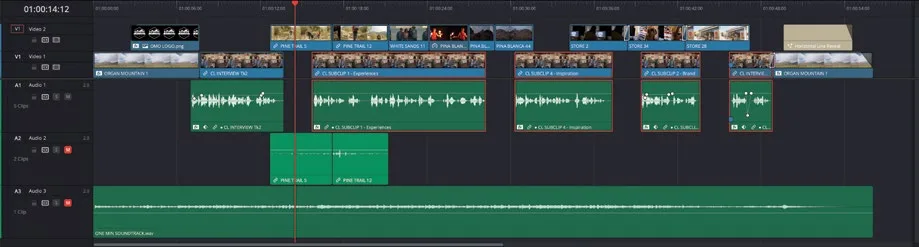
这样就会把第一个片段上的 Noise Reduction 插件应用到该轨道上的所有其他片段,同时保留你之前为每个片段单独调整的音量。This will apply the Noise Reduction plug-in copied from the first clip to all other clips in the track, while preserving all the individual volume adjustments you made earlier.
NOTE · 注意提示:如果需要追赶进度再进入下一步,可选中 TIMELINES bin,选择 File > Import > Timel…
提示:如果需要追赶进度再进入下一步,可选中 TIMELINES bin,选择 File > Import > Timeline,导航到 R20 Beginners Guide / Lesson 03 / Timelines / OMO PROMO CATCHUP 09.drt,然后点击 Open。If you need to catch up before moving to the next step, select the TIMELINES bin and choose File > Import > Timeline, navigate to R20 Beginners Guide / Lesson 03 / Timelines / OMO PROMO CATCHUP 09.drt and click Open.
本卡术语Terms in this card
媒体夹Bin 时间线Timeline 检查器Inspector 关键帧Keyframe 播放头Playhead 降噪Noise Reduction 标准化音量Normalize 窗口Power Window Fairlight 音频Fairlight