添加音频淡入淡出与转场Adding Audio Fades and Transitions
13 steps
简介Overview
把所有对白片段的电平调平后,接下来处理音效(effect),比如 Audio 2 上的内容。这类音频常被称为 SOT,即 "sound on tape",这个说法虽然过时,但现在仍用来指代用摄像机录制的音频。Having balanced all the dialogue clips, you can now turn your attention to the effects, such as those on Audio 2. This type of audio is often referred to as SOT, for “sound on tape,” an anachronistic term used to refer to audio recorded on a camera.
- 取消 Audio 2 的静音,从时间线起始处播放,听一听 Audio 2 上的两段音频相对于 Audio 1 上对白片段的听感。Unmute Audio 2 and play the beginning of the timeline, listening to how the two audio clips on Audio 2 sound against the dialogue clips on Audio 1.
第一段片段的电平比第二段略低。The first clip is a little low compared to the second clip.
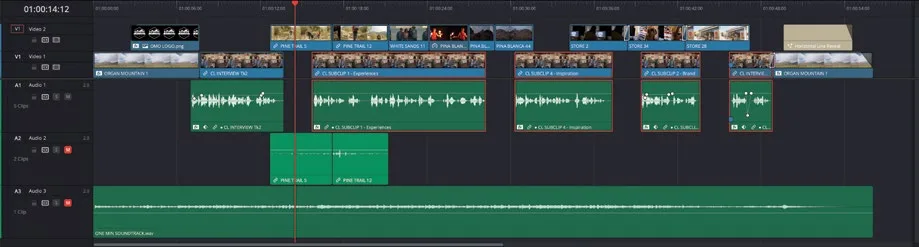
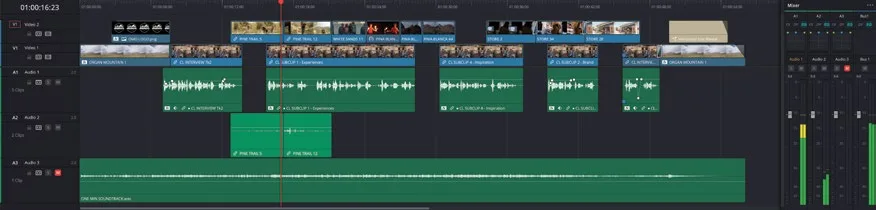
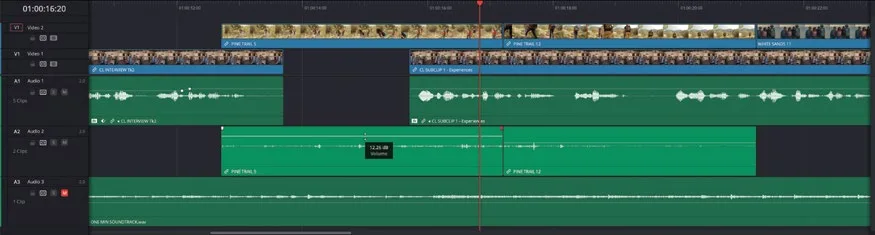
- 把 Audio 2 上第一段片段的音频电平提高大约 12 dB,让它的波形大小接近第二段片段。Increase the audio level of the first clip on Audio 2 by about 12 dB so its waveform is similar in size to the second clip.
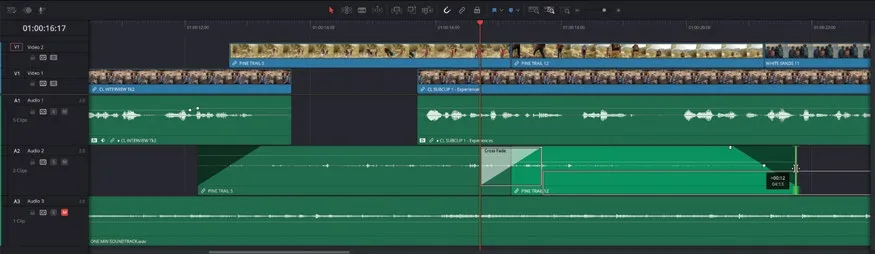
- 用 fade-in handle 把第一段 SOT 片段做大约一秒的淡入。Use the fade-in handle to fade in the first SOT clip over a duration of about a second.
- 用 fade-out handle 把第二段 SOT 片段做大约一秒的淡出。Use the fade-out handle to fade out the second SOT clip over a duration of about a second.
- 选中这两段片段之间的剪辑点(edit point),执行 Timeline > Add Audio Only Transition,或者按快捷键 Shift-T。Select the edit point between these two clips and choose Timeline > Add Audio Only Transition or press Shift-T.
剪辑点上会应用一个音频转场,把两段音频交叉淡化(cross fade),相比直接硬切,转场能让两段音频的衔接更平滑。An audio transition is applied to the edit point, cross fading the two audio clips and providing a smoother audio transition between the two clips than a simple cut.
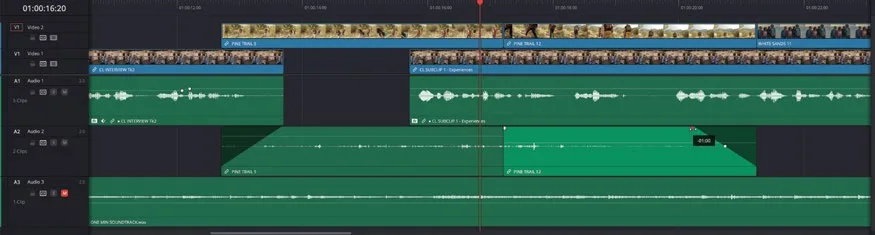
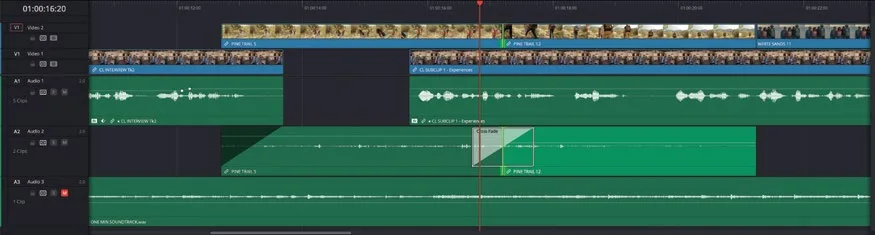
- 在时间线中选中该音频转场,打开 Inspector。Select the audio transition in the timeline and open the Inspector.
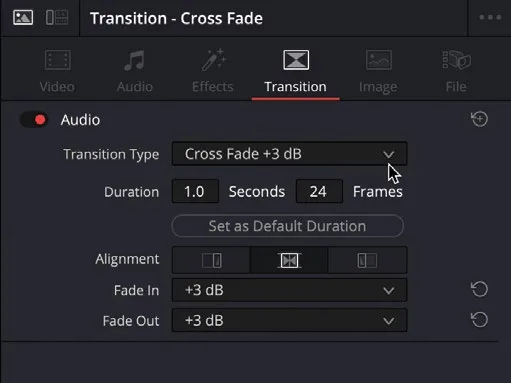
- 在音频转场的控制项中,把 Transition Type 改为 Cross Fade +3 dB。In the controls for the audio transition, change the Transition Type to Cross Fade +3 dB.
对两段片段做交叉溶解(cross dissolve)时,这个转场类型比默认的 0 dB 线性设置更合适。This type of transition is a more appropriate setting for cross dissolving two clips than the linear 0 dB default.
- 再次播放 Audio 2 上的两段片段,确认电平更加一致,并且淡入淡出能让片段的开头、中间衔接和结尾都过渡平滑。Play the clips on Audio 2 again to verify that their levels are more consistent and that the audio fades are working to provide a smooth transition into, between, and out of the clips.
如果想进一步精修整条 Audio 2 轨道的音频电平,可以使用 Audio Mixer(音频调音台)。To further refine the audio levels of the entire Audio 2 track, you can use the Audio Mixer.
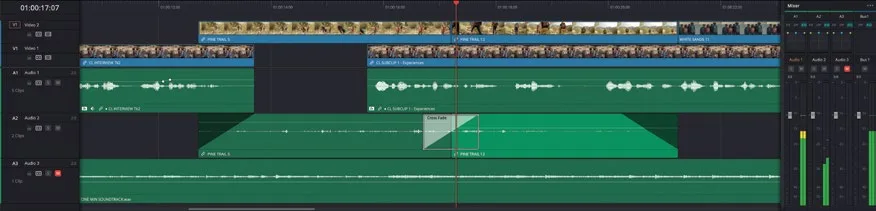
- 在 Audio Mixer 中,将 Audio 2 的电平下调约 -3 dB。In the Audio Mixer, adjust the level of Audio 2 by approximately -3 dB.
TIP · 提示双击滑块可将轨道电平重置回默认的 0 dB 起始位置…
双击滑块可将轨道电平重置回默认的 0 dB 起始位置。Double-click the slider to reset the track level to its default 0 dB starting position.
最后,你需要对 SOT 片段的入场和出场转场做精细调整。Finally, you will finesse the transition into and out of the SOT clips.
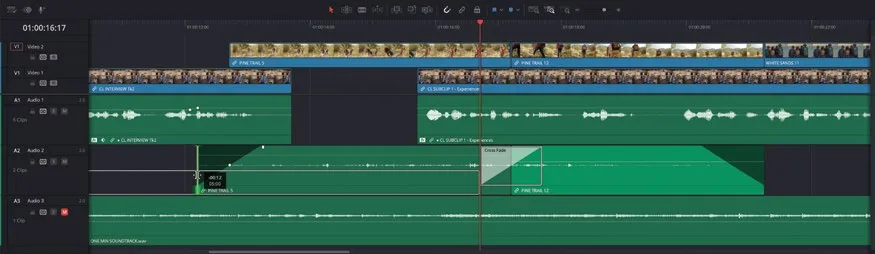
- 在时间线工具栏中点击 Linked Selection(链接选择)按钮,这样就能独立调整音频片段,而不受其链接视频片段的影响。Click the Linked Selection button in the timeline toolbar. This will enable you to adjust the audio clips independently of their linked video clips.
- 将 Audio 2 上第一个片段的入点向左滚动(Roll)约 12 帧,让它在画面剪辑点之前就开始轻微淡入。Roll the start of the first clip on Audio 2 to the left by about 12 frames so that it starts fading in slightly before the visual cut.
- 将第二个片段的出点向右滚动(Roll)约 12 帧,让它在画面剪辑点之后才完全淡出。Roll the end of the second clip to the right by about 12 frames so it finishes fading out completely after the visual cut.
NOTE · 注意如果 Snapping(吸附)影响了你修剪的精度,可以在调整音频片段时按 N 快速关闭吸附;松开鼠标后,吸附会自动重新启…
如果 Snapping(吸附)影响了你修剪的精度,可以在调整音频片段时按 N 快速关闭吸附;松开鼠标后,吸附会自动重新启用。If you find that Snapping is interfering with the accuracy of your trimming, press N to quickly disable Snapping as you adjust the audio clips. When you release the mouse button, Snapping will be automatically re-enabled.
- 完成后,再次点击
Linked Selection按钮,或按 Shift-Command-L(macOS)/ Shift-Ctrl-L(Windows),重新启用链接选择。Once completed, click theLinked Selectionbutton again or press Shift-Command-L (macOS) or Shift-Ctrl-L (Windows) to re-enable Linked Selection.
别忘了在制作过程中随时精修单个片段或轨道的电平,让混音更完美。不过现在,先把音乐加回到混音中。Don’t forget that you can always refine the levels of individual clips or tracks to perfect the mix as you’re working. However, for now, you’ll bring the music back into the mix.
音频转场的类型:DaVinci Resolve 提供三种音频转场,可以通过 Inspector 中的 Transitions 控件访问(就像你刚才那样操作),也可以在 Effects Library 的 Audio Transitions 类别中找到。音频转场的添加、调整、保存为预设以及设为标准转场的方式都与视频转场一致(参见上一课)。Different Types of Audio Transitions DaVinci Resolve has three types of audio transitions, which you can access through the Transitions controls in the Inspector as you just did or via the Effects Library under the Audio Transitions category. Audio transitions can be applied, adjusted, saved as presets, and set as the Standard Transition in the same way as video transitions (see the previous lesson).
默认的标准音频转场是 Cross Fade 0 dB(0 dB 交叉淡化)。虽然看起来这是最自然的音频交叉淡化方式,但由于音频电平的特性,交叉淡化过程中会产生轻微(虽然几乎察觉不到)的电平下降。By default, the Standard Audio Transition is the Cross Fade 0 dB. While this would seem to be the natural audio cross fade you’d want to use, due to the nature of audio levels, it can result in a slight (albeit almost imperceptible) dip in the levels during the cross fade.
Cross Fade +3 dB 能缓解这个问题,它在淡出/淡入的初始阶段对音量做斜坡式调整,速度更慢。这种方式也称为恒定功率交叉淡化(constant power cross fade),常用于音乐或音效片段的交叉淡化。Cross Fade +3 dB minimizes this issue by applying a ramped adjustment to the levels where the audio is initially faded out/in slower. This is sometimes referred to as a constant power cross fade and is commonly used when cross-fading music or sound effect clips.
Cross Fade -3 dB 与恒定功率淡化相反,淡出/淡入的初始速度更快,适合需要将音乐完全淡出的场景。Cross Fade -3 dB is the opposite of the constant power fade, whereby the audio is initially faded out/in faster and can be used when fading music out completely.
在 Transition Inspector 中,可以通过 Fade In 和 Fade Out 弹出菜单混合使用不同类型的音频淡化方式。此外,还可以拖动音频曲线中央出现的控制手柄,手动调整淡化的曲线形状。The Transition Inspector allows you to mix between the different types of audio fades using the Fade In and Fade Out pop-up menus. You can also manually adjust the shape of the fade applied by the fade handles using the control that appears on the center of the audio curve.
归根结底,选择哪种交叉淡化方式,要以实际听感为准。Ultimately, the choice of which type of cross fade works in any given situation depends on what you’re hearing.
NOTE · 注意如果需要先追上进度再继续下一步,选择 TIMELINES 智能文件夹(smart bin),然后选择 File > Im…
如果需要先追上进度再继续下一步,选择 TIMELINES 智能文件夹(smart bin),然后选择 File > Import > Timeline,导航到 R20 Beginners Guide / Lesson 03 / Timelines / OMO PROMO CATCHUP 10.drt,点击 Open。If you need to catch up before moving to the next step, select the TIMELINES bin and choose File > Import > Timeline, navigate to R20 Beginners Guide / Lesson 03 / Timelines / OMO PROMO CATCHUP 10.drt and click Open.
本卡术语Terms in this card
媒体夹Bin 时间线Timeline 预设Preset 交叉溶解Cross Dissolve 检查器Inspector 转场Transition 修剪Trim 淡入淡出Fade 调音台Mixer 曲线Curves 音效Sound Effects