缩放画面Zoom and Reframe
6 steps
简介Overview
除了使用业界标准的剪辑工具来组接和修剪素材之外,Edit page 还提供了一些控制项,可以直接在时间线上对片段进行增强或修复。In addition to using industry-standard professional editing tools and functions to assemble and trim your footage into the story you want to tell, the edit page also contains several controls that allow you to enhance or fix the clips directly in the timeline.
音频片段的调整方法将在下一节介绍,现在我们继续聚焦于时间线的画面部分,先从最常见也最基础的操作开始:改变镜头的取景。You will explore some of the ways you can adjust the audio clips in the next lesson, but for now you will continue to focus on the visual aspects of this timeline starting with a simple but very common change you’ll often need to make: changing the framing of a shot.
关于实时性能与 Render Cache:DaVinci Resolve 是一款高性能软件,针对不同工作站优化,能够在高分辨率下实时播放特效。要确认系统是否保持实时性能,可以查看检视器顶部的 GPU 和帧率播放指示器。绿色表示一切正常;如果变成红色,说明当前 GPU 算力不足以支撑实时播放,帧率也会相应下降。这种情况通常出现在回放带有多个调色节点的片段,或时间线上叠加了较多特效和字幕的区域。About Real-Time Performance and the Render Cache DaVinci Resolve is high-performance software that is optimized to deliver real-time effects at high resolutions on a variety of workstations. To ensure that your system is maintaining real-time performance, you can check the GPU and frame rate playback indicator at the top of the viewers. If the indicator is green, all is well. However, if it changes to red, this indicates that the available GPU power of your computer is insufficient for real-time playback, and the frame rate indicator drops accordingly. Depending on your system specifications, this is probably most noticeable when trying to play back clips with multiple color corrections or a portion of the timeline with many effects and/or titles.
当实时性能下降时,最简单的解决办法之一是开启 Render Cache。选择 Playback > Render Cache,并从以下三种模式中任选其一:When your real-time performance drops, one of the simplest solutions is to enable the Render Cache by choosing Playback > Render Cache and choosing one of the three options:
— Off:不进行任何缓存,所有片段、调色、特效和字幕都尝试实时回放。 — Smart:自动缓存被判定为过于耗时的特效和片段。 — User:手动指定需要缓存的片段,同时按 Project Settings 中的设置自动缓存所有 Fusion 字幕与特效(详见第 7 课“项目设置与组织”)。— Off No render caching takes place, and all timeline clips, grades, effects, and titles are attempted to be played in real time. — Smart Automatically caches intensive effects and timeline clips in formats judged too processor-intensive to play in real time. — User Allows you to manually specify which timeline clips will be cached, along with automatically caching all Fusion titles and effects as part of the Project Settings (see Lesson 7, “Project Setup and Organization”).
Smart 通常是最省心的选择,它会帮你完成大部分工作。如果需要手动指定某个片段,可以在该片段上右键并选择 Render Cache Color Output。Smart is arguably the easiest option to use since it will do much of the work for you, and you can always manually flag a clip to cache by right-clicking the clip and choosing Render Cache Color Output.
随时可以通过 Playback > Delete Render Cache选择 All、Unused 或 Selected Clips 来清理当前时间线的缓存。You can clean up the render cache for the current timeline at any point by choosing Playback > Delete Render Cache and choosing All, Unused, or Selected Clips.
按 Option-R(macOS)或 Alt-R(Windows)可以在三种缓存模式之间循环切换。Pressing Option-R (macOS) or Alt-R (Windows) allows you to cycle between the three render caching options.
改变镜头取景:调整片段的尺寸、位置或旋转的原因有很多,最常见的就是改变取景——既可以修正原始拍摄时的构图问题,也可以通过改变景别来强调重点或增加画面的视觉变化。Changing Shot Framing There are several reasons why you might need or want to adjust the size, position, or rotation of a clip. One common reason is to be able to change the framing of a shot. This could be to correct poor framing when the shot was originally filmed, or if you wish to change the shot size to add emphasis or visual variety to the shots.
在当前剪辑中,如果用一个稍紧的 Chris 镜头收尾,更能凸显 Organ Mountain Outfitters “体验美国西南部”的主题。In the current edit, it might be better to finish on a slightly closer shot of Chris to emphasize the “Experience the Southwest” motto of Organ Mountain Outfitters.
- 在时间线上,将播放头移到最后一个采访片段上。In the timeline, move the playhead over the final interview clip.
- 在时间线检视器中,点击
Transform Mode按钮,或选择View > Viewer Overlay > Transform,调出屏幕上的变换控件。In the timeline viewer, click theTransform Modebutton, or choose View > Viewer Overlay > Transform to enable the onscreen transform controls.
屏幕上变换控件可以用来改变片段的缩放,以及画面在屏幕上的位置和旋转。The onscreen transform controls can be used to change the zoom of the clip as well as the onscreen position and rotation.
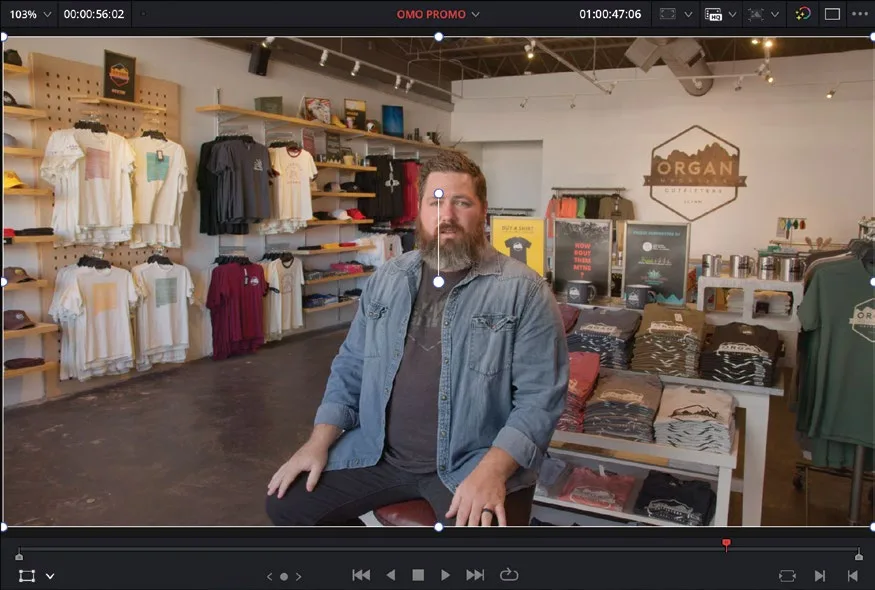
- 将鼠标指针放在屏幕辅助线中心位置,滚动鼠标滚轮,在时间线 viewer 中稍稍缩小画面。With your mouse pointer over the center of the onscreen guides, use the scroll wheel on your mouse and zoom out slightly in the timeline viewer.
TIP · 提示如果使用触控板,可以用 Option + 双指滚动(macOS)或 Alt + 双指滚动(Windows)来缩放 vie…
如果使用触控板,可以用 Option + 双指滚动(macOS)或 Alt + 双指滚动(Windows)来缩放 viewer。也可以按住鼠标中键在画面内平移;水平滚动用 Command-Shift-滚动(macOS)或 Ctrl-Shift-滚动(Windows);垂直滚动用 Command-滚动(macOS)或 Ctrl-滚动(Windows)。If you are using a trackpad, you can use Option-two finger scroll (macOS) or Alt-two finger scroll (Windows) to zoom the viewer in and out. You can also scroll around the image by holding the middle mouse button, scroll horizontally by using Command-Shift-scroll (macOS) or Ctrl-Shift-scroll (Windows), or scroll vertically by using Command-scroll (macOS) or Ctrl-Scroll (Windows).
- 拖拽角部控制点调整片段大小,使其看起来像是更近的景别。Drag the corner controls to resize the clip so it appears to be a closer shot.
- 调整好画面取景后,点击
Transform Mode按钮,或选择View > Viewer Overlay > Toggle On/Off,关闭屏幕上变换控件。When you are happy with the adjusted framing of the shot, click theTransform Modebutton or choose View > Viewer Overlay > Toggle On/Off to turn off the onscreen transform controls. - 按 Z 键调整画面缩放,使其适配时间线 viewer。Press Z to adjust the scale of the image so it fits the timeline viewer.
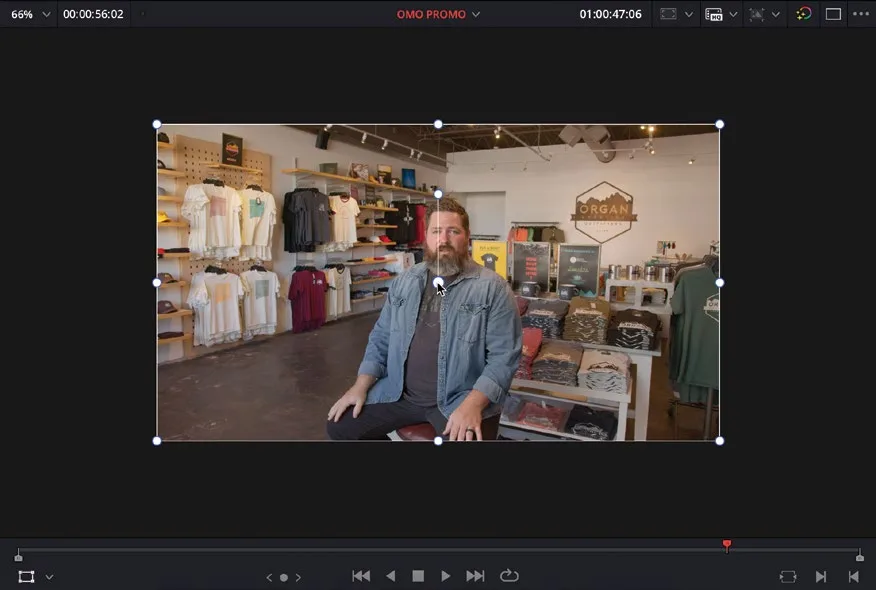
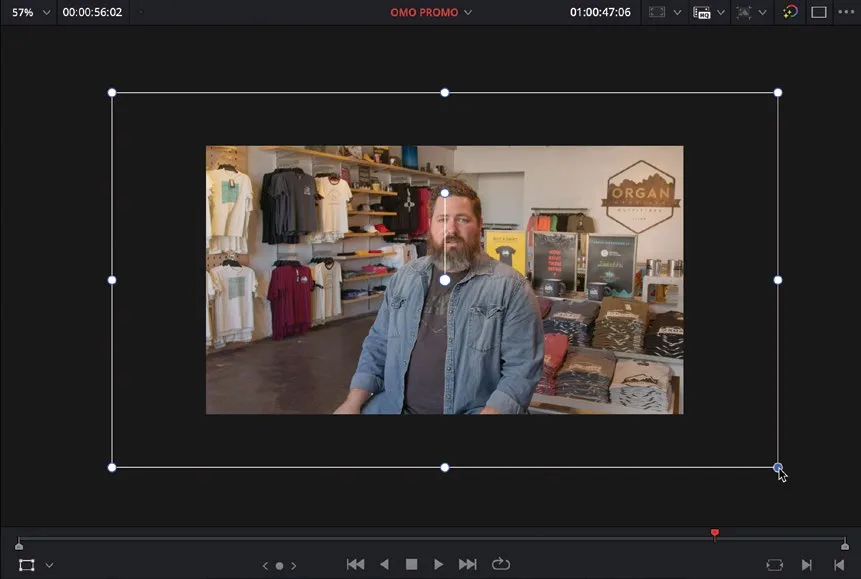
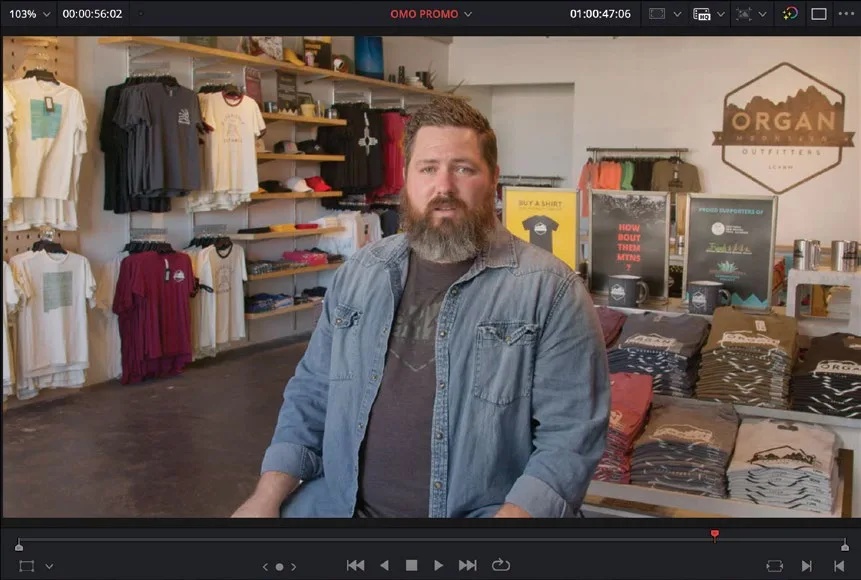
这是一个在时间线中改变镜头大小的简单示例。还有很多其他创造性的理由也会用到类似的调整。This is a simple example of how you can change the size of a shot in the timeline. There are many other creative reasons to make similar adjustments.
本卡术语Terms in this card
时间线Timeline 帧率Frame Rate 渲染Render 分辨率Resolution 编辑页Edit page 播放头Playhead 修剪Trim 调色Grade 项目设置Project Settings Fusion 合成Fusion 节点Node 变换Transform