优化音频标准Optimizing Audio Standards
6 steps
本卡概念Key Concepts
响度(Loudness)是对音频在整个时长上的度量,用于确保不同内容之间听感音量保持一致。Loudness is a measurement of your audio across its total duration, used to ensure consistent perceived levels across content.
简介Overview
Deliver页面里有一项 Quick Export 不支持的设置,就是把音频优化到不同标准。One of the settings available in the deliver page that’s not a part of the Quick Export process is for optimizing your audio to various standards.
不同的交付平台会列出各自的要求,通常包括视频分辨率、帧率、编解码器,如今还增加了音频响度(loudness)规范。Depending on where you deliver your files, you will likely be given a list of requirements. These could be as simple as indicating acceptable video resolutions, frame rates, and codecs. These days, however, they also include loudness levels for your audio.
Resolve 提供了简便方式,在导出时自动把音频优化到 YouTube、Netflix 或广播电视等不同响度标准。Thankfully, Resolve has a simple way of ensuring that your audio adheres to the various loudness standards, whether you’re delivering your content to YouTube, Netflix, or broadcast TV, by optimizing it upon export.
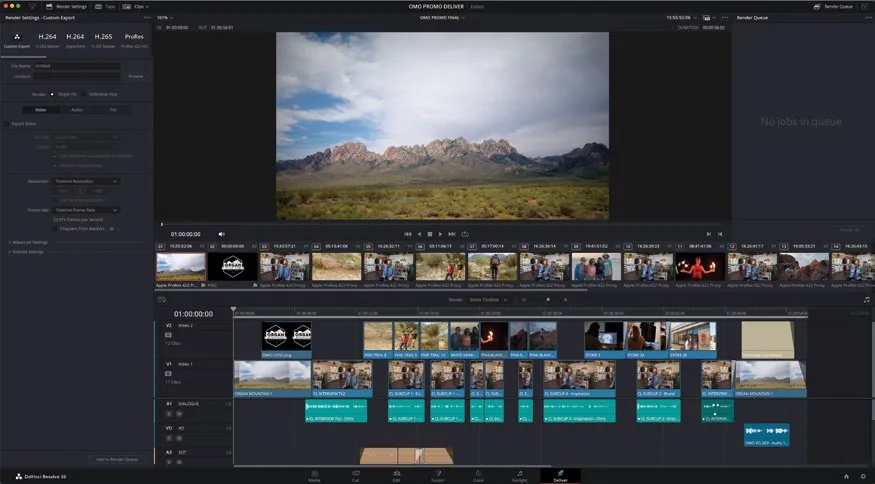
TIP · 提示提示:YouTube 还有更高分辨率的预设(最高 2160p),点击下拉箭头查看完整列表…
提示:YouTube 还有更高分辨率的预设(最高 2160p),点击下拉箭头查看完整列表。For different delivery resolutions for YouTube up to 2160p, click the dropdown menu (downward arrow) for a list of options.
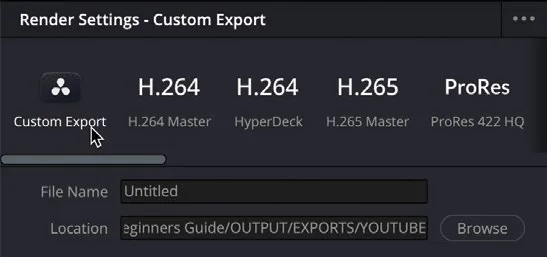
- 在 File Name 栏输入 OMO PROMO YT_FINAL。In the File Name field, type OMO PROMO YT_FINAL.
- 在 Location 处点击
Browse按钮,选择 R20 Beginners Guide / OUTPUT / EXPORTS / YOUTUBE,然后点 Save 保存路径。For the Location, click theBrowsebutton and choose R20 Beginners Guide / OUTPUT / EXPORTS / YOUTUBE, and click Save to save the location.
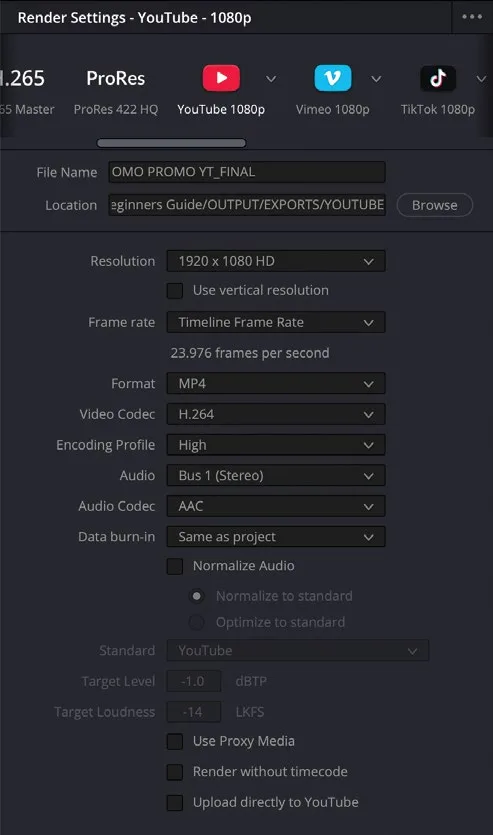
Location 栏下方显示的就是该预设用于渲染 YouTube 适配文件的参数。Below the Location field, you will see the settings used by this preset to render a file suitable for uploading to YouTube.
- 检查这些参数,确认 Resolution 为 1920 x 1080 HD,Frame Rate 为 23.976。Review the settings, ensuring that the Resolution is 1920 x 1080 HD and the Frame Rate is 23.976.
NOTE · 注意提示:导出分辨率可以基于当前时间线调整,但建议选择与时间线相同或更低的分辨率。选择更高分辨率会导致画面从时间线分辨率上采…
提示:导出分辨率可以基于当前时间线调整,但建议选择与时间线相同或更低的分辨率。选择更高分辨率会导致画面从时间线分辨率上采样而画质下降,加入 Render Queue 时会收到警告。同样地,也不应更改导出的帧率。Although you can change the resolution of the exported file from the current timeline’s settings, you’re always advised to choose the same or lower resolution of the timeline. Choosing a higher resolution may result in reduced image quality since rendered images are upscaled from the timeline resolution, which you will be warned about when adding the job to the Render Queue. Similarly, you should not adjust the frame rate of the exported file from the timeline frame rate.
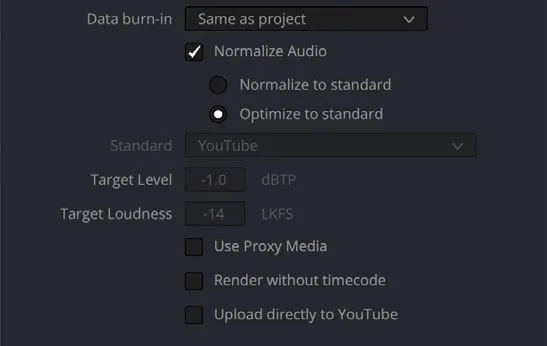
- 勾选 Normalize Audio,并选择 Optimize to Standard。Enable the Normalize Audio option and select Optimize to Standard.
这样导出的音频就能达到 YouTube 交付标准:目标电平 -1 dBTP,目标响度 -14 LKFS。YouTube 预设不允许切换其他优化方案,因为使用该预设的用途就是交付给 YouTube。This will ensure that the exported audio will be at the correct levels for delivering to YouTube: a target level of -1 dBTP and a target loudness of -14 LKFS. The YouTube preset does not allow you to choose an alternative optimization to the standard setting because it’s assumed you’ll be using this preset to deliver to YouTube, for obvious reasons.
- 点击
Render Settings面板底部的 Add to Render Queue 按钮。Click the Add to Render Queue button at the bottom of theRender Settingspanel.
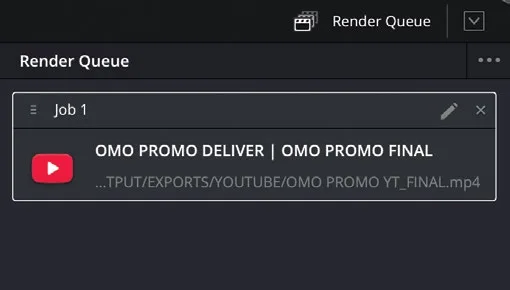
任务会被添加到界面右侧的 Render Queue 中,准备导出。The job is added to the Render Queue on the right side of the interface in preparation for exporting.
本卡术语Terms in this card
时间线Timeline 编码器Codec 交付页Deliver page 导出Export 帧率Frame Rate 响度Loudness 预设Preset 渲染队列Render Queue 渲染Render 分辨率Resolution 标准化音量Normalize 快速导出Quick Export