自定义 Deliver 预设Customizing Deliver Presets
11 steps
简介Overview
接下来我们要自行设置参数,把 Organ Mountain Outfitters 宣传片导出为高质量文件。Now you will choose your own settings for exporting the Organ Mountain Outfitters promo to a high-quality file.
- 在
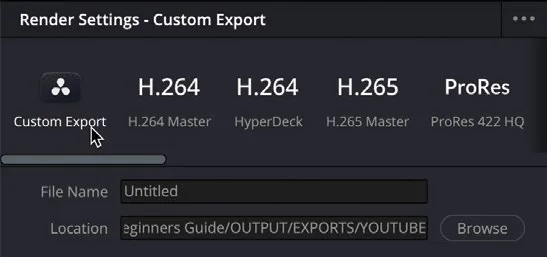
Render Settings面板中选择 Custom Export。In the Render Settings panel, select Custom Export.
上一次选中的预设参数会被保留。The settings from the last selected preset are retained.
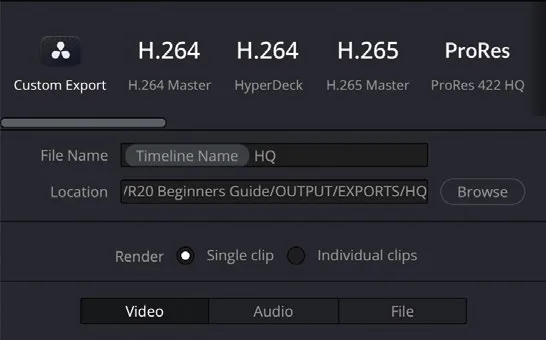
这次不再手写完整的导出文件名,而是用基于项目里 timeline 名称的变量来生成。This time, instead of manually typing the whole name for the exported file, you will use a variable based on the timeline’s name in the project.
- 在 File Name 字段中输入 %Time,从变量列表里选择 Timeline Name,再在末尾加上 HQ。In the File Name field, type %Time, choose the Timeline Name variable from the list of options, and then add HQ to the end.
- 在 Location 字段中点击 Browse,导航到 R20 Beginners Guide / Lesson 10 / Output / HQ,点击 Save 更新导出文件的保存位置。In the Location field, click Browse and navigate to R20 Beginners Guide / Lesson 10 / Output / HQ, and click Save to update the location for the exported file.
- 确认 Render 设为 Single Clip,必要时切换到
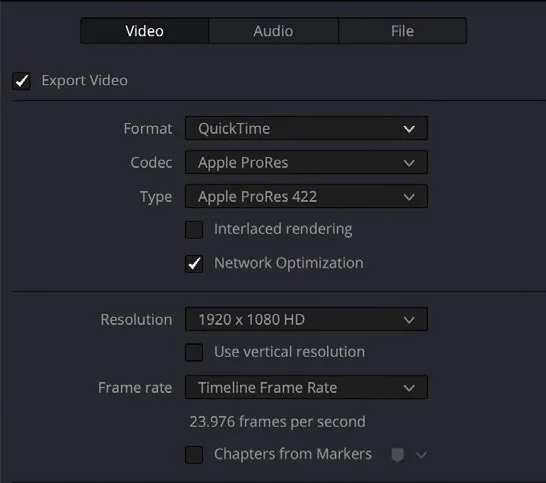
Video选项卡。Ensure that Render is set to Single Clip and select the Video tab if necessary. - Format 选择 QuickTime。For the Format, choose QuickTime.
- Codec 确认选择 Apple ProRes,并在 Type 菜单中选择 ProRes 422。For the Codec, ensure that Apple ProRes is selected and, from the Type menu, select ProRes 422.
Apple ProRes 是常用于制作母版的高质量视频编码。这组参数能保证导出的文件达到母版质量,将来可作为 OMO 宣传片的母版使用,并且兼容 DaVinci Resolve 20 的 Mac、Windows 和 Linux 版本。Apple ProRes is a high-quality video codec commonly used for creating master files. These settings will ensure that you are exporting a high-quality file that you can use as a master file format for the OMO promo in the future and can be used on Mac, Windows, and Linux versions of DaVinci Resolve 20.
- 确认分辨率为 1920 x 1080,帧率为 23.976,这些数值会根据当前 timeline 的设置自动匹配。Ensure that the resolution is 1920 x 1080 and the frame rate is 23.976. These values are set based on the current timeline’s settings.
NOTE · 注意更多高级参数可在 Additional Settings 控件中调整…
更多高级参数可在 Additional Settings 控件中调整。More advanced settings are available in the Additional Settings controls.
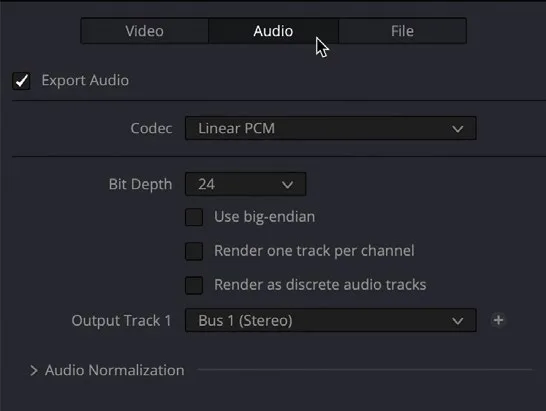
- 点击 Audio 标签页。Click the Audio tab.
这些设置默认就能输出高质量的 Linear PCM 音频,也就是常说的未压缩音频。These settings are already configured to deliver high-quality Linear PCM audio, commonly referred to as uncompressed audio.
TIP · 提示提示:使用 Output Track 选项,可以从时间线渲染指定的或全部轨道…
提示:使用 Output Track 选项,可以从时间线渲染指定的或全部轨道。Use the Output Track option to render specific or all timeline tracks from the timeline.
- 展开 Audio Normalization 控件,启用 Normalize Audio。Reveal the Audio Normalization controls and enable Normalize Audio.
- 将 Optimize 设为 Standard,选择 ITU-R BS.1770-4。Choose Optimize to Standard and choose ITU-R BS.1770-4.
ITU-R BS.1770-4 是通用的响度标准,可以调整 Target Level(true peak)和整体 Target Loudness,不限于默认值。The ITU-R BS.1770-4 standard is a general Loudness standard that will allow you to adjust the Target Level (true peak) and overall Target Loudness from their defaults.
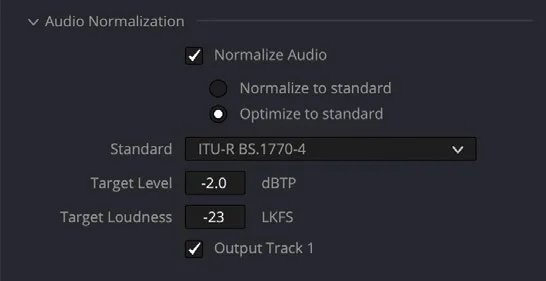
也可以从预设列表中选择符合特定标准的方案,包括 ATSC A/85(美国广播)、EBU R128(欧洲广播)、OP-59(新西兰与澳大利亚广播)、TR-B32(日本广播)、AGCOM 219(意大利广播)。此外还有针对 Netflix、YouTube、Disney 的专用预设。Alternatively, you can select from the list of presets that adhere to various standards, including ATSC A/85 (for US broadcast), EBU R128 (for European broadcast), OP-59 (for New Zealand and Australian broadcast), TR-B32 (for Japanese broadcast), and AGCOM 219 (for Italian broadcast). Separate presets are also available for delivering audio for Netflix, YouTube, and Disney.
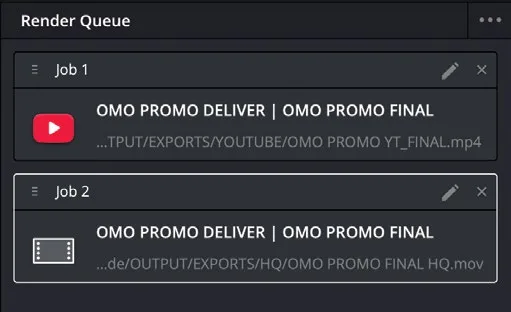
- 点击 Add to Render Queue,将这个新任务加入 Render Queue,准备导出。Click Add to Render Queue to add this new job to the Render Queue in preparation for exporting.
本卡术语Terms in this card
时间线Timeline 编码器Codec 导出Export 帧率Frame Rate 响度Loudness 预设Preset ProResProRes 渲染队列Render Queue 渲染Render 分辨率Resolution 标准化音量Normalize