TASK 2Task 2
手写动画Write-On Animation
20 steps
- 在 Node Editor 中选中 TitleText 节点。In the Node Editor, select the TitleText node.
Inspector 底部就是 Write On 控件,可以快速给文字添加简单的写入和擦除效果。At the bottom of the Inspector, you’ll find the Write On controls, which are used to quickly apply simple Write On and Write Off effects to the text.
现在播放合成,DAVINCI RESOLVE 会在黑矩形停在画面中央后紧接着显示出来。If you play the composition, DAVINCI RESOLVE will be written right after the black rectangle stops in the middle of the screen.
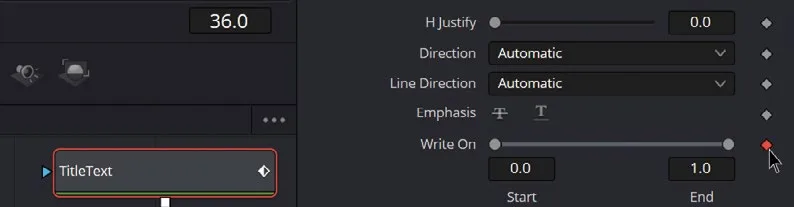
- 把时间线移到第 84 帧,再次点击 Write On 控件右侧的灰色
Keyframe按钮。Go to frame 84 and again click the grayKeyframebutton to the right of the Write On control. - 移到第 107 帧,将 Write On Start 值改为 1.0。Move to frame 107 and change the Write On Start value to 1.0.
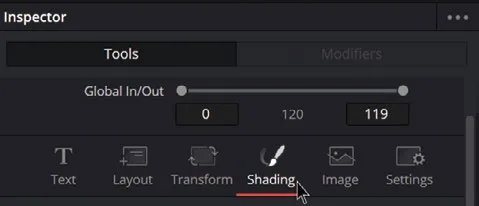
Text+ 节点在 Inspector 顶部有很多选项卡。之前我们一直在 Text选项卡操作,现在切换到 Shading选项卡做一些调整。The Text+ node has many options and tabs you can select at the top of the Inspector. We’ve only worked in the Text tab so far, but now we’ll make some changes in the Shading tab.
- 切换到 Shading(着色)标签页。Go to the Shading tab.
- 移动到第 44 帧。Move to frame 44.
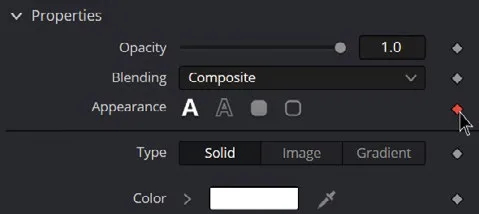
- 在 Properties(属性)下方找到 Appearance(外观)选项,点击其右侧的灰色关键帧按钮添加一个关键帧。Locate the Appearance option below Properties and add a keyframe (click the gray keyframe button to the right of Appearance).
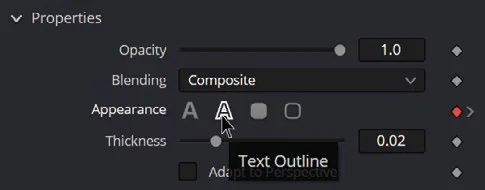
- 向左移动一帧(到第 43 帧),在 Appearance 选项中选择第二个图标:Text Outline(文字描边)。Move one frame to the left (to frame 43) and select the second icon in the Appearance options: Text Outline.
此时主文字会从描边过渡为实色填充。接下来处理第二行文字,加入一些位移动画。At this point, your main text transitions from an outline to a solid color. Let’s move on to the second line of text to incorporate some movement and animations.
首先在末尾添加 Write On(写入)动画,方法和处理 TitleText 节点时一样。First, you’ll add a Write On animation at the end (like you did with the TitleText node).
- 选中 SubtitleText 节点。Select the SubtitleText node.
- 转到第 84 帧,点击 Write On 控件右侧的灰色关键帧按钮。Go to frame 84 and click the gray keyframe button to the right of the Write On control.
- 转到第 107 帧,将 Write On Start 的值改为 1.0。Move to frame 107 and change the Write On Start value to 1.0.
该动画完成后,需要为 Transform2 节点添加关键帧,让 SubtitleText 出现在主标题下方。With that animation complete, you’ll add keyframes to the Transform2 node so that the SubtitleText appears below the main title.
- 选中 Transform2(用于调整 SubtitleText 位置的那个)。Select the Transform2 (the one that modifies the position of SubtitleText).
- 转到第 60 帧,点击 Center Y(当前值为 0.41)右侧的灰色关键帧按钮添加一个关键帧。Go to frame 60 and add a keyframe to the Center Y value (that should be 0.41) by clicking the gray keyframe button to the right.
- 跳到第 48 帧,把 Center Y 改为 0.52。Go to frame 48 and change the Center Y value to 0.52.
现在只差一步:在 SubtitleText 下移到位之前把它遮住。这次用另一个矩形,不过要接到 Merge3 上。The only thing missing is a way to mask out the SubtitleText before it moves down into its place. You can use another rectangle, but this time you’ll apply it to the Merge3 instead.
- 选中 Merge3,点击工具栏的 Rectangle 图标,添加一个 Rectangle2 节点,连到 Merge3 的 Effect Mask 输入端。With Merge3 selected, click the Rectangle icon in the toolbar to add a Rectangle2 node connected to the Effect Mask input of the Merge3 node.
- 选中 Rectangle2 节点,把 Width 设为 1.0,Center Y 设为 0.21。Select the Rectangle2 node and change the Width to 1.0 and the Center Y to 0.21.
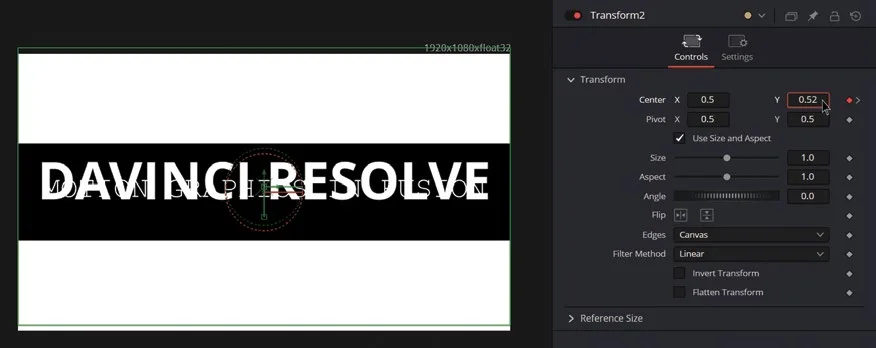
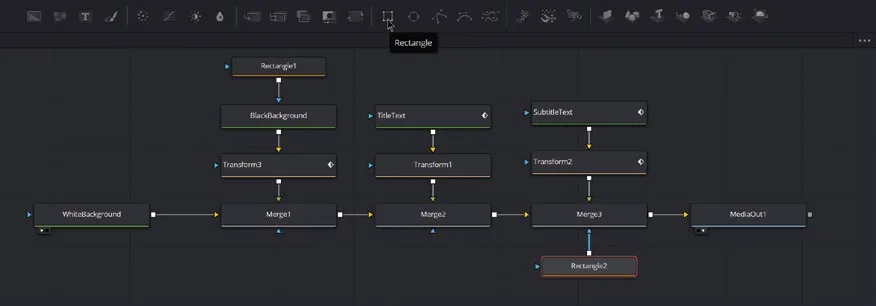
此时字幕已经会向下动画到位。你可以在 Keyframes Editor 中让第 60 帧的关键帧更平滑,方法和之前调 Rectangle1 节点动画一样。想试试看吗?At this point, the subtitle animates down into its place. You could make the keyframe on frame 60 smoother in the Keyframes Editor, just like you did with the animation in the Rectangle1 node. Want to try it out?
- 打开 Keyframes Editor,点击 Zoom To Fit。Open the Keyframes Editor and click Zoom To Fit.
- 展开 Transform2 节点的关键帧,选中第二个关键帧,按 F 键压平曲线。Expand the keyframes for the Transform2 node. Select the second keyframe and press F to flatten the curve.
- 关闭 Keyframes Editor。Close the Keyframes Editor.
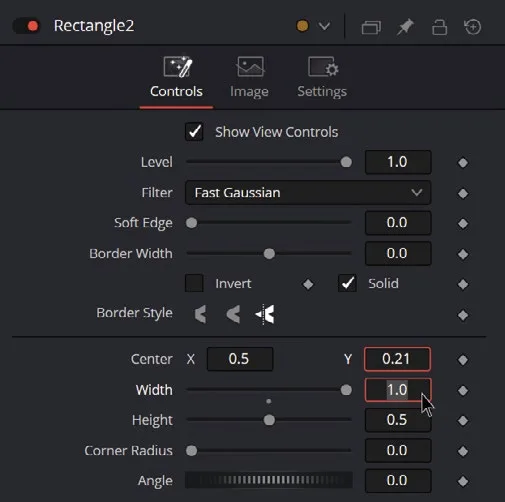
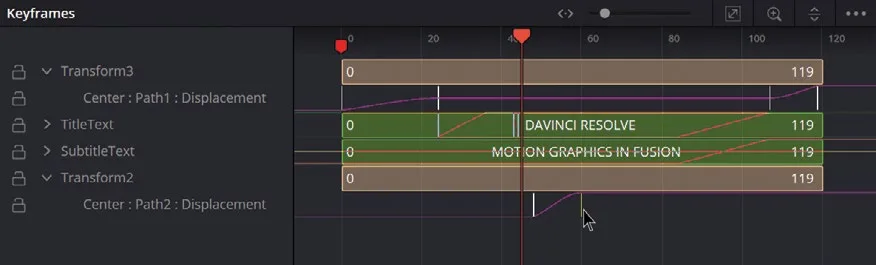
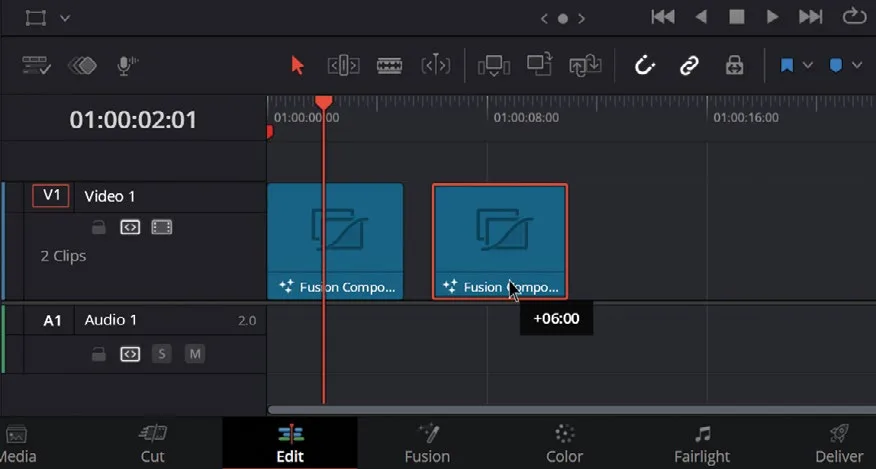
恭喜,这就是你的最终合成!如果中途跟丢了,可以在 Timeline Lesson 09.1.1 CatchUp Versions - Motion Graphics 时间线 00:01:30:00 处找到最终合成,那里有一个红色 marker 和简要说明。时间线上还记录了每一步操作过程,直接读 marker 中的文字即可。在完成的合成中,还能看到一些 sticky notes,标注了关键帧的详细信息。Congratulations, this is your final composition! If you got lost along the way, you can find the final composition in the Timeline Lesson 09.1.1 CatchUp Versions - Motion Graphics timeline at timecode 00:01:30:00. There is a red marker and a brief explanation. You’ll also find every step of the process in this timeline; just read the text in the markers. In the finished composition, you will find some sticky notes with details about the keyframes created.
本卡术语Terms in this card
时间线Timeline 检查器Inspector 关键帧Keyframe 标记Marker 转场Transition 曲线Curves 时间码Timecode 合成Compositing 合并Merge 节点Node 变换Transform