TASK 1Task 1
位移关键帧Position Keyframes
10 steps
- 选中 BlackBackground 节点,在工具栏上找到 Transform 节点并点击,它会被添加到 BlackBackground 之后。Select the BlackBackground node, locate the Transform node on the Toolbar, and click it. It should be added after the BlackBackground.
Transform 节点用来在合成中移动和制作各元素的动画。The Transform node will help us move and animate different elements in our composition.
- 在 Time Ruler 右上的 Current Time 框里输入 24.0,定位到第 24 帧。Go to frame 24 by entering 24.0 in the Current Time box at the top right of the Time Ruler.
- 选中新建的 Transform3 节点,在 Inspector 中点击 Center 值右侧的灰色
Keyframe按钮(会变红)。Select the new Transform3 node. In the Inspector, click the grayKeyframebutton to the right of the Center value (it will turn red).
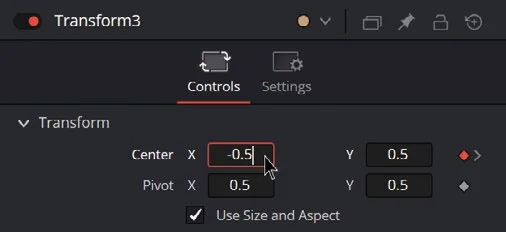
- 回到第 0 帧,把 Center X 的值改为 -0.5。Go to frame 0 and change the Center X value to -0.5.
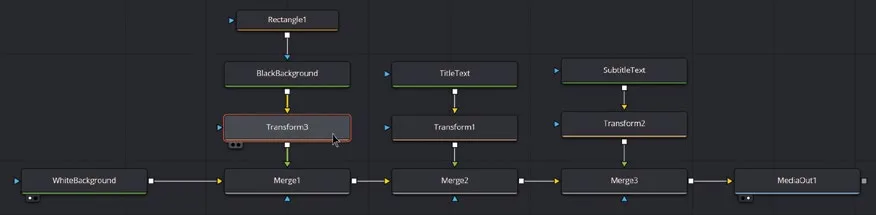
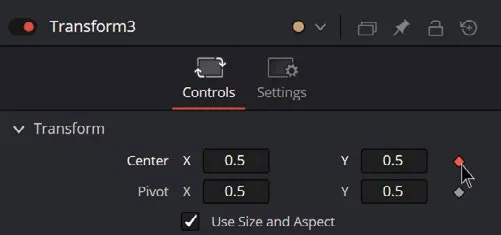
你会在第 0 帧和第 24 帧看到一条白线,表示关键帧位置。You’ll see a white line at frames 0 and 24 indicating the keyframes.
- 移动到第 107 帧,再次点击 Center 值右侧的灰色
Keyframe按钮。Move to frame 107 and click the grayKeyframebutton again to the right of the Center value. - 去到第 119 帧,把 Center X 的值改为 1.5。Go to frame 119 and change the Center X value to 1.5.
点击传输控制条的 Play 或按 Spacebar(JKL 播放也可以),可以看到黑色矩形从左侧进入,停留片刻,再从右侧退出。动画衔接有点突兀,需要在 Keyframes Editor 中对第 24 帧和第 107 帧的关键帧做平滑处理。If you click Play on the transport controls or press the Spacebar ( JKL playback also works), you’ll see the black rectangle entering from the left, staying at the center for a moment, and then exiting to the right. The animation is a bit abrupt, so you’ll need to smooth out the keyframes at frames 24 and 107 in the Keyframes Editor.
- 点击界面右上角的
Keyframes按钮。Click the Keyframes button at the top right of the interface. - 在 Keyframes Editor 中点击 Zoom To Fit 按钮,再点击 Transform3 左侧的展开图标。In the Keyframes Editor, click the Zoom To Fit button and click the expand icon to the left of Transform3.
- 框选第 24 帧和第 107 帧(中间那两帧)的关键帧。选中后呈黄色,按 F 键将曲线展平(flatten)。Click and drag to select the keyframes at frames 24 and 107 (the middle ones). When they are yellow (selected), press F to flatten the curve.
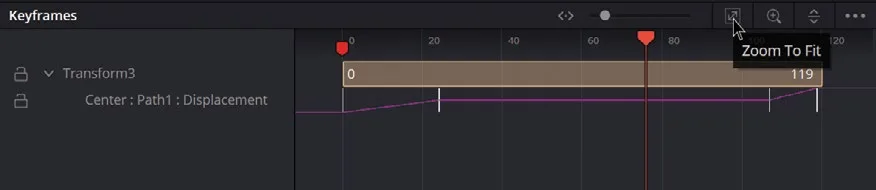
这样调整后,矩形在到达画面中心时会减速,然后从第 107 帧开始加速离开屏幕。This adjustment will make the rectangle decelerate as it reaches the center and then accelerate from frame 107 to exit the screen.
- 关闭 Keyframes Editor。Close the Keyframes Editor.
接下来给文字做动画。目标是让文字在黑矩形出现的同时开始显示,并在矩形移出画面前消失。我们将在 Text+ 节点的 Write On 参数上设关键帧来实现。主标题打完后,还要在 Shading选项卡中调整 Appearance 参数来改变它的材质。最后给 Merge3 加一个 Mask,配合 Transform 节点让第二行文字从主标题后方落下。开始吧!Animating the Text Your composition is looking great, but you still need to animate the text. To do this, you’ll create keyframes so that the text starts to appear as soon as the black rectangle appears on the screen and disappears just before the rectangle moves off to the right. We’ll animate the Write On parameter within the Text+ nodes to achieve this. Additionally, for the main title, we’ll change its material once it finishes typing by adjusting the Appearance parameter in the Shading tab. Finally, we’ll add a mask to Merge3 and use a Transform node to animate the second line of text, allowing it to drop down behind the main text. Let’s get started!
本卡术语Terms in this card
检查器Inspector 关键帧Keyframe 曲线Curves 静帧Still 合成Compositing 合并Merge 节点Node 变换Transform