系统偏好设置System Preferences
5 steps
简介Overview
前面已经学过如何正确建立项目、用不同方式导入素材,以及整理媒体来提升工作效率。接下来要讲的是通过 Preferences(偏好设置)来自定义 DaVinci Resolve。So far in this lesson, you have learned how to set up a project correctly, explored different ways of importing clips, and learned how to organize media to make it easier to work with. Now it’s time to learn more about how to customize DaVinci Resolve through its preferences.
DaVinci Resolve 提供两类偏好设置:System Preferences(系统偏好)控制 Resolve 对电脑硬件的使用方式;User Preferences(用户偏好)则影响 Resolve 对你这个使用者的呈现方式。DaVinci Resolve includes two sets of preferences that you can configure: System Preferences are a group of settings that control how Resolve uses your computer hardware. User Preferences affect how Resolve works for you, the user.
- 选择
DaVinci Resolve > Preferences,打开Preferences窗口。Choose DaVinci Resolve > Preferences to open thePreferenceswindow.
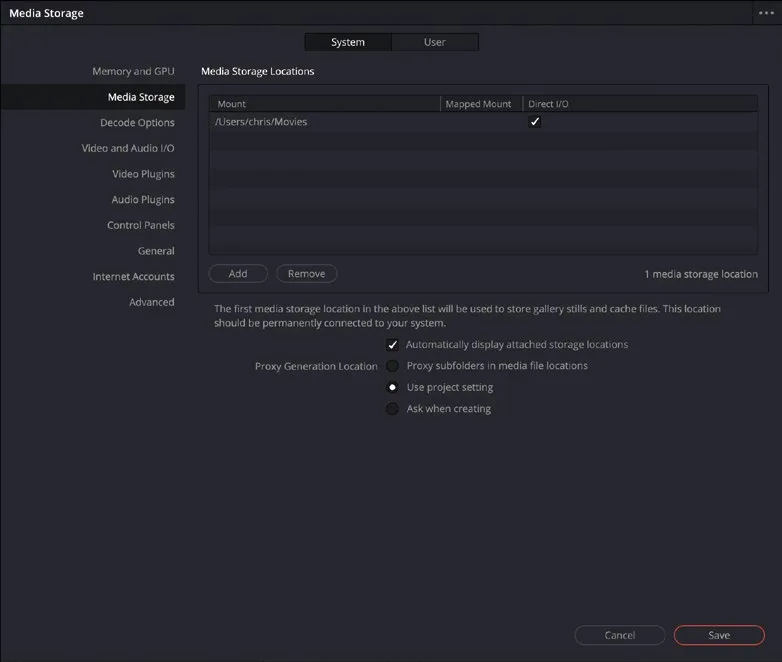
System 与 User 两种偏好设置列在 Preferences窗口顶部,分类则像 Project Settings 一样排列在左侧。默认情况下,窗口会打开到 System Preferences 下的 Media Storage 分类,除非自上次打开后项目尚未关闭。The two types of preferences—System and User—are listed at the top of the Preferences window and, like the Project Settings window, categories are listed along the left side. By default, the Preferences window opens to the Media Storage category in the System Preferences, unless the project hasn’t been closed since the Preferences window was last opened.
Media Storage 偏好用于管理 DaVinci Resolve 可访问的各种媒体存储位置。这些位置可以在 Media页面(导入时)的 media storage browser 中方便地访问文件。列表中的第一项同时用于存放:在 Color页面(参见第 5 课)创建的 gallery stills,以及在 Edit页面(参见第 2 课)生成的 cache files。该位置通常称为 scratch disk。默认情况下始终指向当前用户的 Movies 文件夹,因为这个路径在每台电脑上都会自动存在。它同时也是 Project Settings 中 Working Folders(Project Media Location 除外)的默认位置。The Media Storage preferences allow you to manage various media storage locations that DaVinci Resolve can access. These can be used to access files easily in the media storage browser in the media page for importing, but the first location in this list is also used to store gallery stills you create in the color page (see Lesson 5) and cache files generated in the edit page (see Lesson 2). This location is more commonly referred to as a scratch disk. By default, this location is always set to the current user’s Movies folder because this location should automatically exist on every computer. This location also serves as a default for the Working Folders in Project Settings, except for the Project Media Location.
NOTE · 注意建议将第一项媒体存储位置设为电脑上最大、最快的硬盘。但跟随本书学习时无需更改当前设置…
建议将第一项媒体存储位置设为电脑上最大、最快的硬盘。但跟随本书学习时无需更改当前设置。It’s almost always advisable to set the first media storage location to the largest, fastest hard drive available to your computer. However, for the purpose of following this book, it is not necessary to change the current location.
如需更改或添加媒体存储位置,点击 Add按钮,选择要作为媒体存储位置的硬盘或文件夹。若要移除不需要的位置,在列表中选中后点击 Remove 即可。If you wish to change or add a media storage location, click the Add button and select the hard drive or folder you wish to add as a media storage location. To remove an unwanted media storage location, simply select it in the list and click Remove.
- 确保勾选 Automatically display attached storage locations。Ensure that “Automatically display attached storage locations” is selected.
这个选项很重要:勾选后,连接电脑的硬盘或其他存储设备会立刻出现在 Media页面,方便你直接导入其中的素材并尽快开始工作。This option is important since it will allow hard drives and other storage media you connect to your computer to be instantly available in the media page so you can import any files stored on them directly into Resolve and begin working as quickly as possible.
NOTE · 注意如果你使用 macOS 并从 Mac App Store 下载了 DaVinci Resolve 或 DaVinci R…
如果你使用 macOS 并从 Mac App Store 下载了 DaVinci Resolve 或 DaVinci Resolve Studio,需要勾选该选项并授予 Resolve 访问硬盘的权限,否则 Resolve 将无法导入任何素材。If you’re working on macOS and have downloaded DaVinci Resolve or DaVinci Resolve Studio from the Mac App Store, you will need to select this option and give permission for Resolve to access your hard drive. Unless you do this, Resolve will be unable to import any footage.
- 点击 Video and Audio I/O 分组。Click the Video and Audio I/O group.
NOTE · 注意I/O 指的是 Input/Output(输入/输出)…
I/O 指的是 Input/Output(输入/输出)。I/O refers to Input/Output.
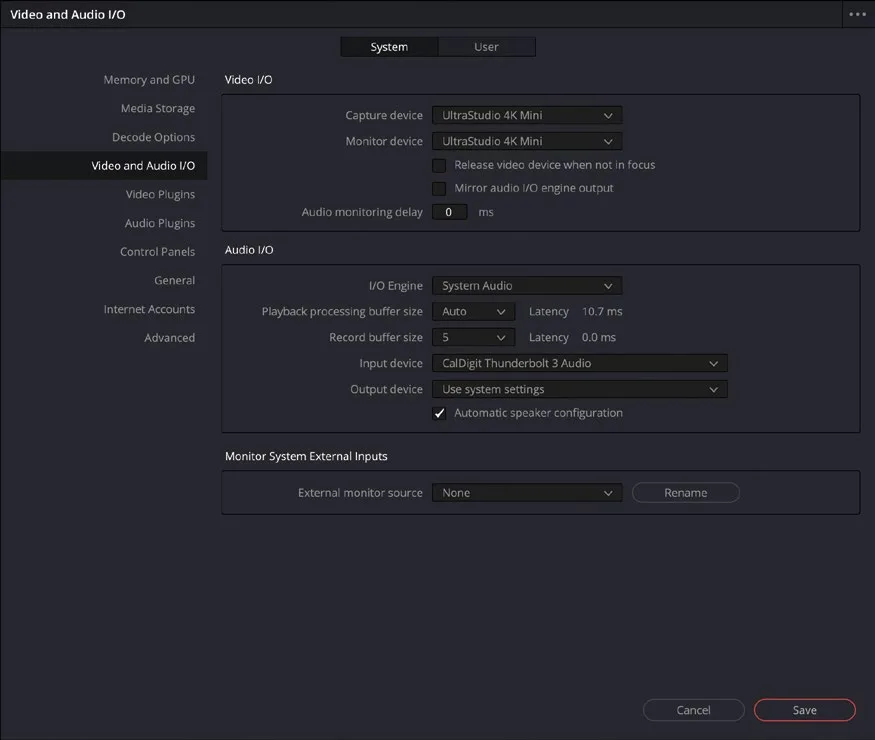
如果电脑连接了 Blackmagic Design 的采集或回放设备(如 Decklink PCI Express 卡或 UltraStudio 设备),可以在这里将其指定为采集和/或监看设备。指定后,当时间线播放时画面就能输出到外接视频监视器。如果系统没有连接支持的设备,Capture 和 Monitor 设备选项将无法选择。If you have a Blackmagic Design capture or playback device attached to your computer, such as a Decklink PCI Express card or UltraStudio device, you will be able to specify this as a capture and/or monitor device here. Specifying such a supported device as a monitor device will allow you to play the current timeline out to an external video monitor. If you do not have a supported device attached to your system, the Capture and Monitor device options will not be selectable.
- 点击
Control Panels面板组。Click the Control Panels group.
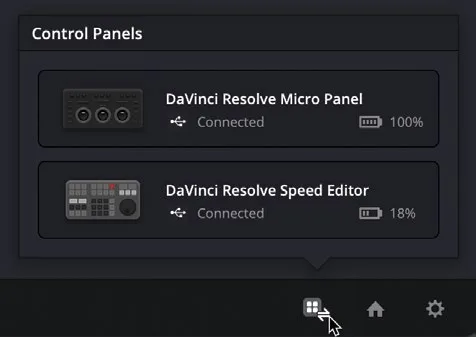
和 Video/Audio I/O 设置类似,这里可以指定调色所用的控制面板类型,并配置电脑连接的其他硬件控制器,如 Speed Editor 键盘。As with the Video and Audio I/O settings, this is where you can specify which type of control panel you want to use for color grading and detail any other hardware controllers you have attached to your computer, such as a Speed Editor keyboard.
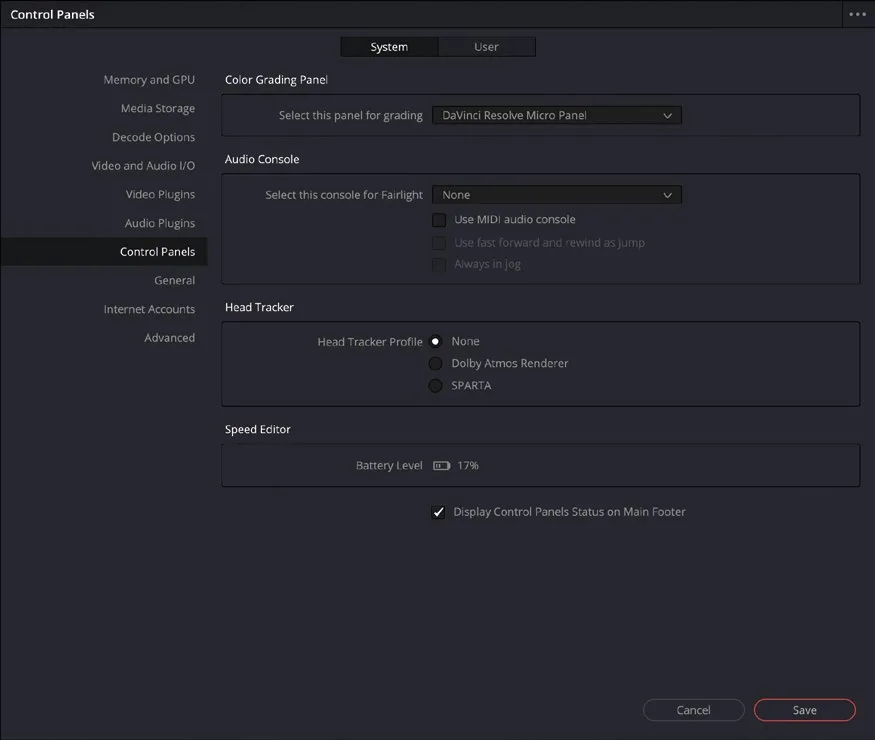
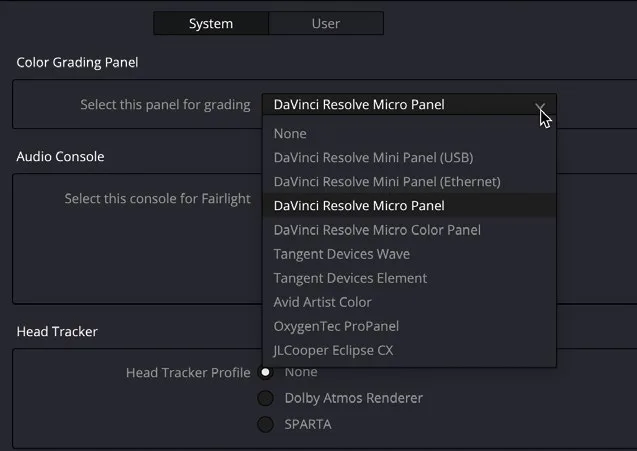
除 Blackmagic Design 的 Micro、Mini 和 Advanced Panels 外,DaVinci Resolve 也支持多家厂商的面板。In addition to the Blackmagic Design Micro, Mini, and Advanced Panels, DaVinci Resolve also supports a range of panels from other manufacturers.
NOTE · 注意如果系统连接了控制面板,主界面 Project Manager 按钮旁边会出现一个状态图标,点击可查看控制器的当前状态…
如果系统连接了控制面板,主界面 Project Manager按钮旁边会出现一个状态图标,点击可查看控制器的当前状态。If you have control panels attached to your system, you will also see a status icon next to the Project Manager button in the main interface, which you can click to see the controllers’ current status.
- 点击
Internet Accounts面板组。Click the Internet Accounts group.
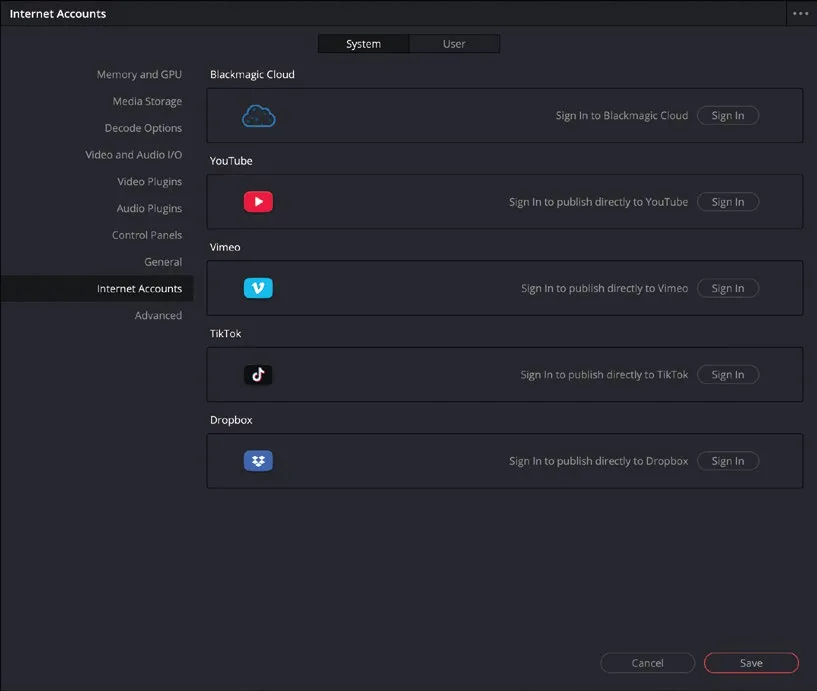
这里可以登录支持的视频分享和社交媒体服务。登录后,DaVinci Resolve 就能通过 Deliver页面对应的 Quick Export 预设替你上传导出文件,详情会在第 10 课“交付与媒体管理”中介绍。This is where you can sign in to supported video sharing and social media services. Signing in to any of these services will allow DaVinci Resolve to upload an exported file to that service on your behalf from the appropriate Quick Export preset of the Deliver page, which you will explore in more detail in Lesson 10, “Delivery and Media Management.”
本卡术语Terms in this card
媒体存储浏览器Media Storage Browser 项目管理器Project Manager 时间线Timeline 交付页Deliver page 导出Export 媒体管理Media Management 预设Preset 编辑页Edit page 变速Speed 快速导出Quick Export 调色页Color page 窗口Power Window 调色Grade 静帧Still 项目设置Project Settings