TASK 2Task 2
导入元数据文件Import Metadata File
4 steps
- 选择 File > Import Metadata To > Media Pool。Choose File > Import Metadata To > Media Pool.
- 导航到 R20 Beginners Guide / Lesson 07,选中文件 OMO METADATA.csv。Navigate to R20 Beginners Guide / Lesson 07 and select the file OMO METADATA.csv.
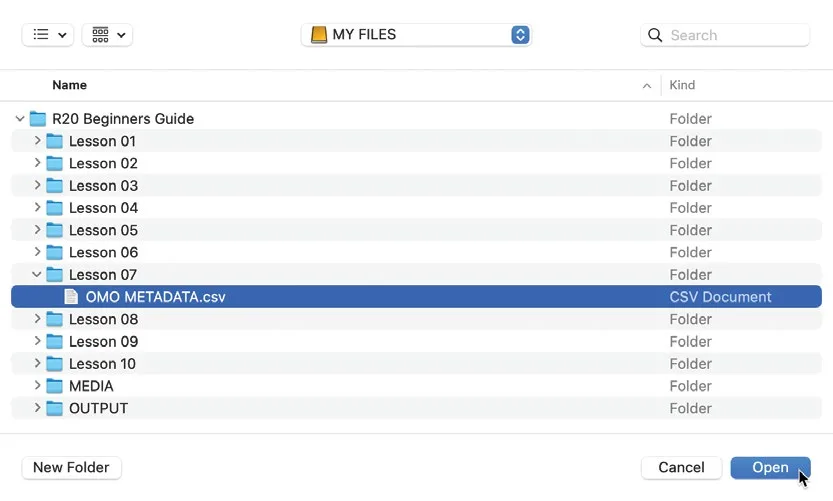
这个 .csv(逗号分隔值)文件由简单的电子表格程序导出,包含额外的 Comments 和 Keyword 元数据,可用来更新 Media Pool 中的片段。This .csv (comma-separated values) file was exported from a simple spreadsheet program and contains additional Comments and Keyword metadata with which you will update the clips in the media pool.
- 点击 Open。Click Open.
弹出 Metadata Import 对话框。The Metadata Import dialog opens.
这个窗口用来设置 Resolve 如何把 .csv 文件里的元数据与 Media Pool 中的片段进行匹配,以及如何把 .csv 元数据与片段已有元数据合并。默认按文件名和起止时间码匹配片段,并且只把 .csv 中的字段写入元数据;如有需要也可以调整匹配和合并方式。This window allows you to choose how you want Resolve to match the metadata in the .csv file with the clips in the media pool and how you want to merge the metadata in the .csv file with existing clip metadata. The default is to match clips based on their filenames and starting and ending timecodes and only update metadata with entries in the .csv file, although you can adjust these or use additional matching and merge options as required.
本例中 .csv 文件已经包含必需的文件名和时间码信息,而且只需要更新其中列出的元数据字段,因此无需修改任何选项。In this case, the .csv file has both the required filename and timecode information, and you will only need to update the metadata fields listed in the .csv file, so you don’t need to change any of these options.
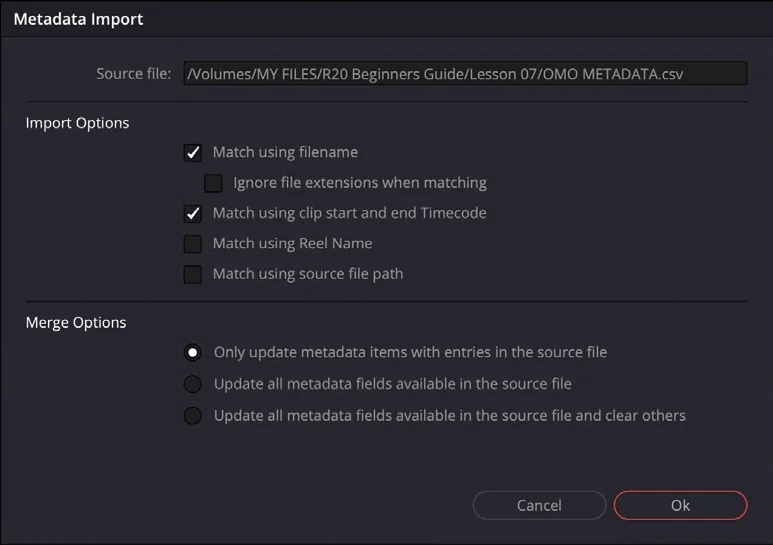
- 点击 OK。Click OK.
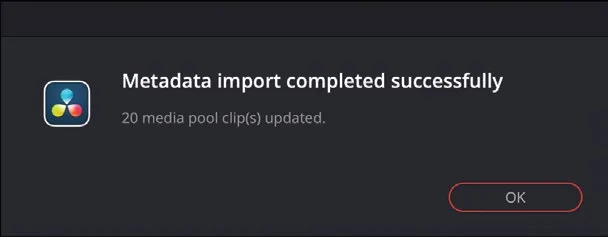
弹出确认窗口,提示元数据导入成功,已用 .csv 文件中的新元数据更新了 20 个片段。A confirmation window states that the metadata import has successfully updated 20 clips with the new metadata from the .csv file.
可以查看 Media Pool 中新出现的关键词 smart bin,确认 .csv 文件里的信息已经添加到对应片段上。You can verify that the information from the .csv file has been added to the media pool clips by the new Keyword smart bins that have just appeared.
现在可以在 Media Pool 中浏览这种新的组织方式,同时新添加的 Comments 字段也能在 Inspector 或 Metadata面板里看到。希望通过这些例子,你开始理解这些附加信息对快速定位片段的价值。You can now explore this new level of organization applied to your clips in the media pool, along with some newly added Comments, which you’ll be able to see in either the Inspector or the Metadata panel. Hopefully, you might begin to see how all this additional information can help you find the clip(s) you’re looking for.
导出元数据和 Bin。除了上面把元数据导入 Media Pool 片段之外,也可以选择导出 Media Pool 整体或选中片段的元数据。方法是选择 File > Export Metadata From > Media Pool,或 File > Export Metadata From > Selected Media Pool Clips(按需选择)。导出的片段元数据会保存为 .csv 文件,方便在不同项目之间传递元数据——只要这些项目使用同一份媒体,即使分布在不同的 Resolve 系统上也可以。Exporting Metadata and Bins In addition to importing metadata to clips in your media pool, as detailed in the preceding steps, you can also choose to export the metadata from your media pool or from selected clips from the media pool. To do so, simply choose File > Export Metadata From > Media Pool, or choose File > Export Metadata From > Selected Media Pool Clips (as appropriate). Your chosen clip metadata will then be exported as a .csv file and will provide a way of easily transferring metadata from one project to another that uses the same media, even if that project is on another Resolve system.
也可以通过选择 File > Export > Export Bin导出整个 bin。该命令会把当前选中 bin 的片段元数据(不是媒体本身)导出为 .drb 文件。和导出元数据一样,如果需要在不同 Resolve 项目或系统之间迁移 bin,可以选择 File > Import > Import Bin来导入。You can also export an entire bin by choosing File > Export > Export Bin. This command will export the clip metadata (not the media) from the currently selected bin to a .drb file. As with exported metadata, you can use this option to transfer bins between different Resolve projects or systems by choosing File > Import > Import Bin.
.drb 文件中列出的所有片段会连同其关联元数据一起自动导入到当前项目。如果源媒体的位置与导出 bin 的系统一致,会自动与新导入的片段链接;如果媒体在别的位置,就需要像第 1 课那样手动重新链接。Any clips listed in the .drb file will be automatically imported into the current project, together with their associated metadata. If the source media is in the same location as the system the bin was exported from, it will be automatically linked to the newly imported clip. If the media is in a different location, you will have to manually relink it as you did in Lesson 1.
本卡术语Terms in this card
媒体夹Bin 关键词智能媒体夹Keyword Smart Bins 媒体池Media Pool 智能媒体夹Smart Bins 导出Export 检查器Inspector 窗口Power Window 关键词Keywords 元数据Metadata 时间码Timecode 合并Merge