做出创意决策Making Creative Decisions
7 steps
简介Overview
现在你已经掌握了如何创建静帧(stills)和 LUT 来保存不同的调色版本。调色中最令人兴奋的部分,就是为整个项目或特定场景决定整体风格与氛围。如果保存了多个不同的 look(以静帧或 LUT 的形式),你可能希望把它们并排比较,看看哪一版更适合某个镜头或场景。You now know how to create stills and LUTs to save different grades. One of the most exciting elements of color grading is making the creative decisions regarding what the look and feel of your project or certain scenes will be. If you have created a number of different looks, by saving them as stills or LUTs, you may want to compare these looks side by side to see what look a shot or scene may lend itself to.
- 选中 clip 16,在
Node窗口中右键点击,选择 Reset All Grades and Nodes。Select clip 16 and right-click in theNodewindow and choose Reset All Grades and Nodes. - 点击
Gallery按钮,打开Gallery面板。Select the Gallery button to turn on the gallery. - 在
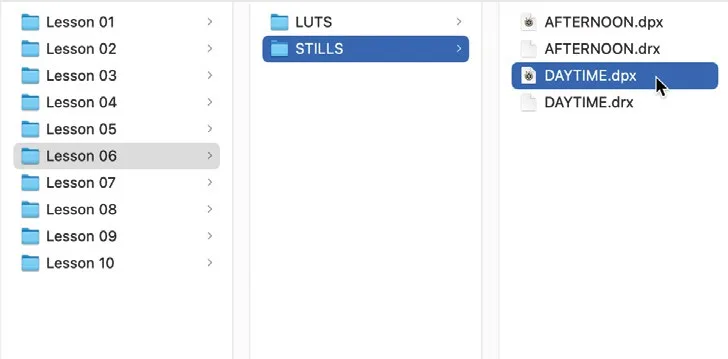
Gallery面板中右键点击,选择 Import。Right-click in the gallery and choose Import. - 在浏览器中导航到 Lesson 06 文件夹,选中 STILLS 文件夹,导入 DAYTIME 静帧。Navigate to the Lesson 06 folder in the browser, select the STILLS folder, and import the DAYTIME still.
- 在 viewer 左上角点击
Split Screen按钮,viewer 周围会出现白色边框。In the top left corner of the viewer, click theSplit Screenbutton. A white outline will appear around the viewer.
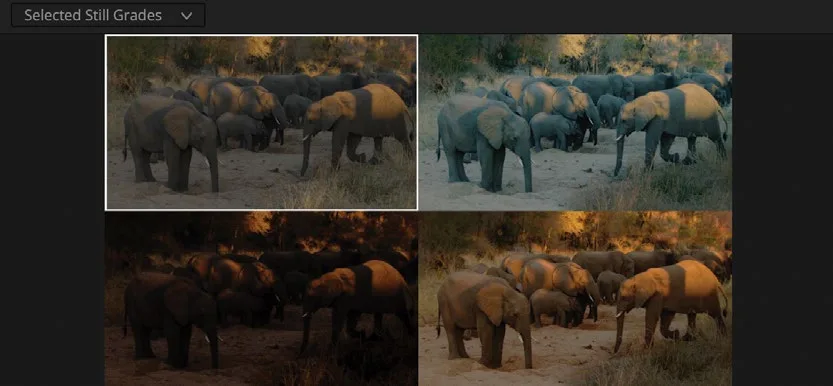
- 点击 split screen 菜单,选择 Selected Still Grades。Click the split screen menu and choose Selected Still Grades.
- 在
Gallery面板中按住 Command 键(macOS)或 Ctrl 键(Windows),依次选中 EVENING、MORNING 和 DAYTIME 静帧。In the gallery, hold down the Command key (macOS) or Ctrl key (Windows) and select the EVENING, MORNING, and DAYTIME stills.
Viewer 会被分成四栏,分别显示原始画面和套用三张静帧调色后的版本。从这里你可以判断哪张静帧最适合该镜头,在 viewer 中双击对应画面即可应用。The viewer will split into four, showing the original clip and three other versions of the clip with the selected still applied. From here, you can decide which still suits the clip the best and add it by double-clicking in the viewer to add the specific still.
熟悉了 Color页面后,你就能快速组合出各种 look,也可以使用 LUT 或导出自己的 LUT 与同事共享。在调色过程中随时把完成的版本另存为静帧,可以帮助你快速平衡风格相近的镜头,并打造可在不同项目中复用的 look。With an understanding of the color page, you can now quickly assemble a variety of looks using your color-grading skills. You could also employ the use of LUTs or export your own to share with fellow collaborators. By saving stills of your grades as you progress, you will be able to quickly balance similar shots and create looks that you can reuse in different projects.
使用 Blackmagic Cloud 协作调色:在 Blackmagic Cloud 的协作项目里,多个调色师可以同时在同一条时间线上工作。协作模式下,调色师选中某个镜头后即成为该镜头的所有者,直到他选中时间线上的下一个镜头;调色师姓名的首字母会显示在缩略图左上角。当该调色师切换到下一个镜头时,其他用户可以选择刷新按钮来应用更新后的调色,确保全球各地的调色师都能无缝协作。Color Grading Using Blackmagic Cloud and Collaboration When working in collaborative projects in Blackmagic Cloud, multiple colorists can grade on the same timeline at the same time. In collaboration mode, a colorist who selects a clip will become the owner of that clip until they select another in the timeline. The colorist’s initials will appear in the top left corner of the thumbnail. When they move on to the next clip, a refresh symbol can be selected by every other user in the project, and the grade will be applied, ensuring a seamless workflow wherever the colorists are in the world.
Cloud 流程还支持远程监看,可在装有 Blackmagic Design Desktop Video 设备的 iOS 设备或电脑上查看。只需打开远程监看,DaVinci Resolve 就会生成一个串流密钥,发送给世界上任何地方的人。对方下载并打开远程监看应用,粘贴密钥后即可在设备上看到调色完成的时间线。调色会实时同步,你调整画面的同时,远程监视器上的画面也会同步变化。The Cloud workflow also allows for remote monitoring to an iOS device or computer with a Blackmagic Design Desktop Video device. By simply turning on remote monitoring, DaVinci Resolve will generate a stream key that can be sent to anyone, anywhere in the world. By simply downloading and opening the remote monitoring app, the key can be pasted in, and a graded timeline will be shown on the device. The grades are shown in real time, so when you adjust the grade, it can be seen changing on the remote monitor.
本卡术语Terms in this card
时间线Timeline 导出Export 调色页Color page 窗口Power Window 调色Grade LUT(查找表)LUT 静帧Still 节点Node
相关知识卡Related Cards
Blackmagic Cloud 协作Blackmagic Cloud Collaboration 时间线Timeline 远程监控Remote Monitoring